Workspace Groups
Workspace Groups
The Workspace Groups module displays a catalog of all workspace groups and provides access to all workspace group management functions. Workspace Groups allow to control task availability and assignment by defining which users have access to specific sets of tasks.
To manage Workspace Groups, users must have Workspace Groups modification permissions. See Role Permissions.
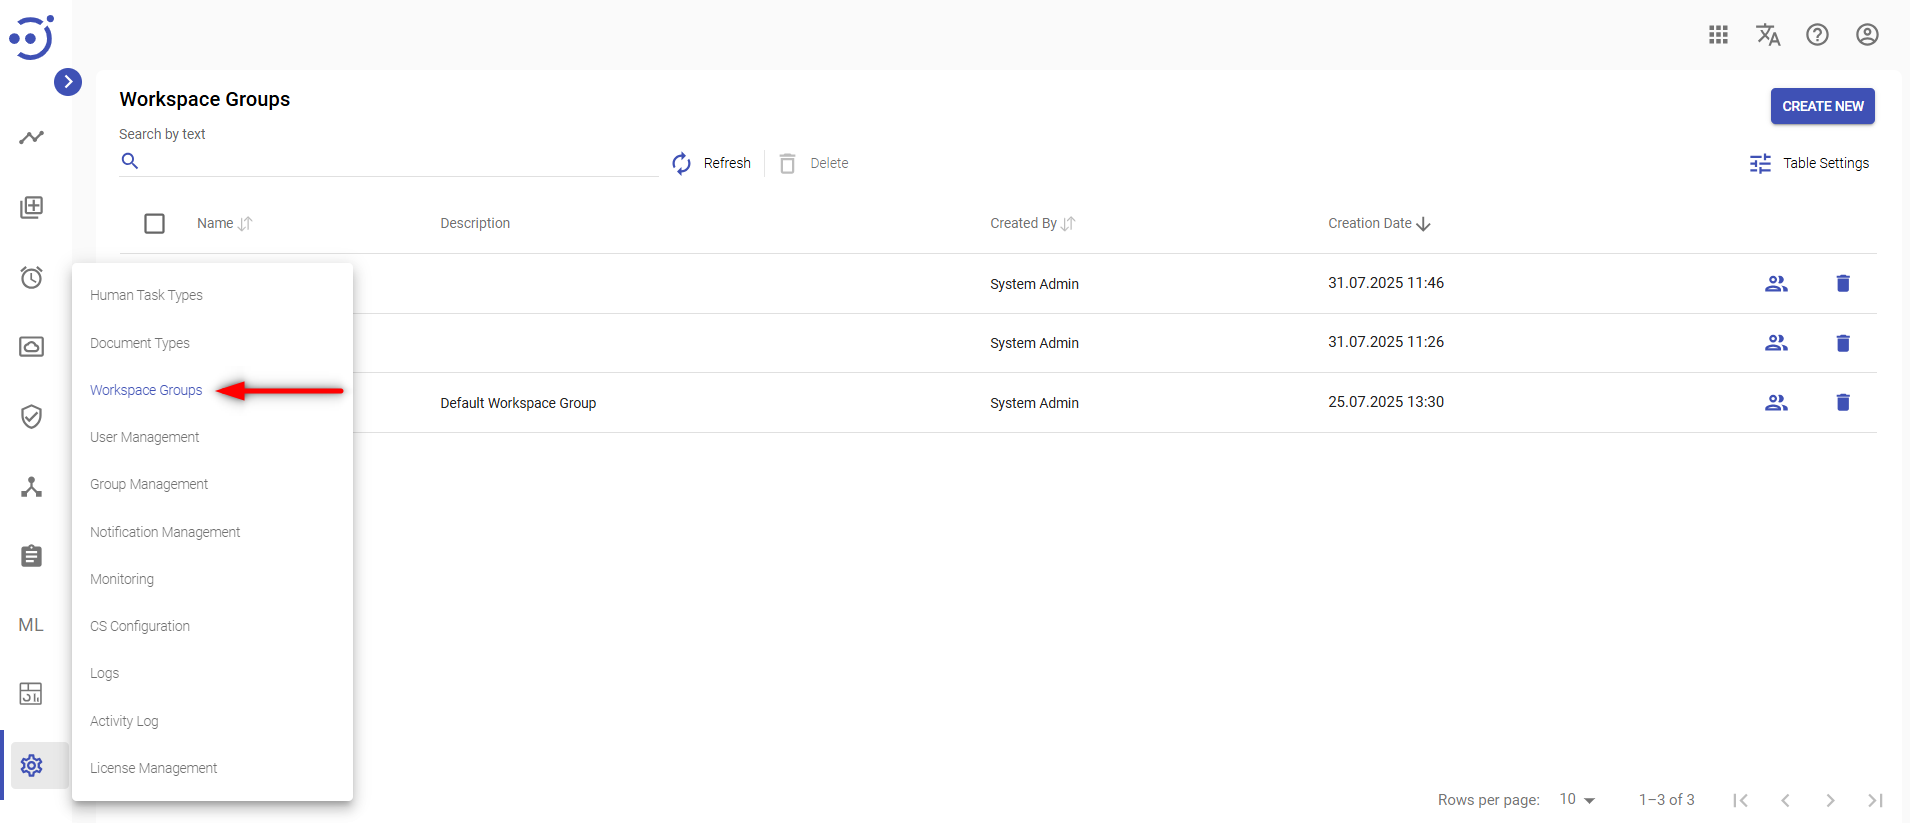
You can access the module by clicking Administration → Workspace Groups. Required Permission: WorkspaceGroup-READ. See Role Permissions.
EasyRPA Control Server allows to perform the following actions:
- Create a new workspace group via CREATE NEW icon above the table.
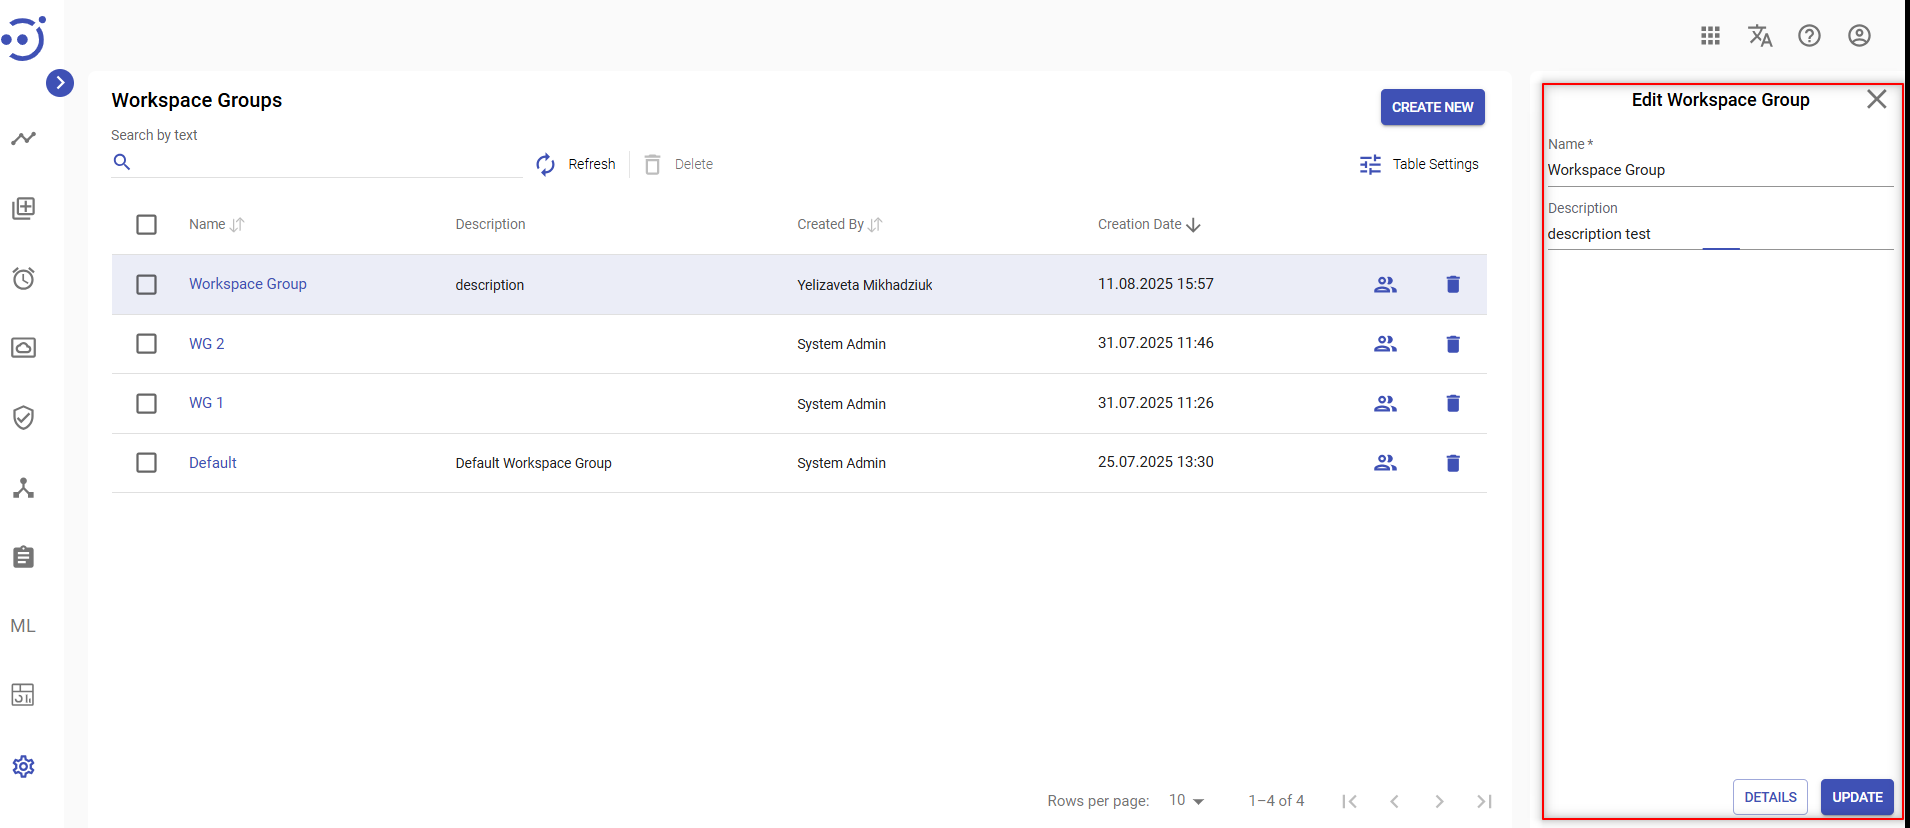
- Edit an existing workspace group via Edit Workspace Group popup panel.
- Security Access - to manage a group for a specific workspace group.
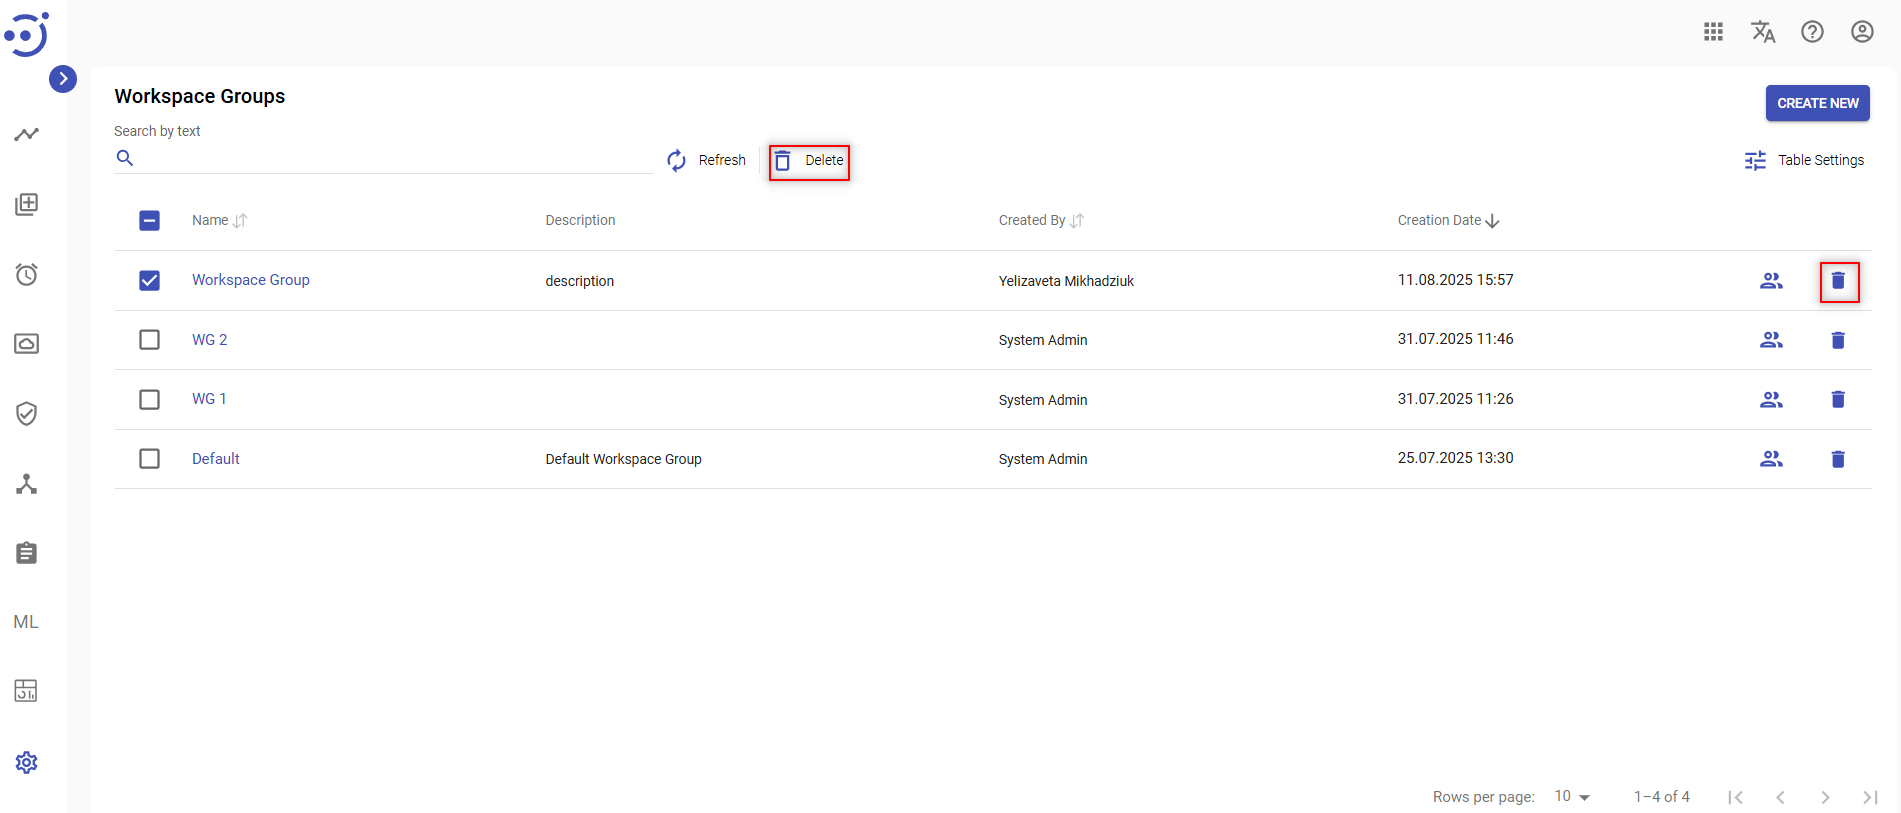
- Delete an existing workspace group via the recycle bin control icon in the table row or Delete icon above the table.
- Pull the last updates from the server via Refresh icon.
Manage existing Workspace Groups
The EasyRPA control server allows managing the workspace groups catalog.
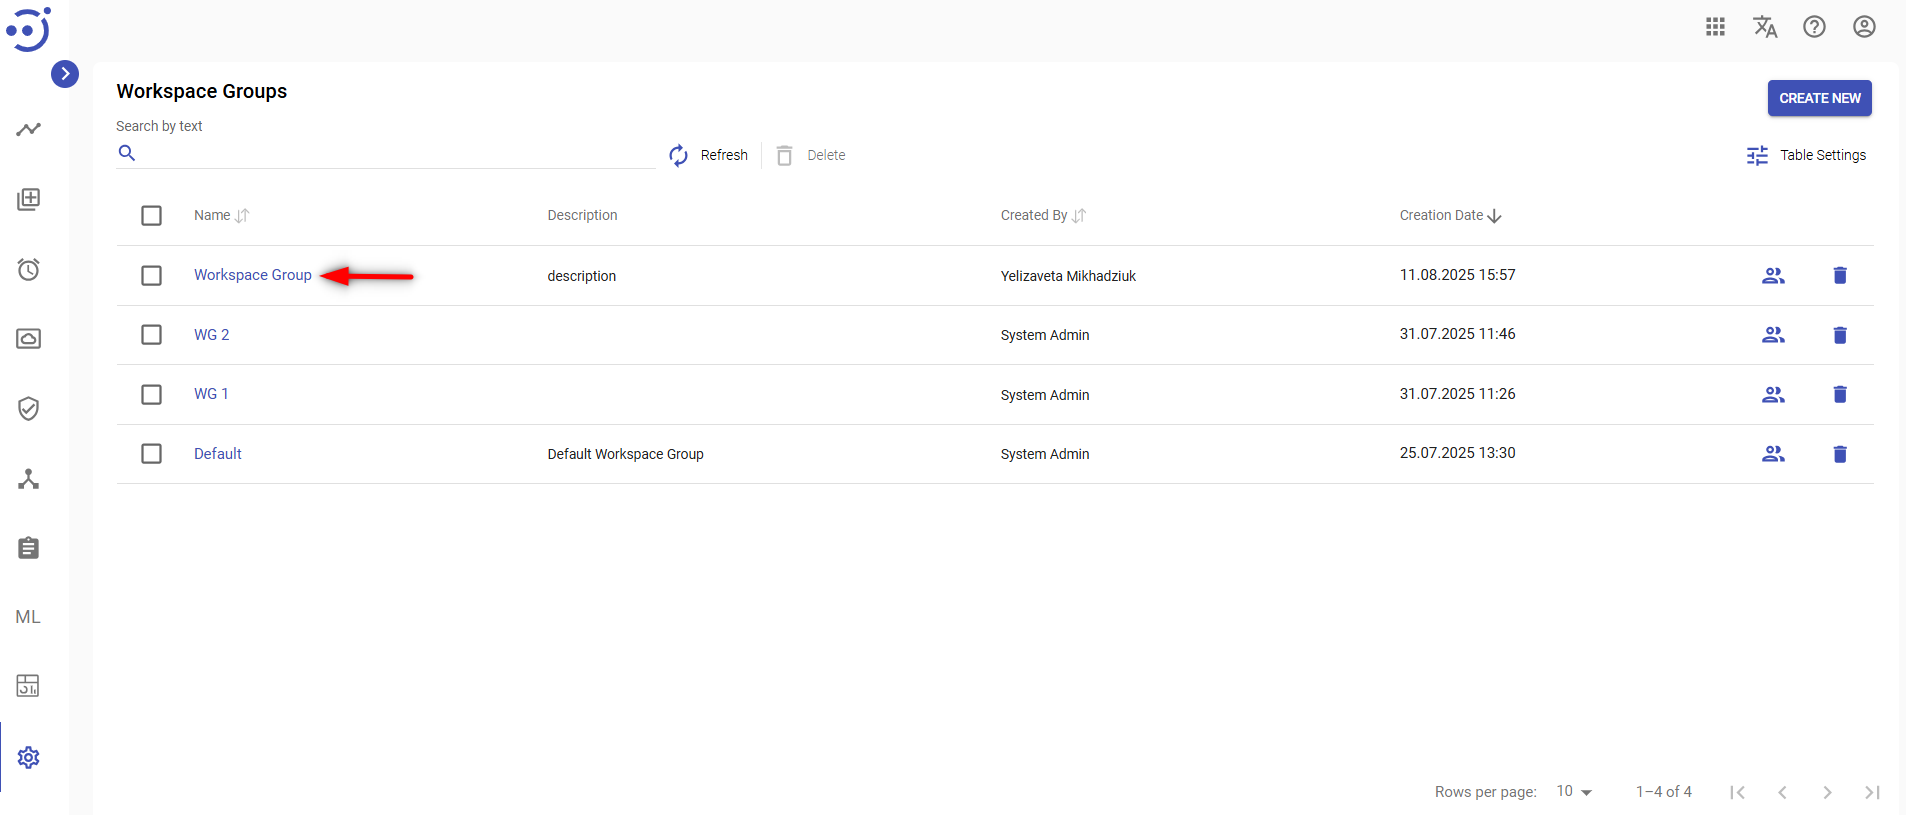
Columns Description
- Name - the workspace group name.
- Description - a short description of the workspace group.
- Created By - the name of the user, who created the workspace group.
- Creation Date - the date and time of the workspace group creation.
Table Settings
Table settings allow you to manage the table view. Click the icon ![]() to start working with the table settings. The table settings can be managed with the following buttons:
to start working with the table settings. The table settings can be managed with the following buttons:
- Advanced filter - to switch the advanced filters for the columns.
- Columns Display - to select the columns that will be displayed in the table.
- Apply - to apply the changes made to the table settings.
- Сancel - to cancel the last actions with the table settings.
Filter by text
Filtering allows you to search the workspace group by its Name, Description and author.
Advanced filters by columns
Advanced Filter allows you to extract a list from a table with predefined criteria. Click the icon ![]() to start working with the advanced filter. The advanced filters can be managed with the following buttons:
to start working with the advanced filter. The advanced filters can be managed with the following buttons:
- Clear filter - to reset all the proposed advanced filter criteria for the column.
- Сancel - to cancel the last actions with the proposed criteria for the column.
Apply - to filter the table according to the proposed criteria for the column.
Sorting
Ascending/descending sorting is allowed for the columns: Name, Description, Creation Date, Last Update.
Create a New Workspace Group
To create a group:
- Go to the Workspace Groups module and click CREATE NEW. Required Permission: WorkspaceGroup-CREATE. See Role Permissions.
- In the New group popup panel:
- Enter a unique Name to distinguish the workspace group.
- Provide a workspace group Description.
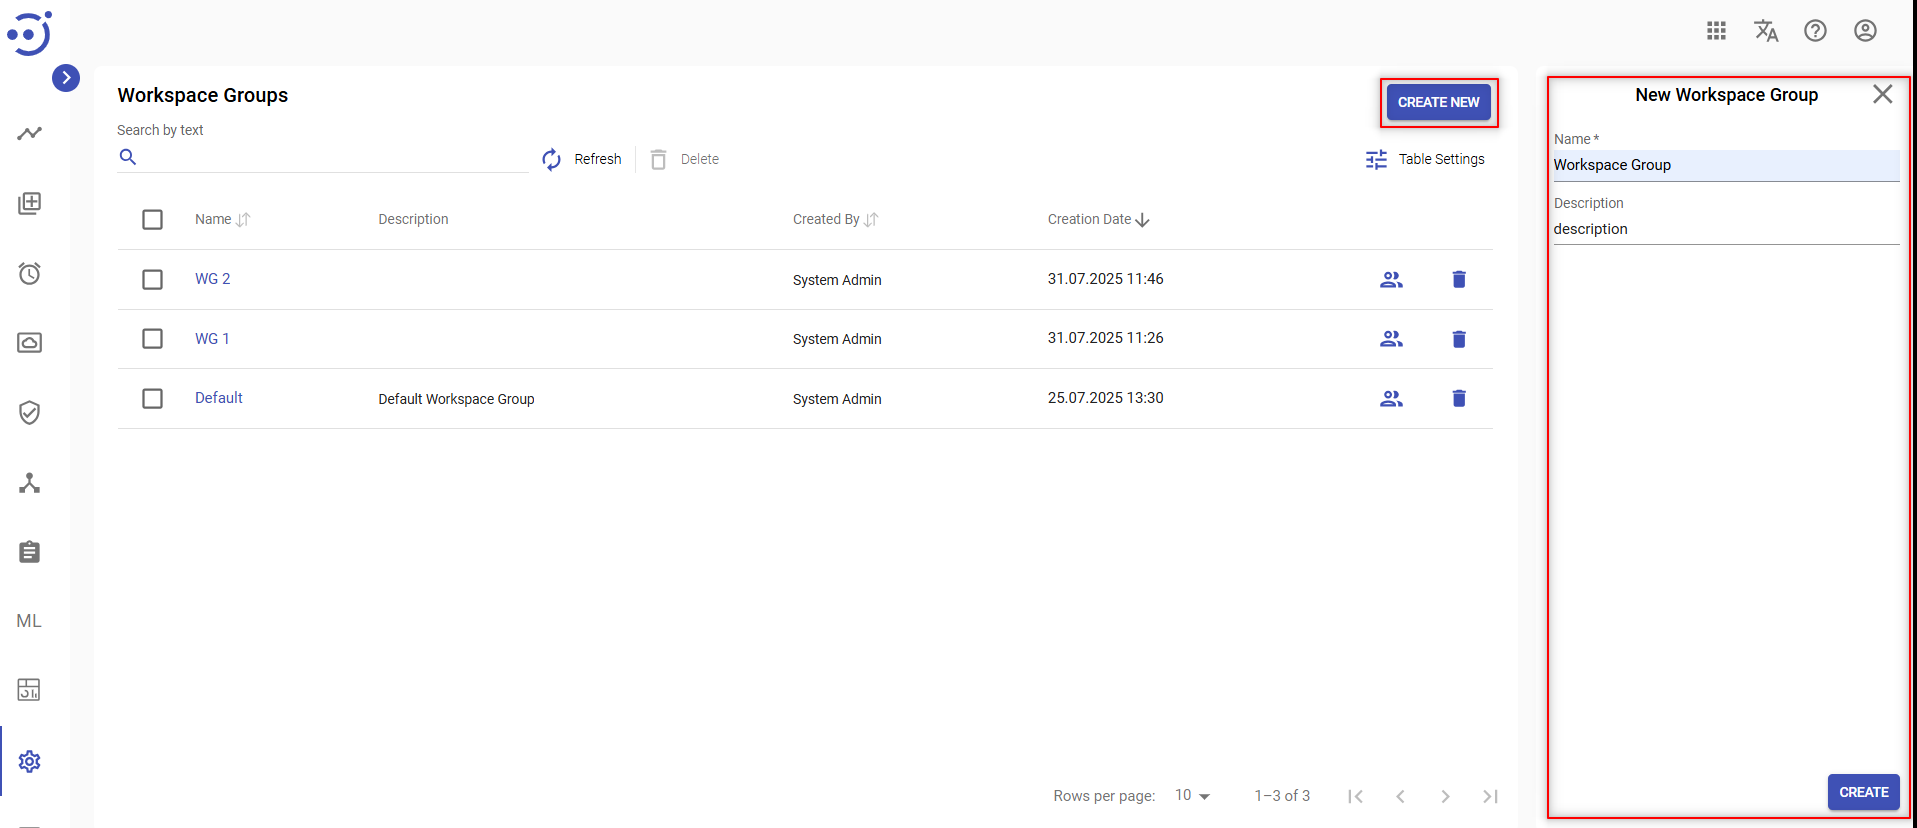
3. Click CREATE.
View/Edit a Workspace Group Properties
To view or edit group information, click the corresponding group row, make changes in the popup panel, and click UPDATE. Required Permissions: WorkspaceGroup-READ,UPDATE. See Role Permissions.
Delete an Existing Workspace Group
To delete the workspace group, use the recycle bin control icon in the table row or Delete icon above the table. Required Permissions: WorkspaceGroup-READ,DELETE. See Role Permissions.
Details
The Details tab displays general settings that are necessary for the Workspace Group creation, metrics and Notifications.
To view/edit Workspace Group details, you need to click on corresponding group row.
Change one of the field values and click UPDATE.

Metrics
The Metrics tab allows users to view the graphs that visualize performance and status of Human Tasks within Workspace Groups. The dashboard can be used to monitor throughput and analyze team productivity. To access the Metrics, you need to be granted WorkspaceGroup-READ permission. See Role Permissions.
Control icons
- Refresh - to refresh the metrics, updates all graphs and widgets to display the most recent data.
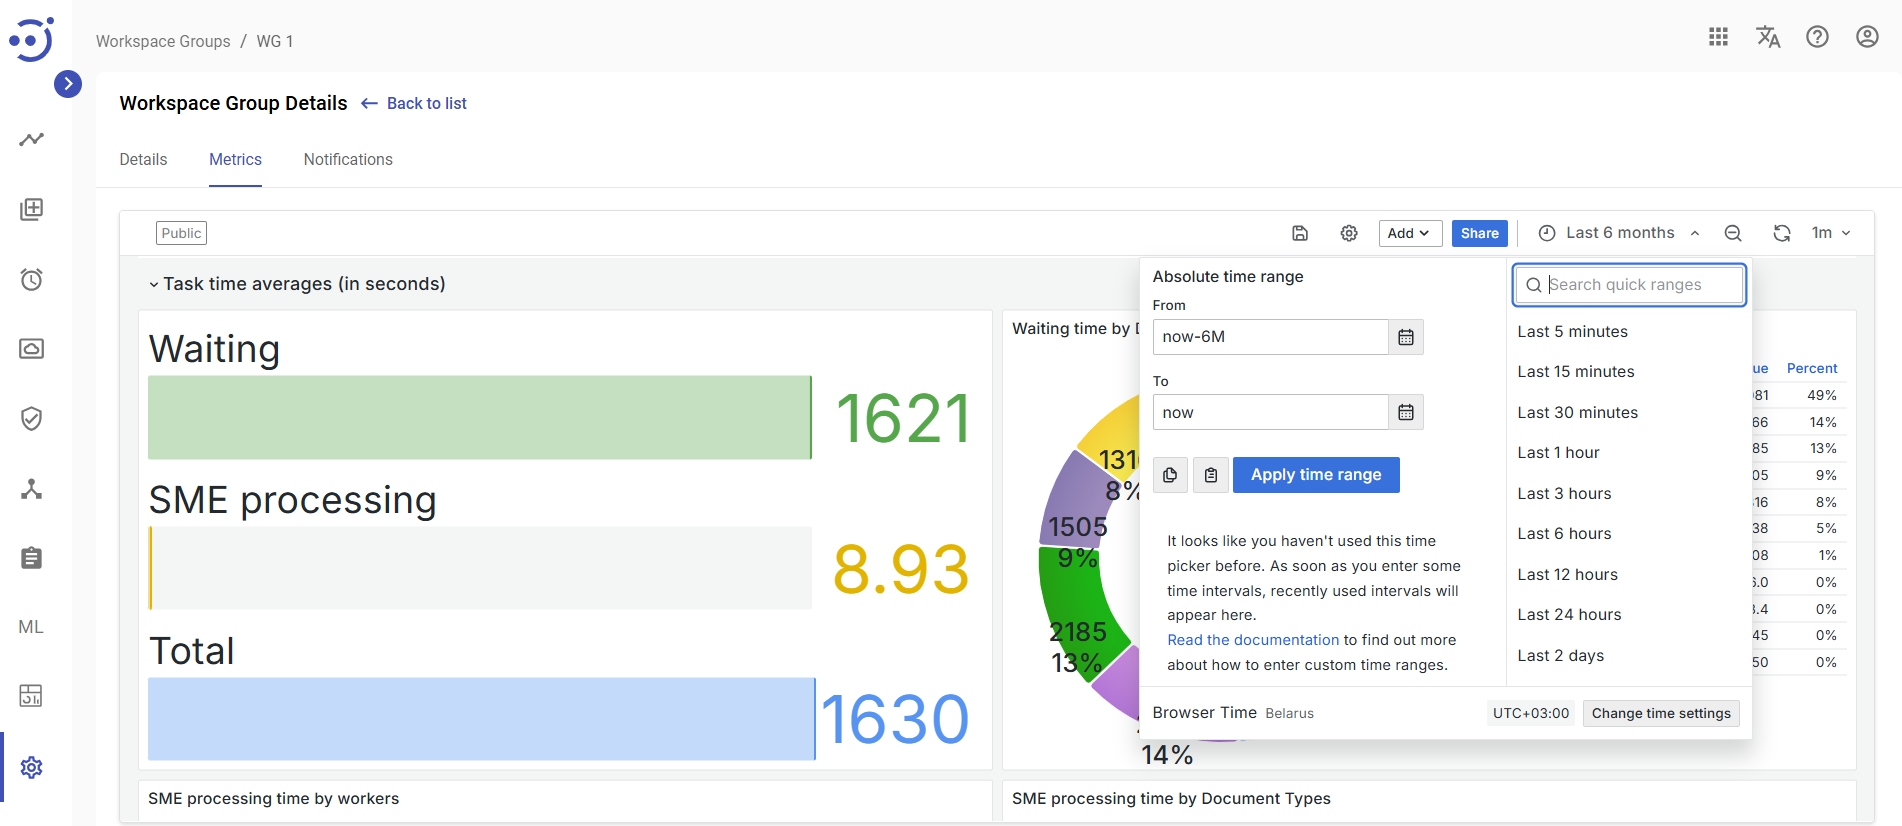
- Time Range selector - a dropdown menu that allows you to define the time period for which the metrics are displayed (e.g., Last 24 hours, Last 7 days, Custom range).
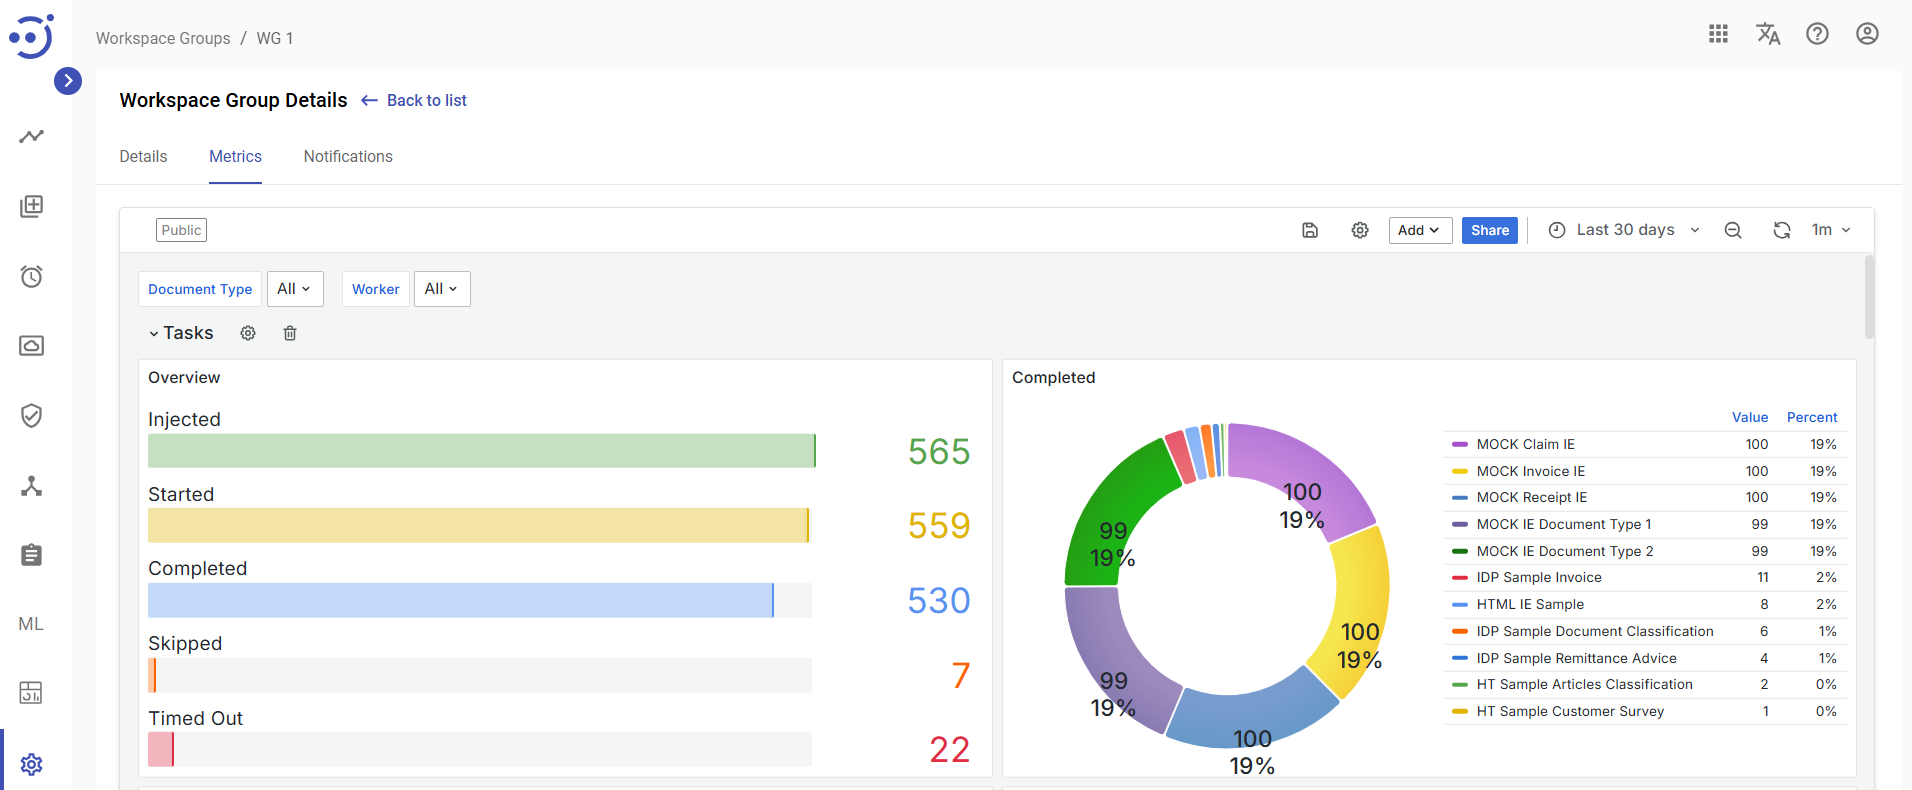
Tasks row of panels provides a high-level overview of task volume and status.
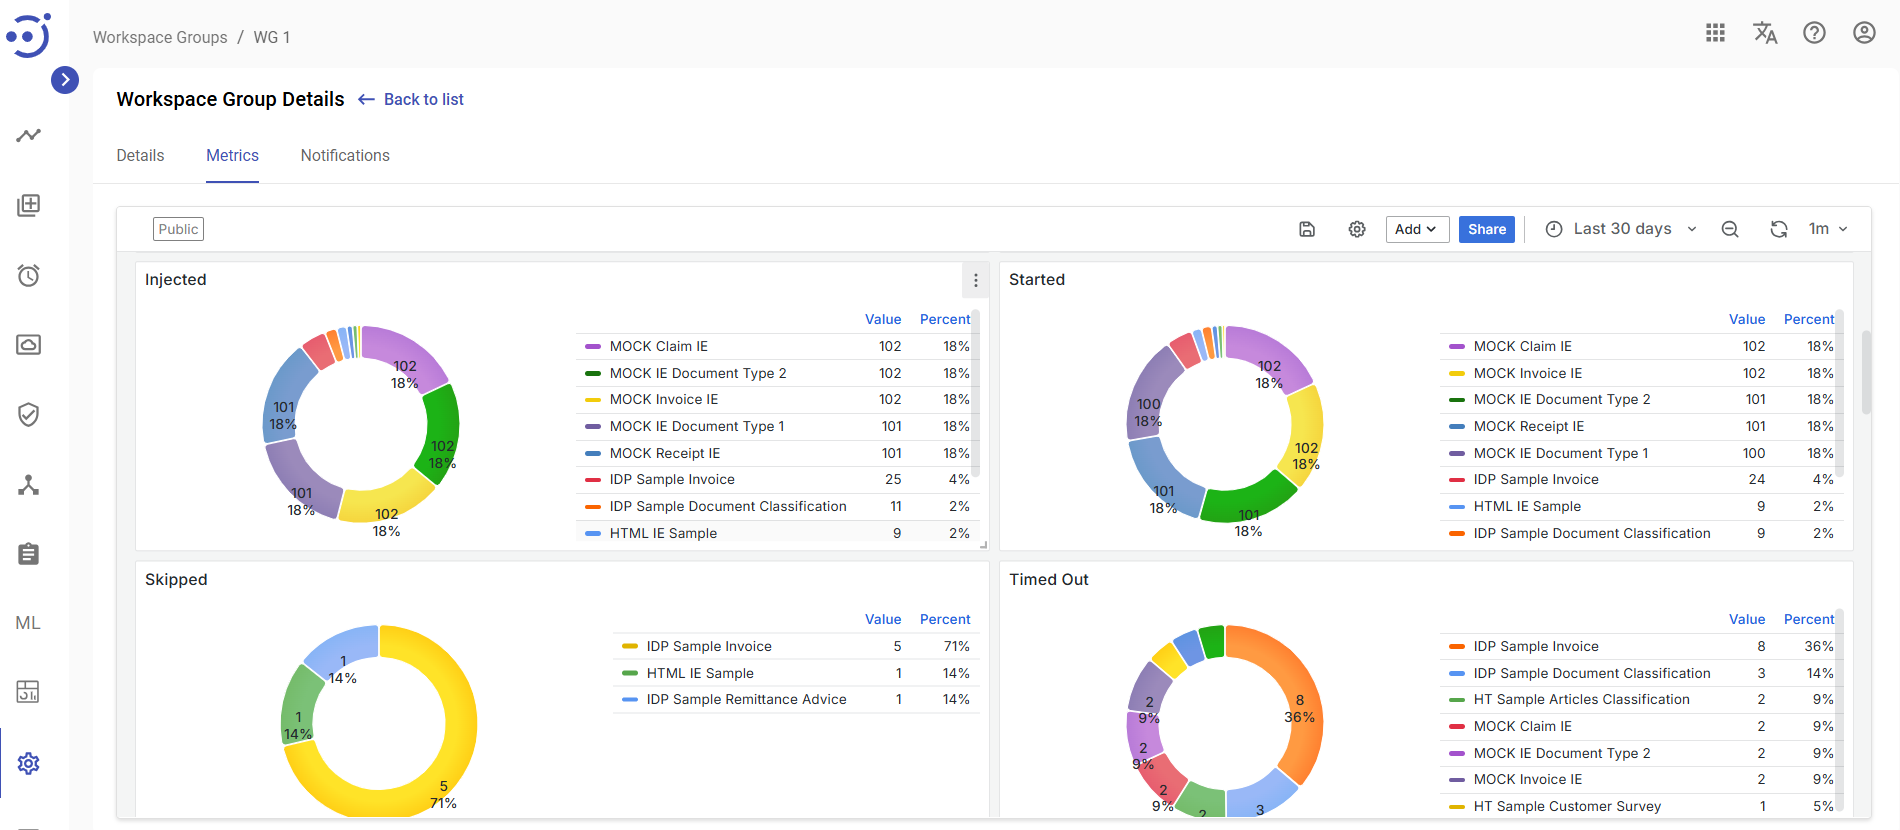
- Overview widget displays the total count of tasks in key states:
- Injected: total number of tasks submitted to the system for processing,
- Started: the number of tasks that have been accepted by workers,
- Completed: the number of tasks that were submitted successfully,
- Skipped: the number of tasks that were not processed,
- Timed Out: the number of tasks that were started but were not completed within a predefined time limit.
Completed widget displays the number of successfully finished tasks, by document type.
- Injected widget displays the number of tasks submitted to the system for processing, by document type.
- Started widget displays the number of tasks accepted by a workers, by document type.
- Skipped widget displays the number of tasks that were not processed, by document type.
- Timed Out widget displays tasks that exceeded their time limit, by document type.
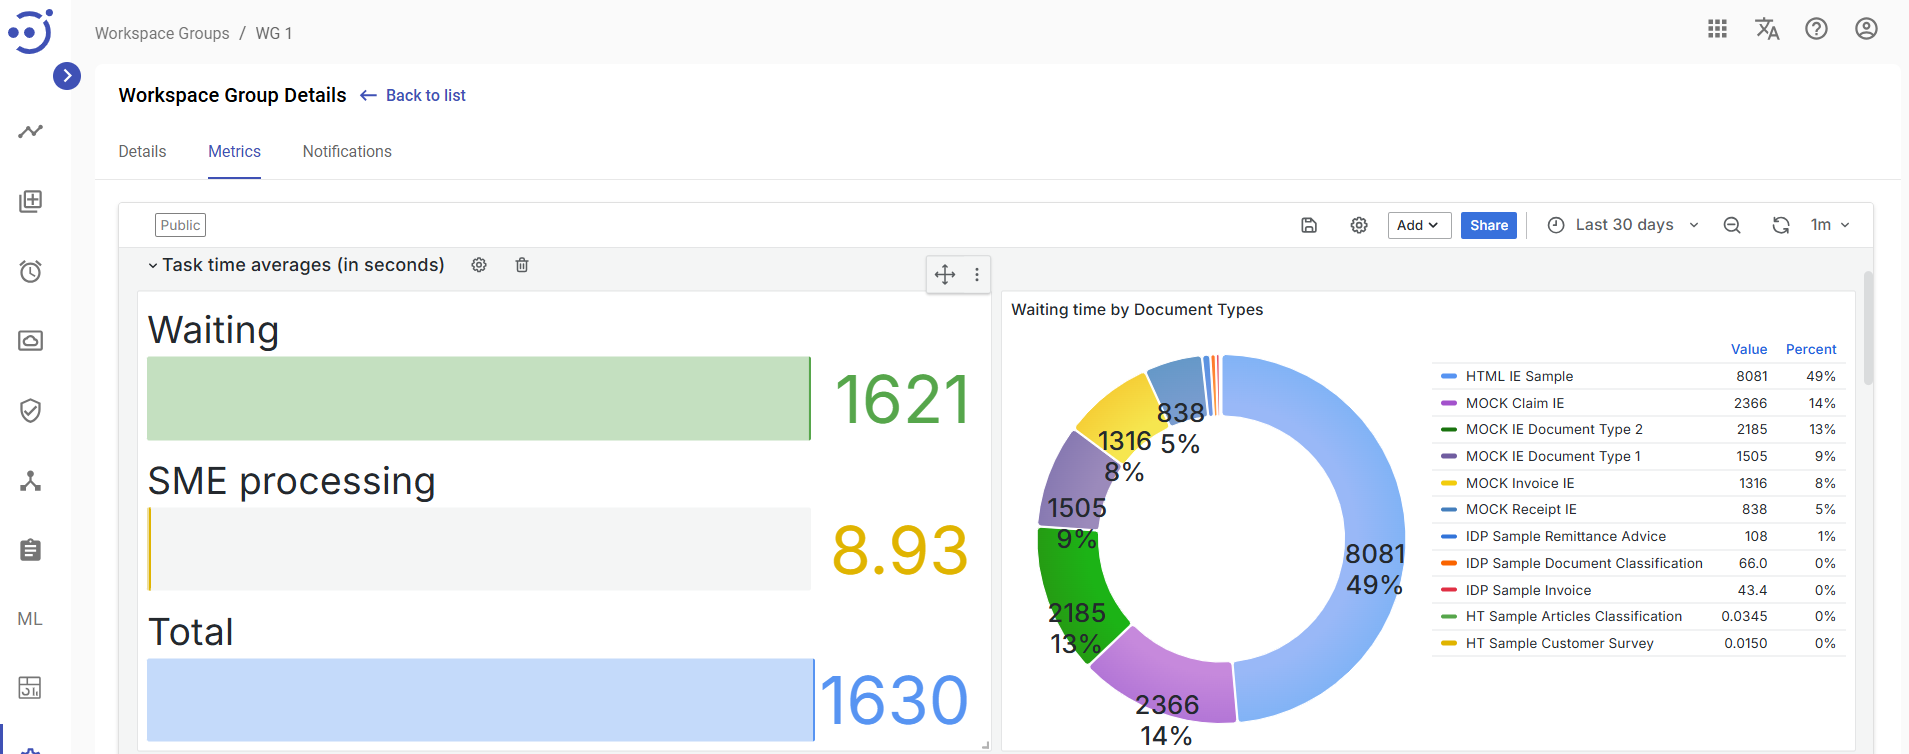
Task time averages (in seconds) row of panels analyze the time tasks spend in the system.
- Waiting, SME processing, Total widget displays the total average time of tasks, the average time tasks waiting to be processed and the average time the tasks were processed by workers.
- Waiting time by Document Types displays average queue waiting time, by document type, measured in seconds.
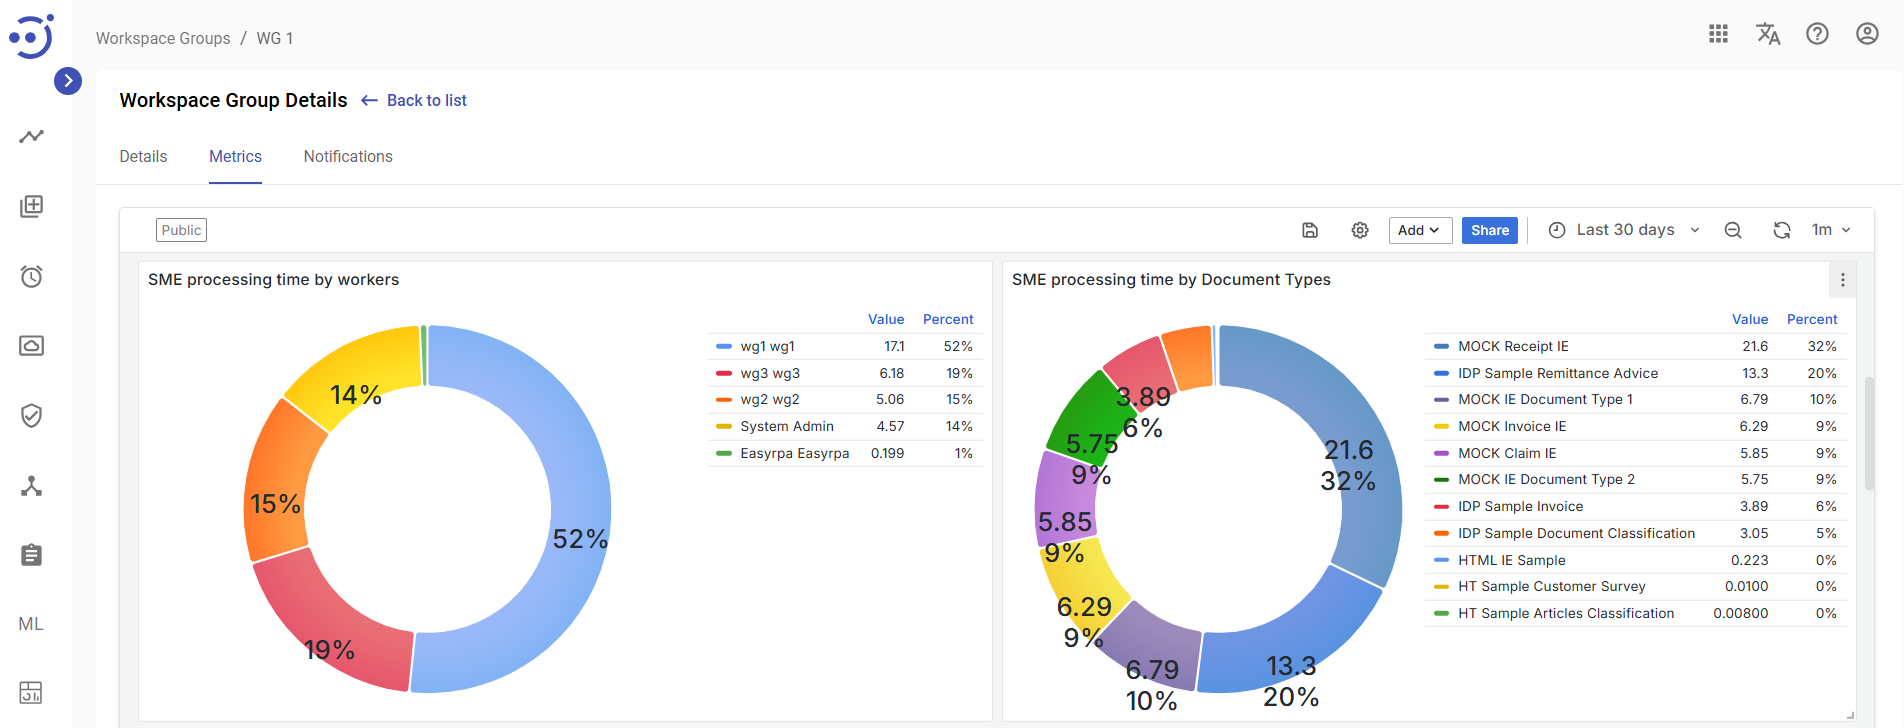
- SME processing time by worker focuses on the average time spent actively working on tasks, broken down by user.
- SME processing time by Document Types focuses on the average time spent actively working on tasks, broken down by Document Type.
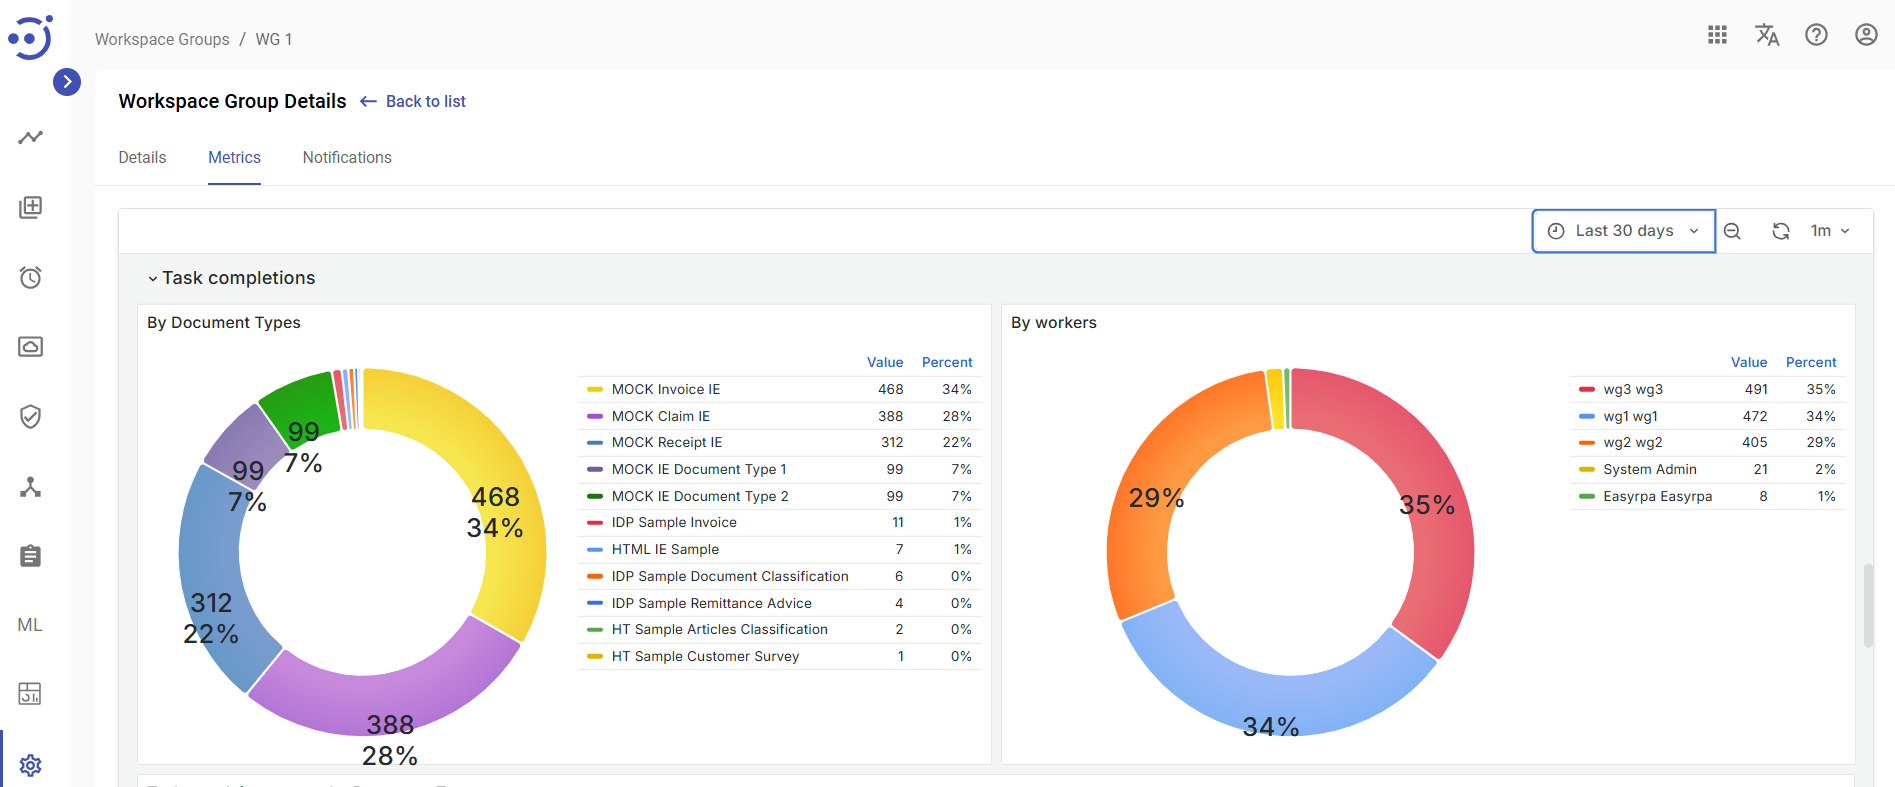
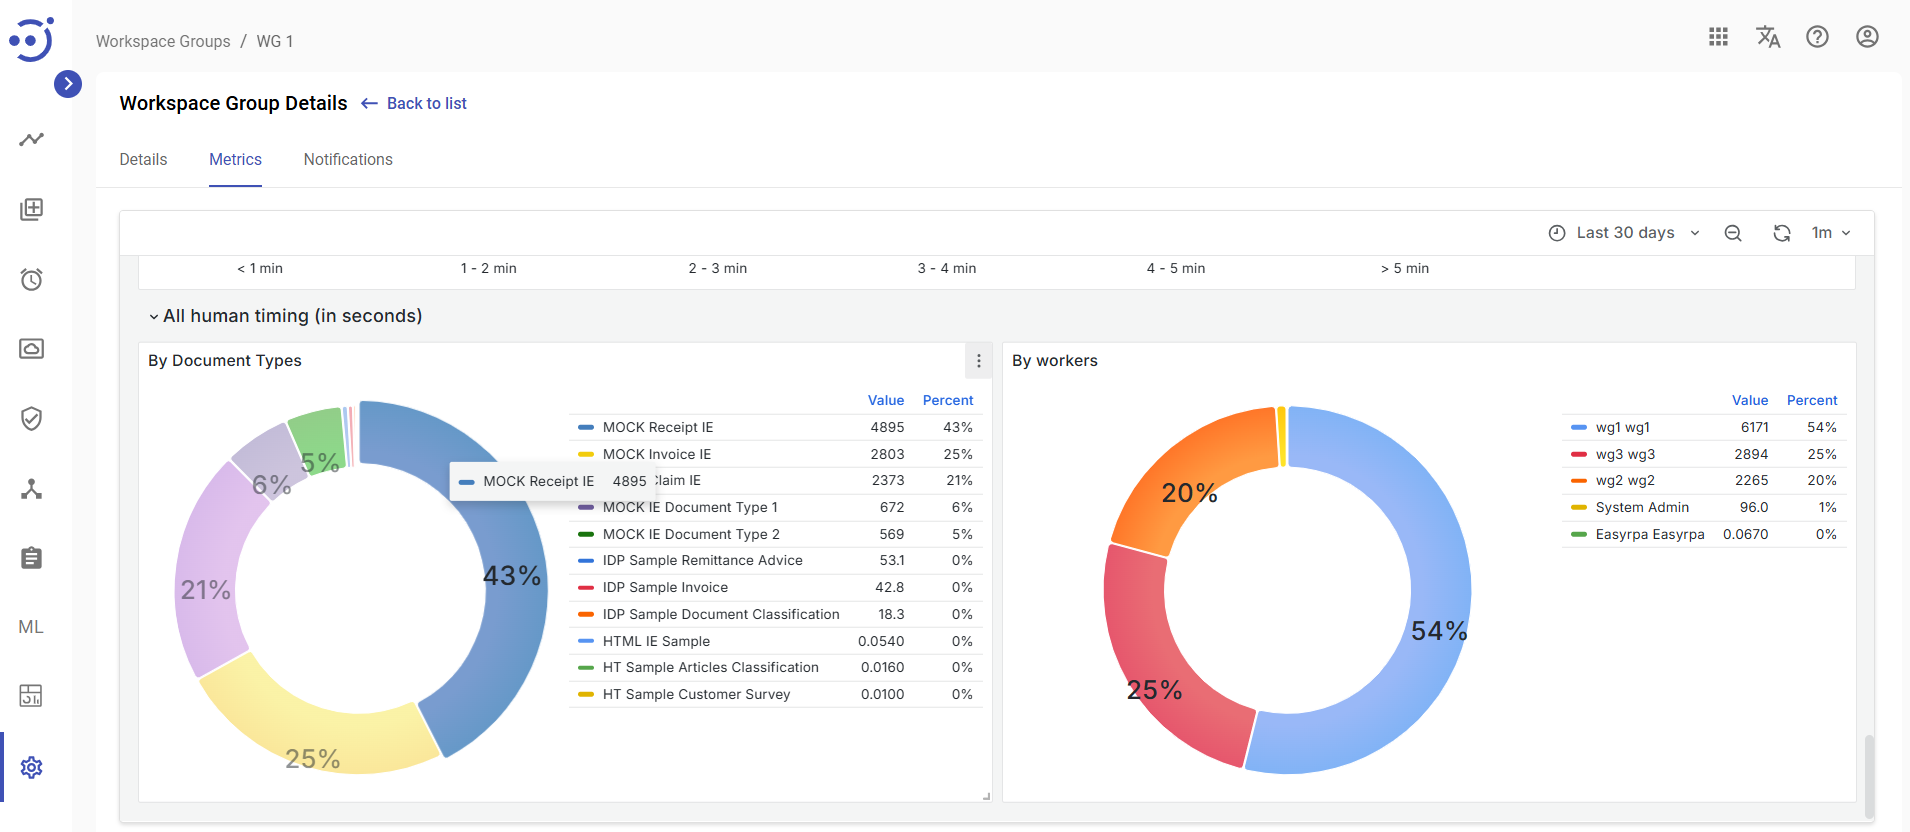
Task completions row of panels contains two dashboard widgets that display the number of successfully completed tasks, broken down:
- By Document Types
- By workers
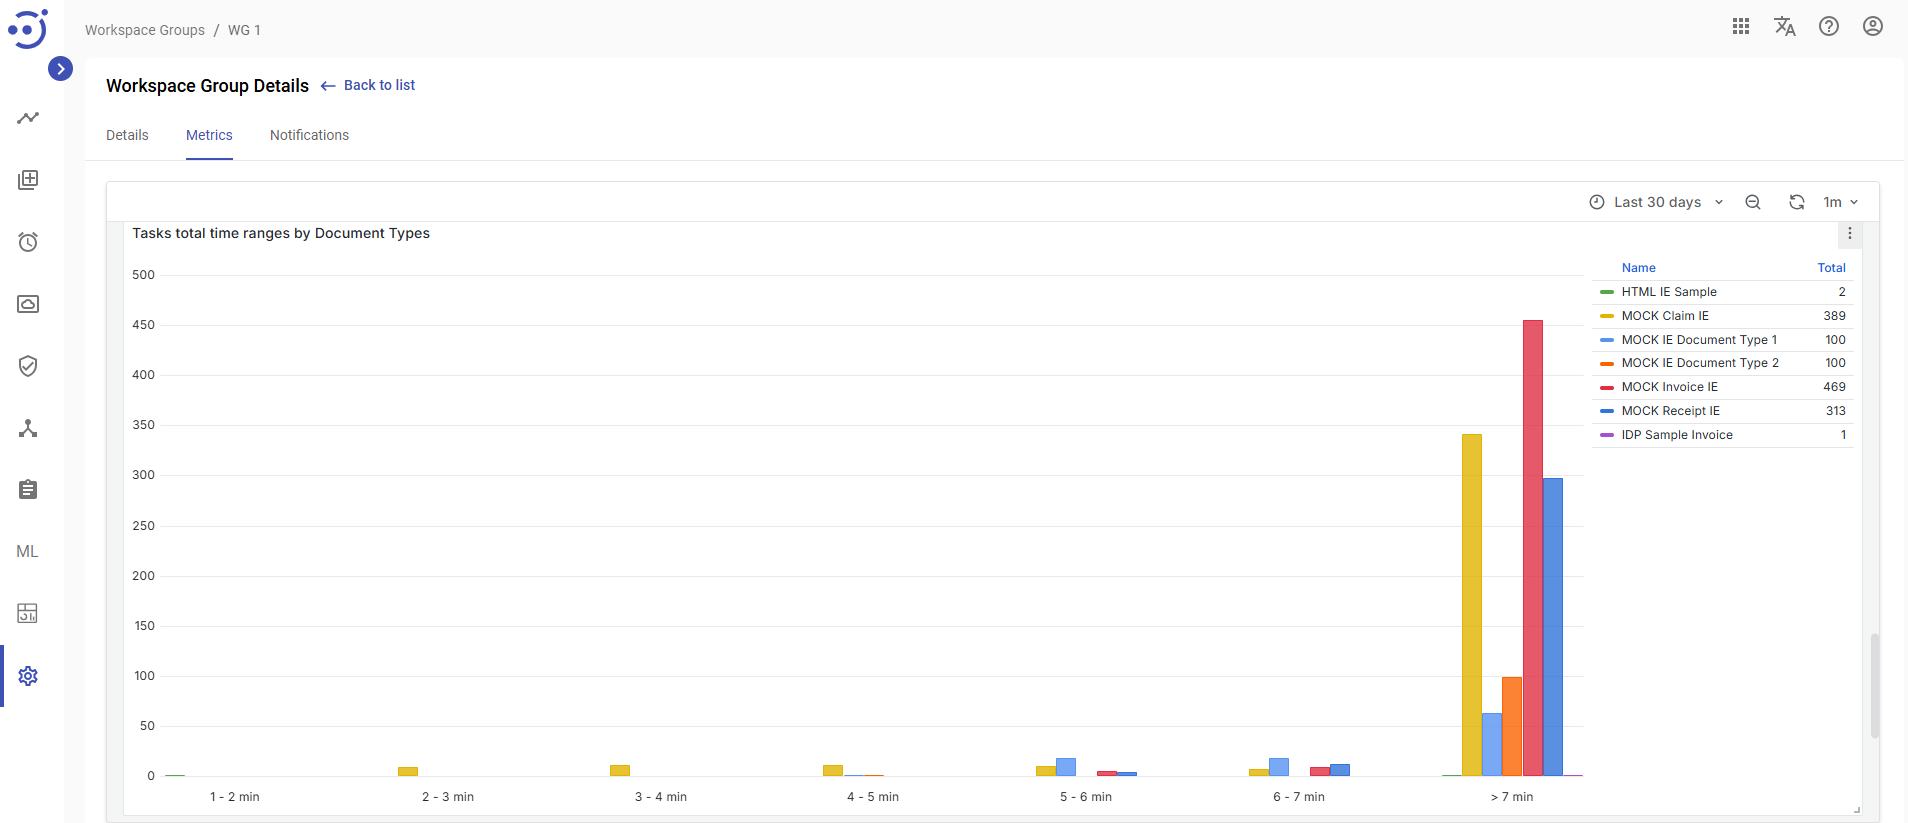
Task total time ranges by Document Type widget provides a high-level overview of the distribution of execution times for tasks, categorized by document type. Its primary function is to help users quickly identify processes with atypical performance – whether unusually fast (potentially indicating errors) or unusually slow (indicating bottlenecks).
All human timing (in seconds) widgets focus on the active processing time in seconds, broken down:
- By Document Types
- By workers
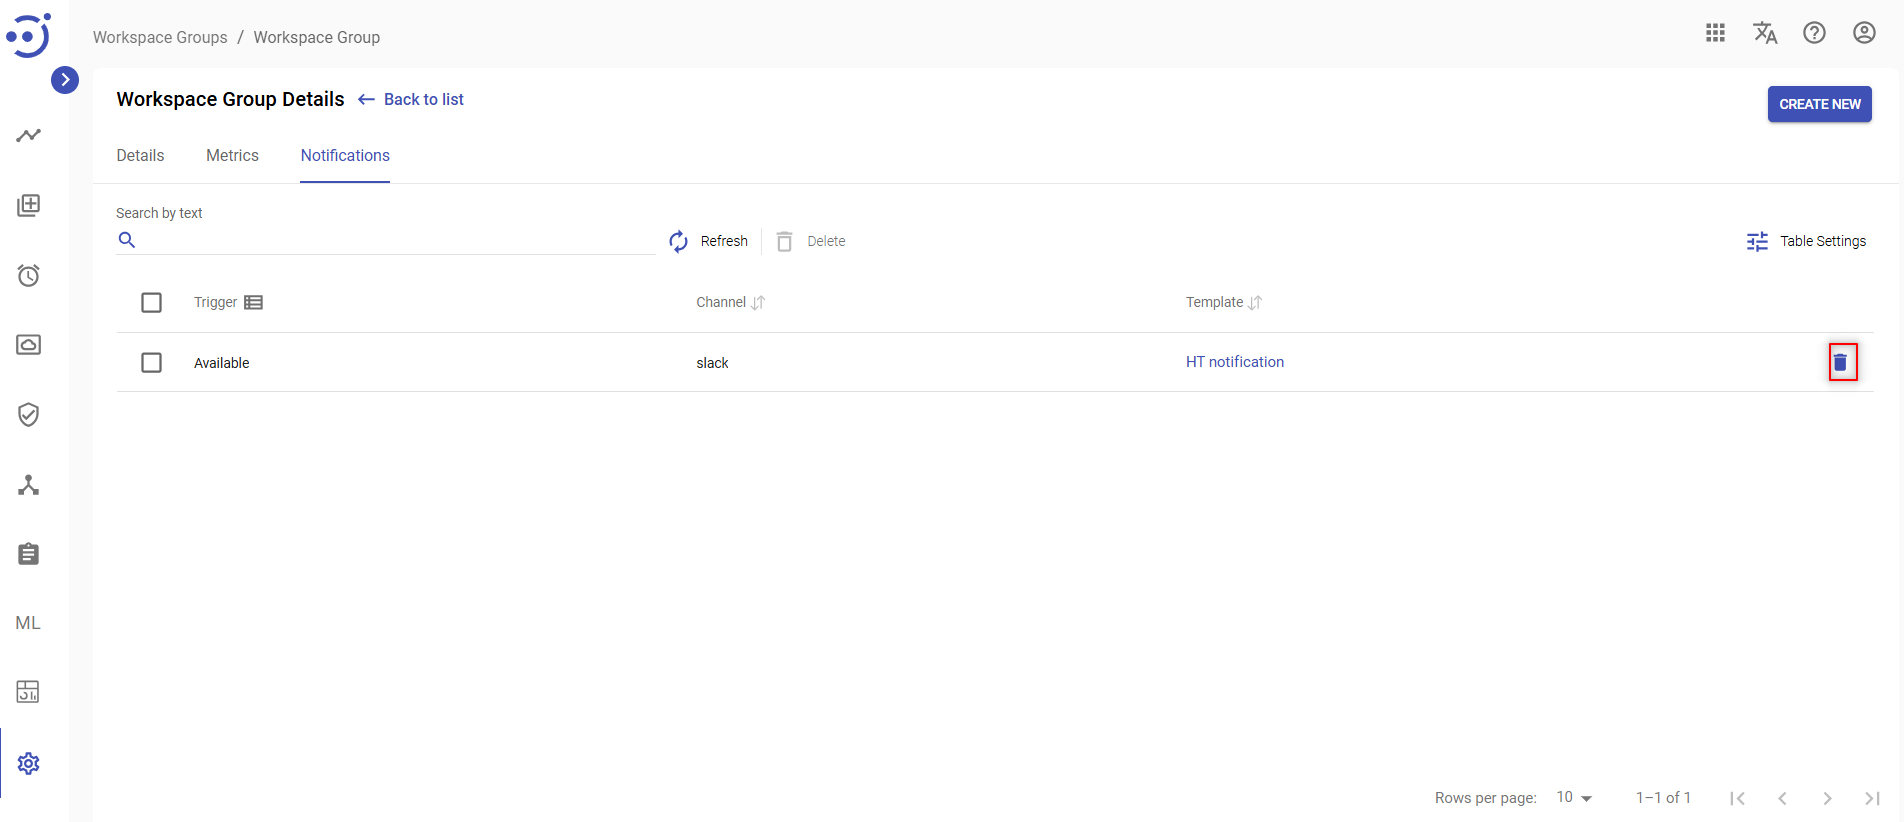
Notifications
The Notifications tab allows users to receive messages about a particular AP Run. To access the Notifications, you need to be granted WorkspaceGroup-READ permission. See Role Permissions.
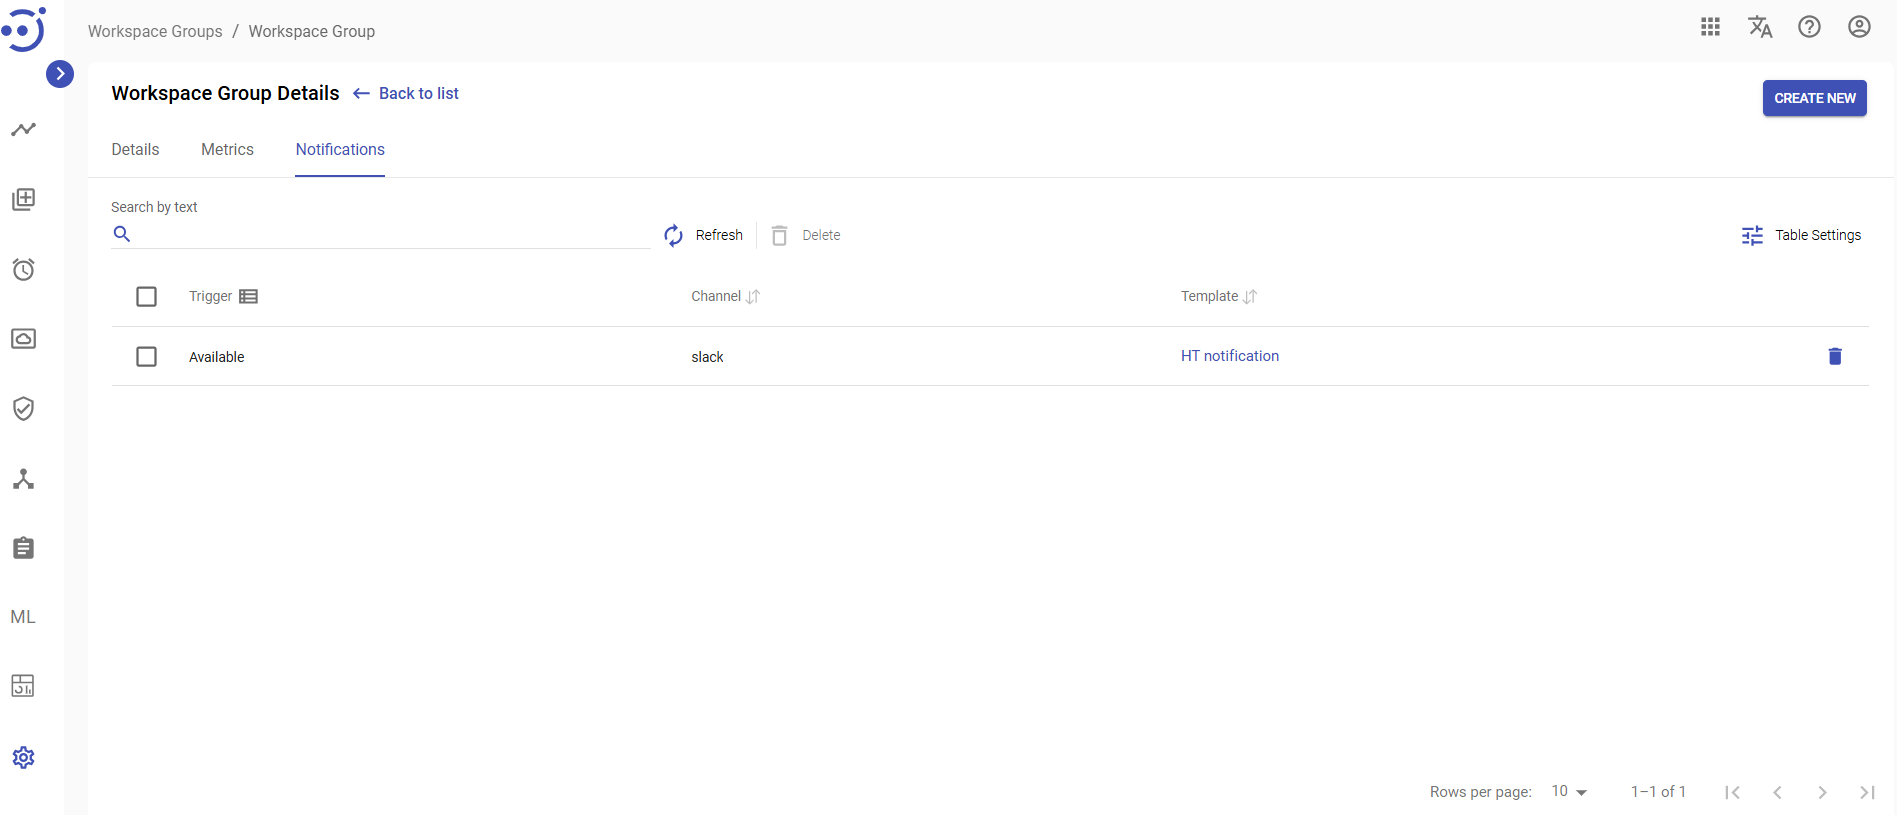
Columns Description
- Trigger - the action for which the message is sent to the particular channel.
- Template - example of a message is sent to a channel. By clicking on the Template, you can see the Template Details.
- Channel - mailing list of contacts.
Control icons
- Refresh - to refresh the page.
- Delete - to delete the Notifications via the recycle bin control icon in the table row or Delete icon above the table.
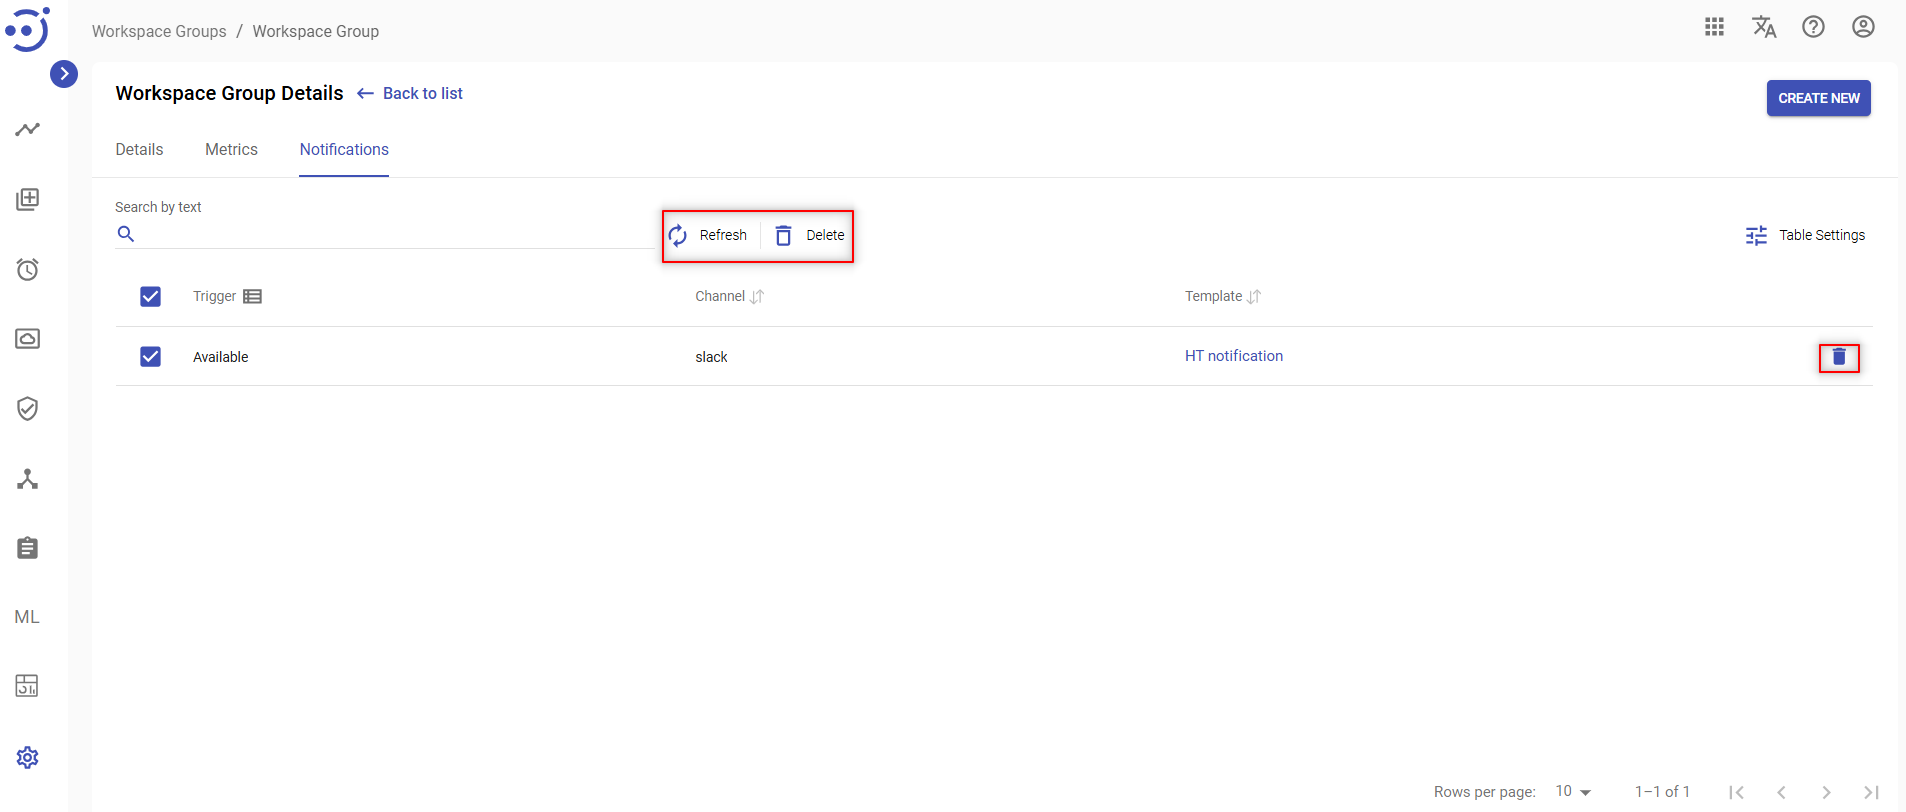
Table Settings
Table settings allow you to manage the table view. Click the icon ![]() to start working with the table settings. The table settings can be managed with the following buttons:
to start working with the table settings. The table settings can be managed with the following buttons:
- Advanced filter - to switch the advanced filters for the columns.
- Columns Display - to select the columns that will be displayed in the table.
- Apply - to apply the changes made to the table settings.
- Сancel - to cancel the last actions with the table settings.
Filter by text
Filtering allows you to search the notification by Trigger, Channel and Template.
Advanced filters by columns
Advanced Filter allows you to extract a list from a table with predefined criteria. Click the icon ![]() to start working with the advanced filter. The advanced filters can be managed with the following buttons:
to start working with the advanced filter. The advanced filters can be managed with the following buttons:
- Clear filter - to reset all the proposed advanced filter criteria for the column.
- Сancel - to cancel the last actions with the proposed criteria for the column.
Apply - to filter the table according to the proposed criteria for the column.
Sorting
Ascending/descending sorting is allowed for the columns: Channel, Template.
Grouping
Grouping is allowed for the Trigger column.
Create a New Notification
To create a New Notification:
- Click CREATE NEW button.
- On the New Notification pop-up panel enter Trigger, Chanel, Template.
- Click CREATE.

To create the Node Notifications, you need to be granted WorkspaceGroup-UPDATE permission. See Role Permissions.
Update Notifications
To Update an existing notification parameters, you need to:
- Click on the corresponding notification.
- On the Edit Notification pop-up panel change one of the field values.
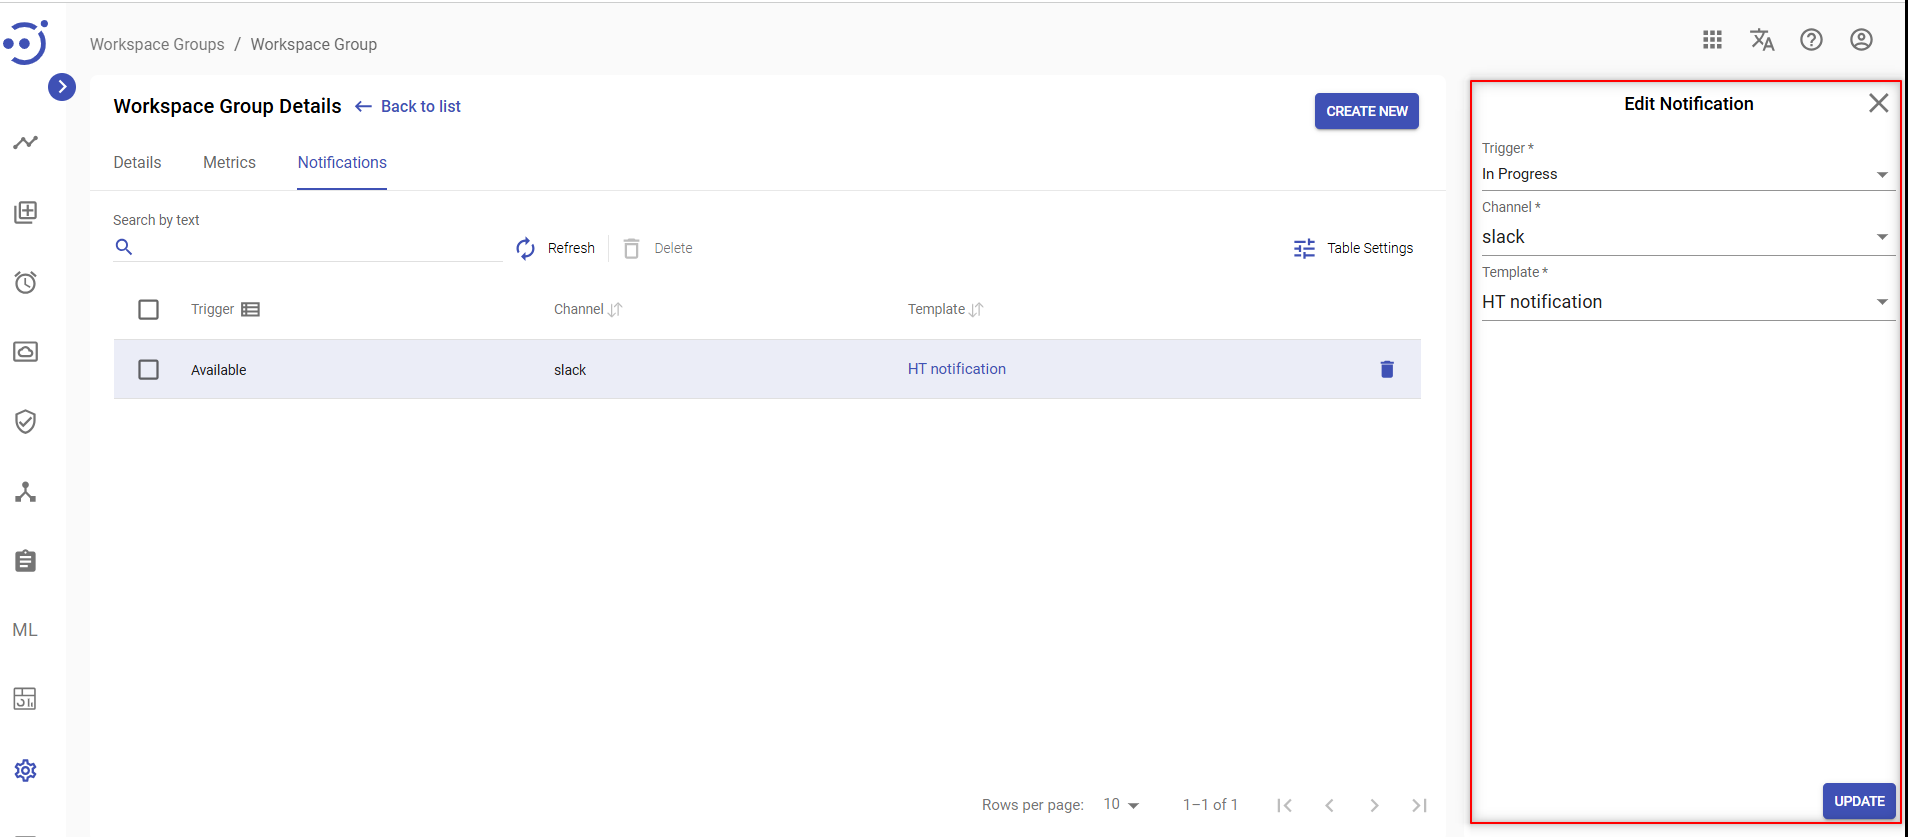
- Click UPDATE.
To update the Node Notifications, you need to be granted Workspace-UPDATE permission. See Role Permissions.
Delete Notifications
There 2 ways to Delete Notifications:
- Click control icon Delete in the row.
- Choose the particular (or all) Notification and click icon Delete above the table.
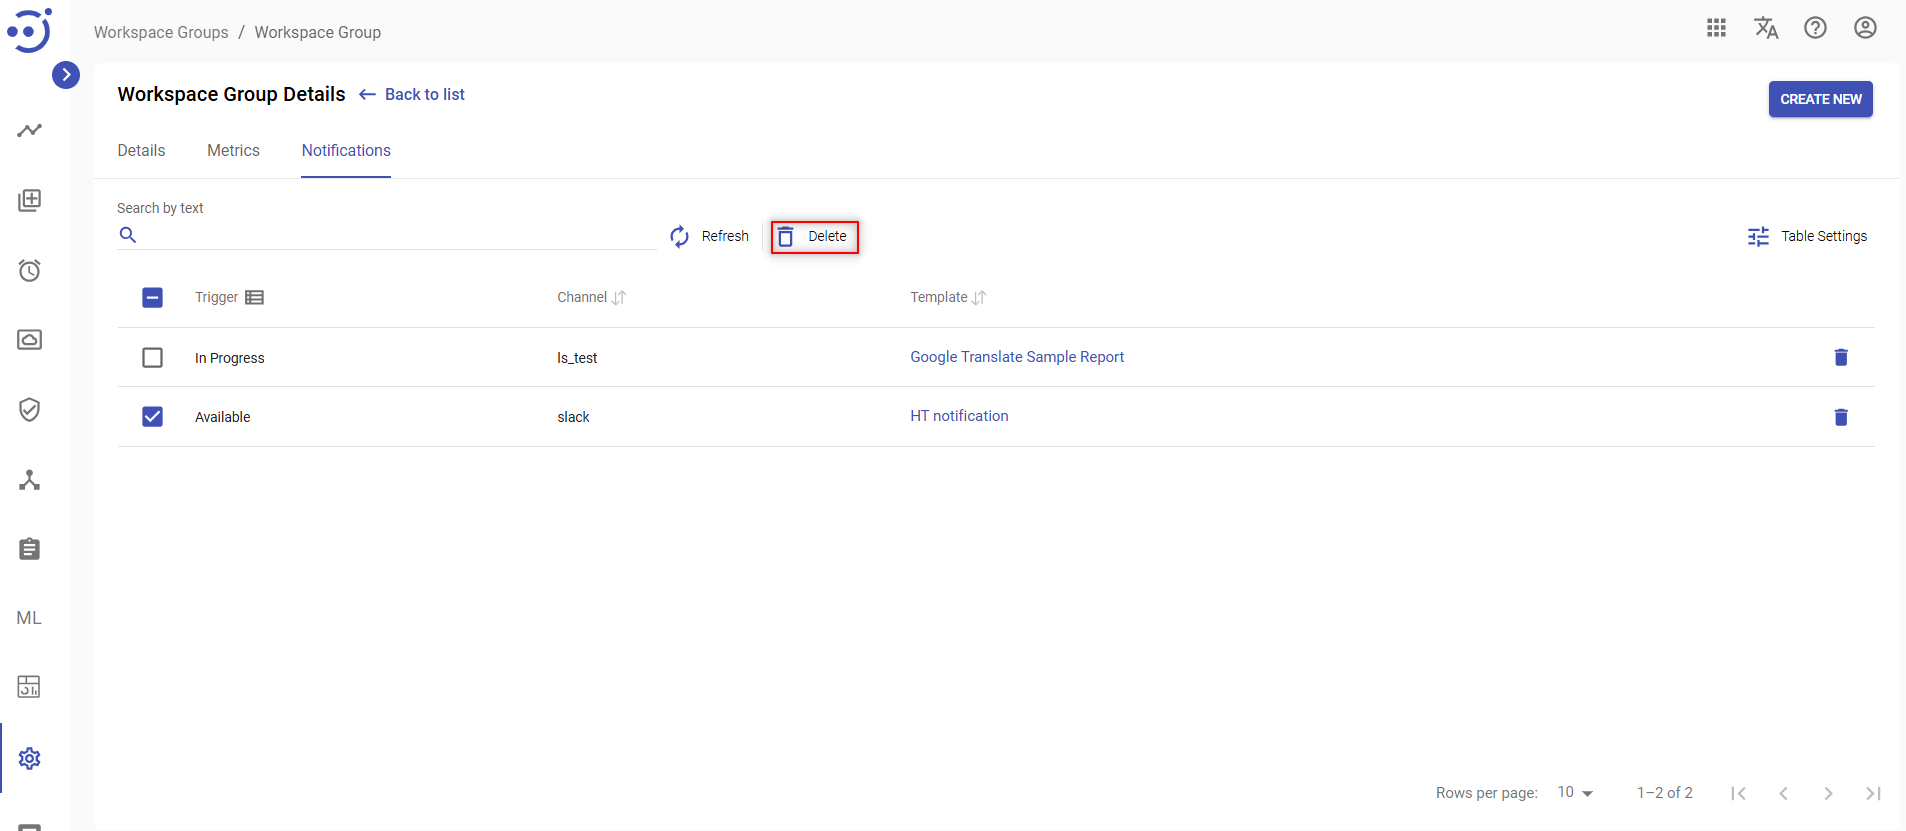
You need to be granted WorkspaceGroup-UPDATE permission. See Role Permissions.
For more information on how to assign Human Tasks to different Workspace Groups, please, refer to Assigning Human Tasks to Wrokspace Groups.