Node Details
Node Details
The Node Details page contains general information about node, configuration parameters for this node, automation processes executed on this node, features, and logs. You can view/edit node details, configuration parameters and manage automation process runs. To access the Node Details, you need to be granted Node-READ permission. See Role Permissions .
Details
The Details tab displays general settings that are necessary for the Node creation. If at least once the node agent was started and at least once automation process was launched, information about node agent, features and about the last automation process executed on this node is displayed on the tab.
To view/edit node details, you need to:
- Navigate to the Node Management module.
- Click on the corresponding Node Name.

- Change one of the field values.

- Click UPDATE.
To update the Node Details, you need to be granted Node-UPDATE permission. See Role Permissions.

Control icons
- Download - to download the node agent installation package (the icon remains the same for all the tabs). Required Permission: Node-ACTION.
- Restart - to restart the node agent (the icon remains the same for all the tabs). Required Permission: Node-ACTION.
- Shut down - to shut down the node (the icon remains the same for all the tabs). Required Permission: Node-ACTION.
UPGRADE VERSION - to upgrade node version to Control Server version. Required Permission: Node-ACTION.
Please note, that UPGRADE VERSION button is always enabled. After clicking this button new node agent package will be downloaded and put to Node working directory.
Fields Description

General:
- Name - the node name.
- Description (optional) - a short description of the node functionalities.
- Working Directory (optional) - the default directory where the automation process runs information is saved. By default, this is %Temp%NODE NAME.
- Capabilities - the list of capability labels indicating what capabilities the node has.
- Dedicated - the toggle allows you to make the node dedicated. The dedicated node is configured on the machine of the end-user, and the user can navigate to the dashboard with all the dedicated processes and launch any with one click. See Dedicated Automation Processes.
Node Agent:
This group of fields represent the physical characteristics of the node, they include
- Version - the version of the running node agent.
- CPU - the amount of the node's CPU.
- Total memory - the node total memory volume.
- Free memory - the amount of memory available for use.
- IP addresses - the IP address of the node.
Features:
This group of fields represents concise information about the system capabilities available for the specific node, it includes:
- Features titles.
- Their Statuses: Enabled or Disabled.
- Healthy.
- Timestamp of the run.
See Node features for more detailed information.
Configuration Parameters
The Configuration Parameters tab displays the list of node parameters in the form of key-value pairs. Here you can specify the parameters required to start the automation process on the current node.
To access the Configuration Parameters, you need to be granted Node-READ permission. See Role Permissions.
![]() If the same parameter with a different value is present in the CS Configuration and the Automation Process Configuration Parameters modules, the priority is assigned in the following order: Node Configuration Parameter -> Automation Process Configuration Parameter -> CS Configuration Parameter.
If the same parameter with a different value is present in the CS Configuration and the Automation Process Configuration Parameters modules, the priority is assigned in the following order: Node Configuration Parameter -> Automation Process Configuration Parameter -> CS Configuration Parameter.
Add Configuration Parameter
There are 2 ways to Add a new configuration parameter:
- Click CREATE NEW and add a configuration parameter manually. Required Permission: Node-UPDATE.
- Click the UPLOAD icon and import a file with the appropriate file format. Required Permission: Node-UPDATE.
- DEFAULT - CSV file as a delimiter comma (,)
- SEMICOLON_SEPARATED - CSV file as a delimiter semicolon (;)
- TAB_SEPARATED - CSV file as a delimiter tab ( )
- CUSTOM - CSV file as a delimiter comma (,) other options - for advanced user.

Update Configuration Parameter
To Update an existing configuration parameter, you need to:
- Click on the corresponding configuration parameter.
- Change one of the field values.
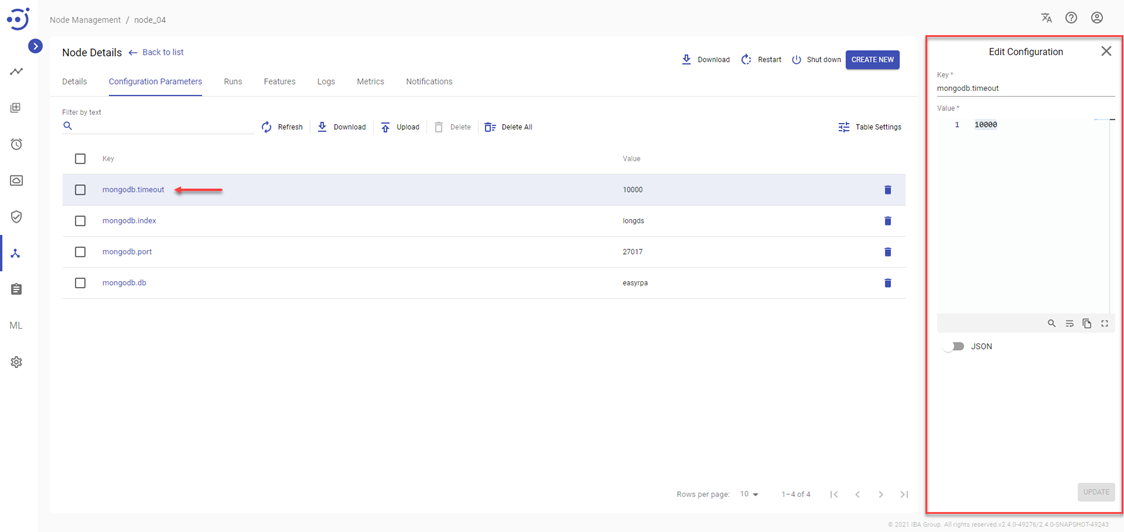
- Click UPDATE.
To update the Automation Process Configuration Parameters, you need to be granted Node-UPDATE permission. See Role Permissions .
There are also tab-specific controls regarding Configuration Parameters:

Control icons
- Refresh - to refresh the configuration parameters' list.
- Download - to download existing configuration parameters in CSV file. Required permission: Node-READ.
- Upload - to import new configuration parameters from a file with the appropriate file format. Required Permission: Node-UPDATE.
- Delete - to delete the configuration parameter. Required Permission: Node-UPDATE.
- Delete all - to delete all configuration parameters of this node. Required Permission: Node-UPDATE.
Table Settings
Table settings allow you to manage the table view. Click the icon ![]() to start working with the table settings. The table settings can be managed with the following buttons:
to start working with the table settings. The table settings can be managed with the following buttons:
- Advanced filter - to switch the advanced filters for the columns.
- Columns Display - to select the columns that will be displayed in the table.
- Apply - to apply the changes made to the table settings.
- Сancel - to cancel the last actions with the table settings.
Filter by text
Filtering allows you to search the configuration parameter by Key, Value columns.
Advanced filters by columns
Advanced Filter allows you to extract a list from a table with predefined criteria. Click the icon ![]() to start working with the advanced filter. The advanced filters can be managed with the following buttons:
to start working with the advanced filter. The advanced filters can be managed with the following buttons:
- Clear filter - to reset all the proposed advanced filter criteria for the column.
- Сancel - to cancel the last actions with the proposed criteria for the column.
Apply - to filter the table according to the proposed criteria for the column.
Runs
The Runs tab contains information about all the runs that were started on this node and their statuses. To access the Automation Processes Runs, you need to be granted AutomationProcess-READ permission. See Role Permissions.

Columns Description
- Run ID - a numeric identifier of the particular process run. By clicking on the Run Id, you can see the history of the particular process run. See Automation Process Run for more information.
- Process Name - the automation process name. By clicking on the Process Name, you can see information about all runs of the particular automation process and their statuses. See Automation Process Run for more information.
- Created By - the First and Last names of the user who started the automation process. The automation process runs initiated by the schedule will have System Scheduler value.
- Creation Date - the date and time when the Run was created.
- Status - the current status of the Run.
Control icon
- Refresh - to refresh the runs' list.
Table Settings
Table settings allow you to manage the table view. Click the icon ![]() to start working with the table settings. The table settings can be managed with the following buttons:
to start working with the table settings. The table settings can be managed with the following buttons:
- Advanced filter - to switch the advanced filters for the columns.
- Columns Display - to select the columns that will be displayed in the table.
- Apply - to apply the changes made to the table settings.
- Сancel - to cancel the last actions with the table settings.
Filter by text
Filtering allows you to search the automation process by Run ID, Process Name, Created By, Status columns.
Advanced filters by columns
Advanced Filter allows you to extract a list from a table with predefined criteria. Click the icon ![]() to start working with the advanced filter. The advanced filters can be managed with the following buttons:
to start working with the advanced filter. The advanced filters can be managed with the following buttons:
- Clear filter - to reset all the proposed advanced filter criteria for the column.
- Сancel - to cancel the last actions with the proposed criteria for the column.
Apply - to filter the table according to the proposed criteria for the column.
Sorting
Ascending/descending sorting is allowed for the Creation Date column.
Grouping
Grouping is allowed for the Status column.
Related page
See Automation Process Run Status Lifecycle for more information about the automation process statuses and control icons.
Node features
See Node features for detailed information about this tab.
Logs
The Logs tab displays the logs of the particular node. To access the Logs, you need to be granted Node-READ permission. See Role Permissions.
Control icons
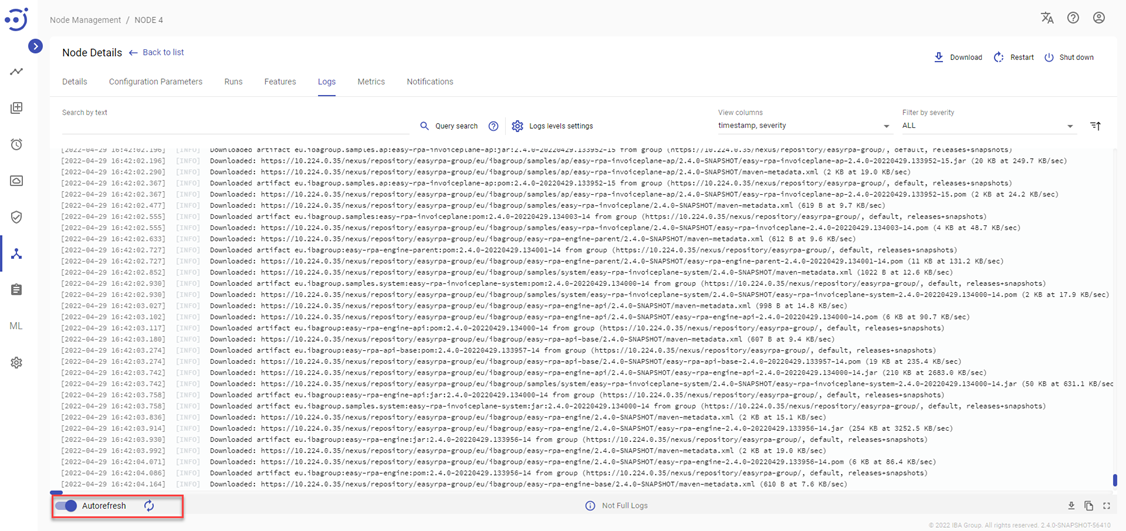
- Refresh - to pull the latest logs from the server.
- Autorefresh toggle - to turn on/off an automatic refresh of logs.
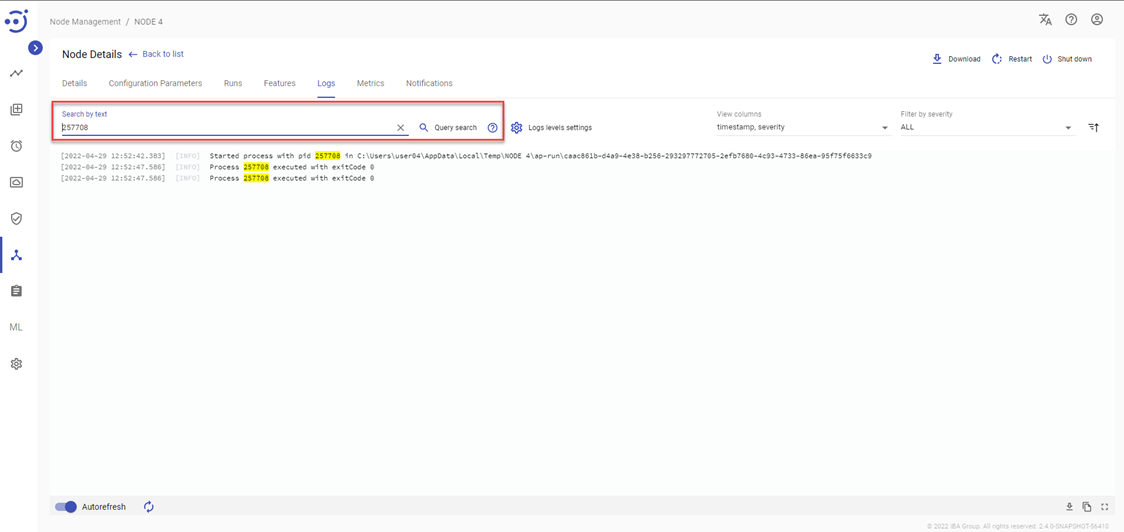
Search by text and Query search
You can search for a particular log by its text. The logs found are highlighted in yellow. Refer to the following article for more information on using the Search field to search through logs by query: Logs Search syntax.
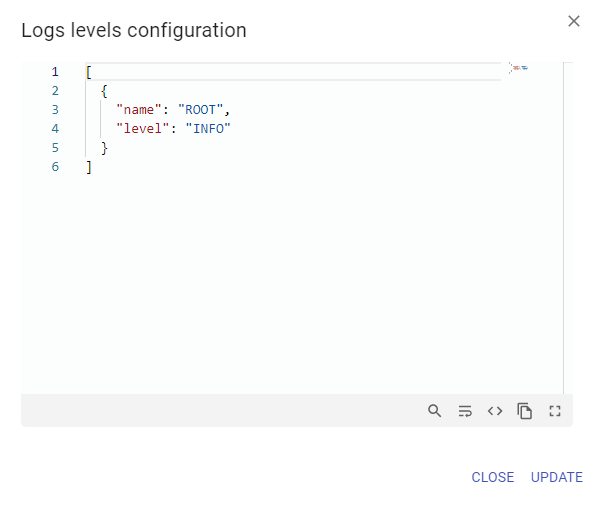
Log levels settings
Log level setting is used to determine the hierarchy of events. Based on the severity assigned to each event, you can filter the events out.
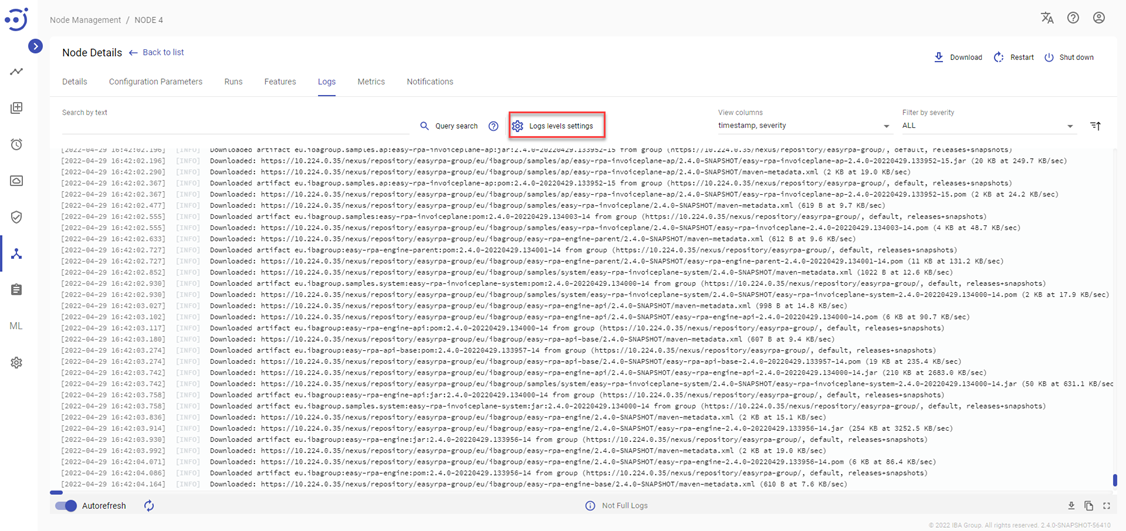
Refer to the following article for more information on using the Log levels configuration setting: Log Management.
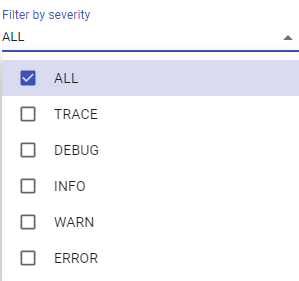
Filter by severity
Filtering allows you to choose the level of severity of the displayed logs from the dropdown menu. The available options are as follows:
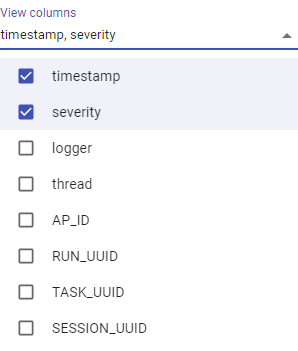
View columns
You can add or remove the columns timestamp/severity/logger/thread/AP_ID/RUN_UUID/TASK_UUID/SESSION_UUID from the event log view.
Sort by timestamp
Ascending/descending logs sorting by the timestamp is allowed: ![]()
Not Full Logs
Not Full Logs indicator appears at the bottom right corner when the log becomes too long for one page: ![]()
Full Screen
To view more log records simultaneously enter the full screen mode via clicking the corresponding button: ![]()
Copy
To copy the displayed logs only use Copy button: ![]()
Download Full Logs
To download full logs (a .txt file with logs) use Download Full Logs button: ![]()
Node Status Lifecycle
The Node can receive the following statuses:
- Down - the node receives this status immediately after its creation and when the node agent is not started yet.
- Available - describes the state when the node is ready to run the automation processes on it. The Node receives this status when the node agent is started on the target machine.
- Busy - describes the state when the node is fully loaded by the automation processes running on it, and cannot accept more automation process tasks.
- Stopping - a transient status received by the node when it is restarting or shutting down.
Control icons
The following actions can be applied to the node with corresponding statuses:
Restart | Shut down | Delete | |
|---|---|---|---|
| Available | ✓ | ✓ | ✓ |
| Down | ✗ | ✗ | ✓ |
| Busy | ✓ | ✓ | ✓ |
| Stopping | ✗ | ✗ | ✓ |
Metrics
The Metrics tab allows users to view the graphs that visualize information about Node status. To access the Metrics, you need to be granted Node-READ permission. See Role Permissions.
Control icons
- Refresh - to refresh the metrics.
To display the data on a graph within a particular time range drop-down Time range can be used.
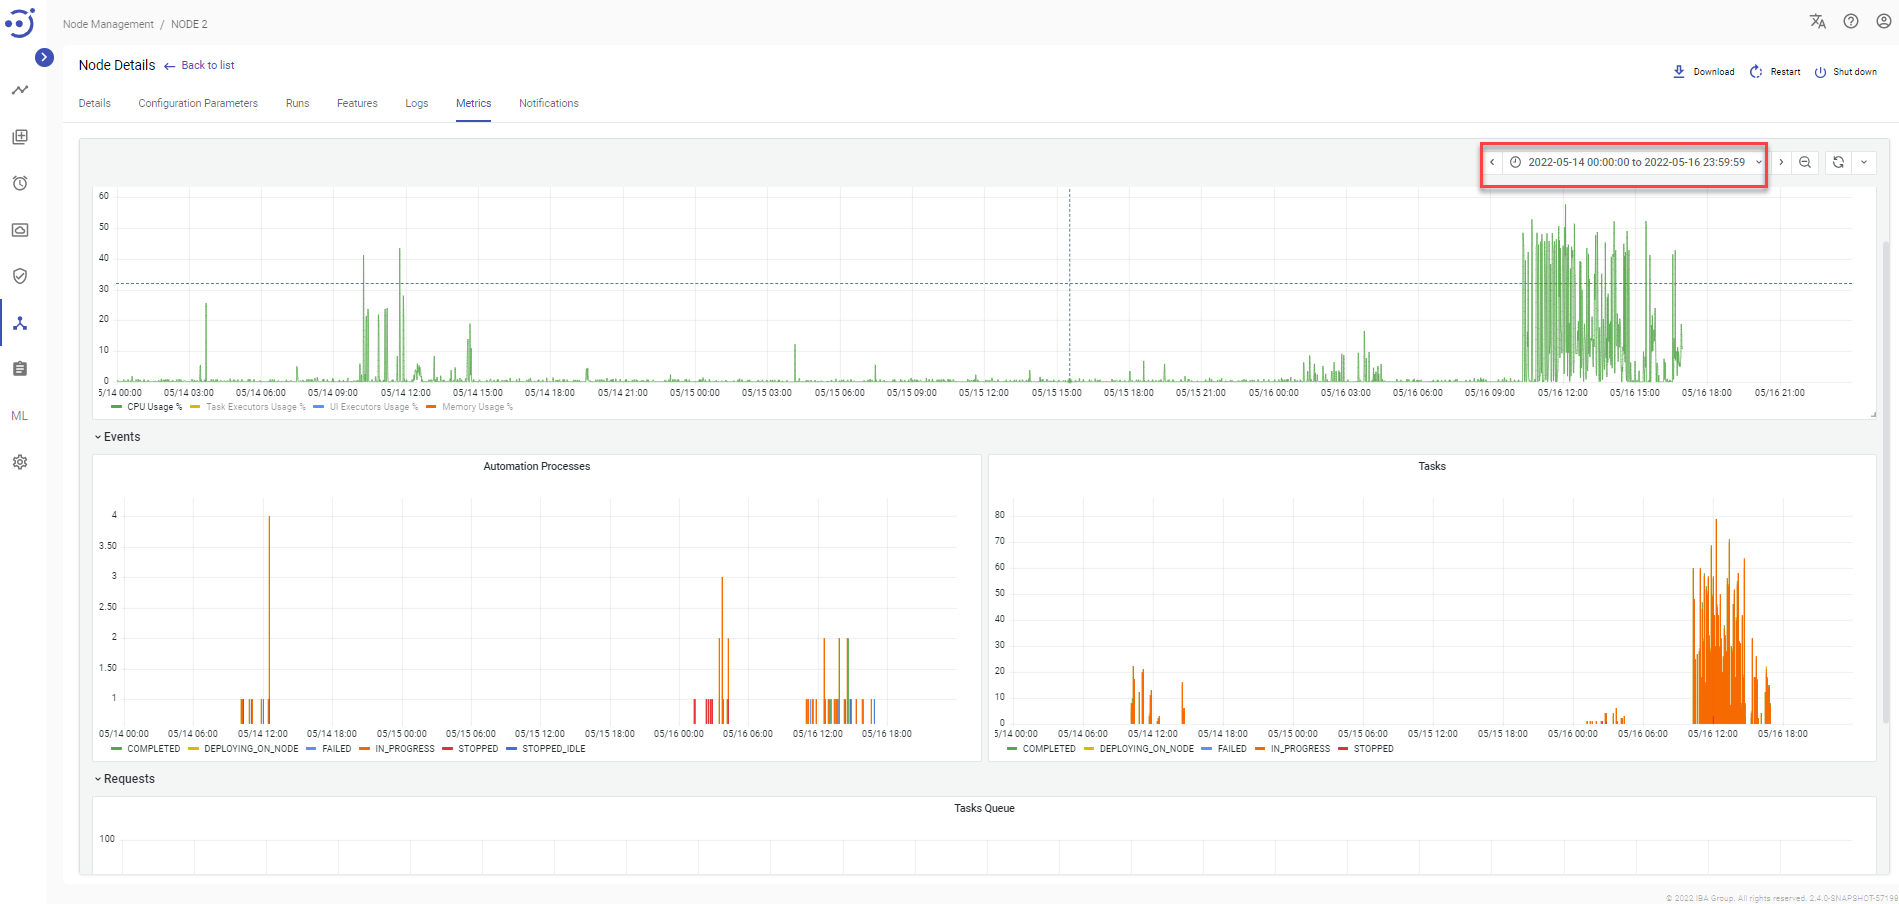
There are three graphs placed in the Metrics tab:
- Node resources - the graph shows the percentage of utilization of the node resources (ordinate axis), such as CPU data, Task Executors Usage, UI Executors Usage, Memory Usage during the selected time range (abscissa axis).

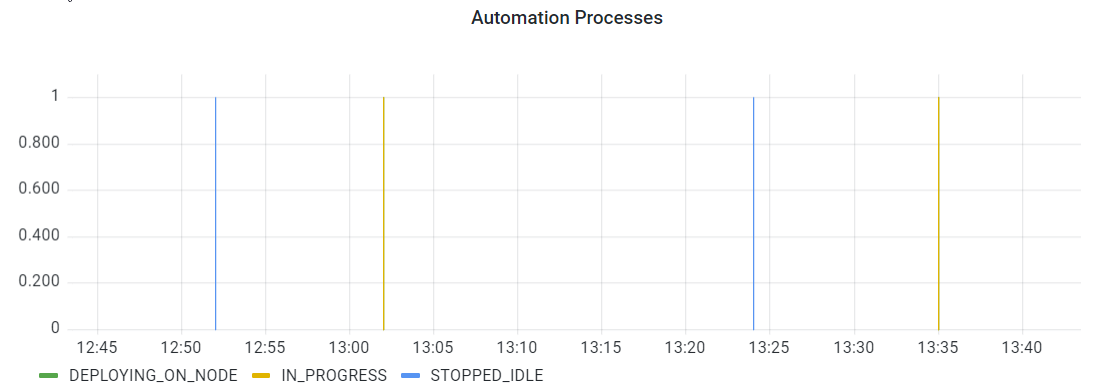
- Automation Processes - the graph shows the number of APs (ordinate axis) that moved into a certain status during the selected time range (abscissa axis).
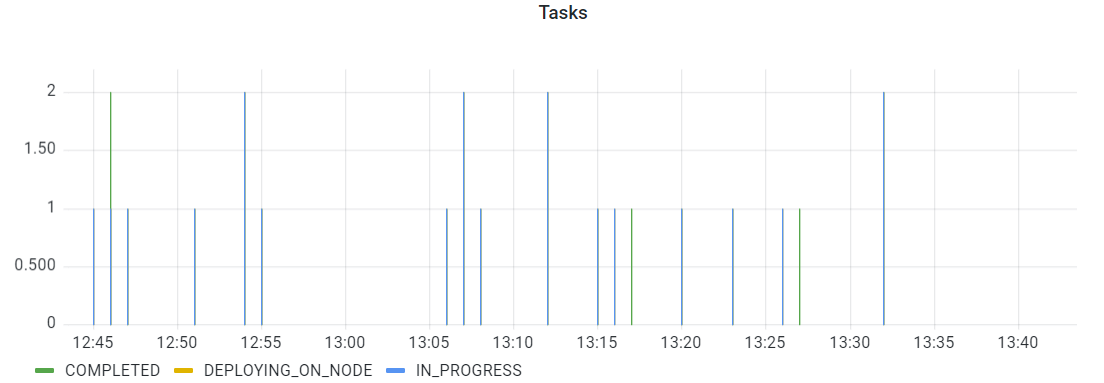
- Tasks - the graph shows the number of AP Tasks (ordinate axis) that moved into a certain status during the selected time range (abscissa axis).
Hotkeys to manipulate the graph view
To update the view the following hotkeys can be used:
- CTRL or CMD - Press the hotkey and select/deselect the necessary data to be displayed on the graph.
- CTRL + Z - Zoom out the graph.
- To zoom in the particular time range use the mouse selection.
Graphs display and location may vary depending on the settings. To setting graphs, you need to be granted Admin permission to Grafana. See Grafana Roles.
Notifications
The Notifications tab allows users to receive messages about a particular AP Run. To access the Notifications, you need to be granted Node-READ permission. See Role Permissions.

Columns Description
- Trigger - the action for which the message is sent to the particular channel.
- Template - example of a message is sent to a channel. By clicking on the Template, you can see the Template Details.
- Channel - mailing list of contacts.
Control icons
- Refresh - to refresh the page.
- Delete - to delete the Notifications via the recycle bin control icon in the table row or Delete icon above the table.

Table Settings
Table settings allow you to manage the table view. Click the icon ![]() to start working with the table settings. The table settings can be managed with the following buttons:
to start working with the table settings. The table settings can be managed with the following buttons:
- Advanced filter - to switch the advanced filters for the columns.
- Columns Display - to select the columns that will be displayed in the table.
- Apply - to apply the changes made to the table settings.
- Сancel - to cancel the last actions with the table settings.
Filter by text
Filtering allows you to search the automation process by Trigger, Channel and Template.
Advanced filters by columns
Advanced Filter allows you to extract a list from a table with predefined criteria. Click the icon ![]() to start working with the advanced filter. The advanced filters can be managed with the following buttons:
to start working with the advanced filter. The advanced filters can be managed with the following buttons:
- Clear filter - to reset all the proposed advanced filter criteria for the column.
- Сancel - to cancel the last actions with the proposed criteria for the column.
Apply - to filter the table according to the proposed criteria for the column.
Sorting
Ascending/descending sorting is allowed for the columns: Channel, Template.
Grouping
Grouping is allowed for the Trigger column.
Create a New Notification
To create a New Notification:
- Click CREATE NEW button.
- On the New Notification pop-up panel enter Trigger, Chanel, Template.
- Click CREATE.

To create the Node Notifications, you need to be granted Node-UPDATE permission. See Role Permissions.
Update Notifications
To Update an existing notification parameters, you need to:
- Click on the corresponding notification.
- On the Edit Notification pop-up panel change one of the field values.

- Click UPDATE.
To update the Node Notifications, you need to be granted Node-UPDATE permission. See Role Permissions.
Delete Notifications
There 2 ways to Delete Notifications:
- Click control icon Delete in the row.

- Choose the particular (or all) Notification and click icon Delete above the table.

You need to be granted Node-UPDATE permission. See Role Permissions.