Preparing for Tagging
Preparing for Tagging
This stage is critically important because the Data Analyst establishes the foundation for the entire data collection process. Any issues overlooked or unresolved at this point can lead to significant problems in later stages. The main aim of this stage is to prepare everything for tagging to start.
Key activities in this stage include:
- Defining the tagging logic to ensure consistent and accurate tagging criteria,
- Creating clear, comprehensive tagging instructions to guide SMEs who will tag the documents,
- Splitting documents into manageable batches, ideally grouped by layout or content type,
- Designing the human task and sending the batches of documents into Workspace ready for tagging.
At the end of this stage, the Data Analyst assigns specific human tasks for each SME and provides a batch and instructions for it. In the result of this stage, the batches and human tasks are prepared and assigned to SMEs, and all the necessary preparation for the first tagging iteration is conducted.
- The Human Task should be configured according to business logic of all the documents. If a mistake is revealed in the process of tagging, it will take extra time and effort to reconfigure the Human Task, re-tag documents, and even retrain the model (if training iterations start in parallel with tagging).
- Inconsistent and incorrect tagging can result in bad quality for the data set or extra time to re-tag and verify documents.
The following sections will guide you through each step in detail.
Start Working with EasyRPA
To log in to the system for the first time, follow the link to EasyRPA.
If you are an LDAP user, enter your LDAP username and password on the login screen. Upon successful login, your user account will be automatically created in the system.
Human Task Design
The human task can be created for one of the following most common use cases:
- Information Extraction (IE)
- Classification
For model training, we need to find and tag entities (fields) in a document. They will become values for the model to train on.
Human Task Design Best Practices
To create a good human task for each case, it's necessary to consider business logic of all the documents, types of the documents and their layouts. Special attention should be paid to fields' logic and appearance in Information Extraction use cases.
Split into batches
When working with a large training set - especially if it contains over 100 documents or includes multiple distinct layouts - it can be challenging for a single SME to tag all documents in one session effectively. To improve focus and maintain high-quality annotations, it is recommended to divide the dataset into smaller batches of 30 to 50 documents, ideally grouped by similar layout or format.
Single or Multiple
The data analyst reviews the set of fields and defines what fields have only one value in the document and what have several values or, in other words, is it a single value or multiple value field.
- Single value field - field for which the result value will be the only one in each document. Typical examples are Invoice Number, Invoice Date, Total.
- Multiple value field - field for which the result value will be plural. Typical examples are Product Name, Product Description, Quantity, Price.
Required or Optional
- Required field - field which is presented in all the documents in all the batches. For example, Invoice Number, Invoice Date, etc.
- Optional field - field which is presented only in some documents or in some batches. These fields usually have special additional logic.
Required and optional fields need to be considered together with SMEs. However, if the number of fields is 10 or higher, it's strongly recommended to make it impossible to submit the task without making sure that all the necessary values have been tagged.
Assign Hot Keys
Hot keys are really helpful for quick tagging. To increase speed, assign each field a hot key and teach SMEs how to use them. There are two approaches to assigning convenient hot keys:
- Assign intuitively understandable and memorable letters - for example, first letters of fields:
d = date,
p = price,
n = invoice number, etc. - Assign letters and figures that are close to each other on the keyboard:
1, 2, 3 = first three fields
q, w, e = second three fields
Split long entities
Check whether the value can be split into some independent parts - for example, the whole address line can be very difficult to extract, as address formats usually differ from country to country, or even within
different documents' templates. It's recommended to split the value into shorter entities that are situated in onedocument (Street Address, City, State, Zip code, etc.).
Enable additional fields
Additional fields can make the human task output more informative (but only if necessary):
- notes - a textarea field. Notes can be provided to select documents quicker. While tagging, SMEs will provide notes on what is wrong with the document and that can be further picked out. Provide an optional field for comments in the human task where SMEs can mention information about a missing field, document structure, etc.
- radio button to classify documents - If you have, for example, a combined data set of four different invoices, it will be useful to add a special field with the list of all four invoices aas a radio button select. This will simplify further analysis of the data set and its grouping.
- checkbox to mark an invalid document - Even after OCR tuning, there still can be documents with bad OCR. To avoid tagging such documents and easily find them later, it's recommended to include a special checkbox.
Don't make your Human Task too big
It is recommended including 7–10 fields in one human task. If the use case implies extraction of a larger number of fields, it's better to create several tasks. So, if, for example, you need to extract 30 fields, create three separate tasks with three different sets of fields in each. This way, your data set will be processed three times through three different human tasks. Otherwise, too many fields in one task may lead to lower concentration and, consequently, lower quality of the data set.
Provide clear Tagging Instructions
Make sure to provide clear instructions for SMEs who will tag the documents. ML models learn patterns directly from the tagged data. Inconsistent or ambiguous tags teach the model conflicting patterns. Clear instructions result in clean data, allowing the model to learn correct patterns for better information extraction accuracy.
How to Design IE Human Task
To create an IE Human Task, follow these steps:
- Create a Document Type - define the entities to be extracted and their properties;
- Create a Document Set - establish a structured collection of related documents.
- Upload the Training Set - import the prepared training set into the created document set.
- Run Preprocess action - apply transformations to optimize document format and readability.
- Run Send to Workspace action - make the processed documents available for tagging in Workspace.
Before proceeding, ensure that your dataset is split into a training set (80%) and a test set (20%). Only the training set should be uploaded and tagged for model training in Information Extraction.
Create a Document Type
A Document Type determines the structure and presentation of documents in a Human Task, specifying which output fields should be extracted during tagging and usedfor Machine Learning training.
To create a new Document Type for Information Extraction use case:
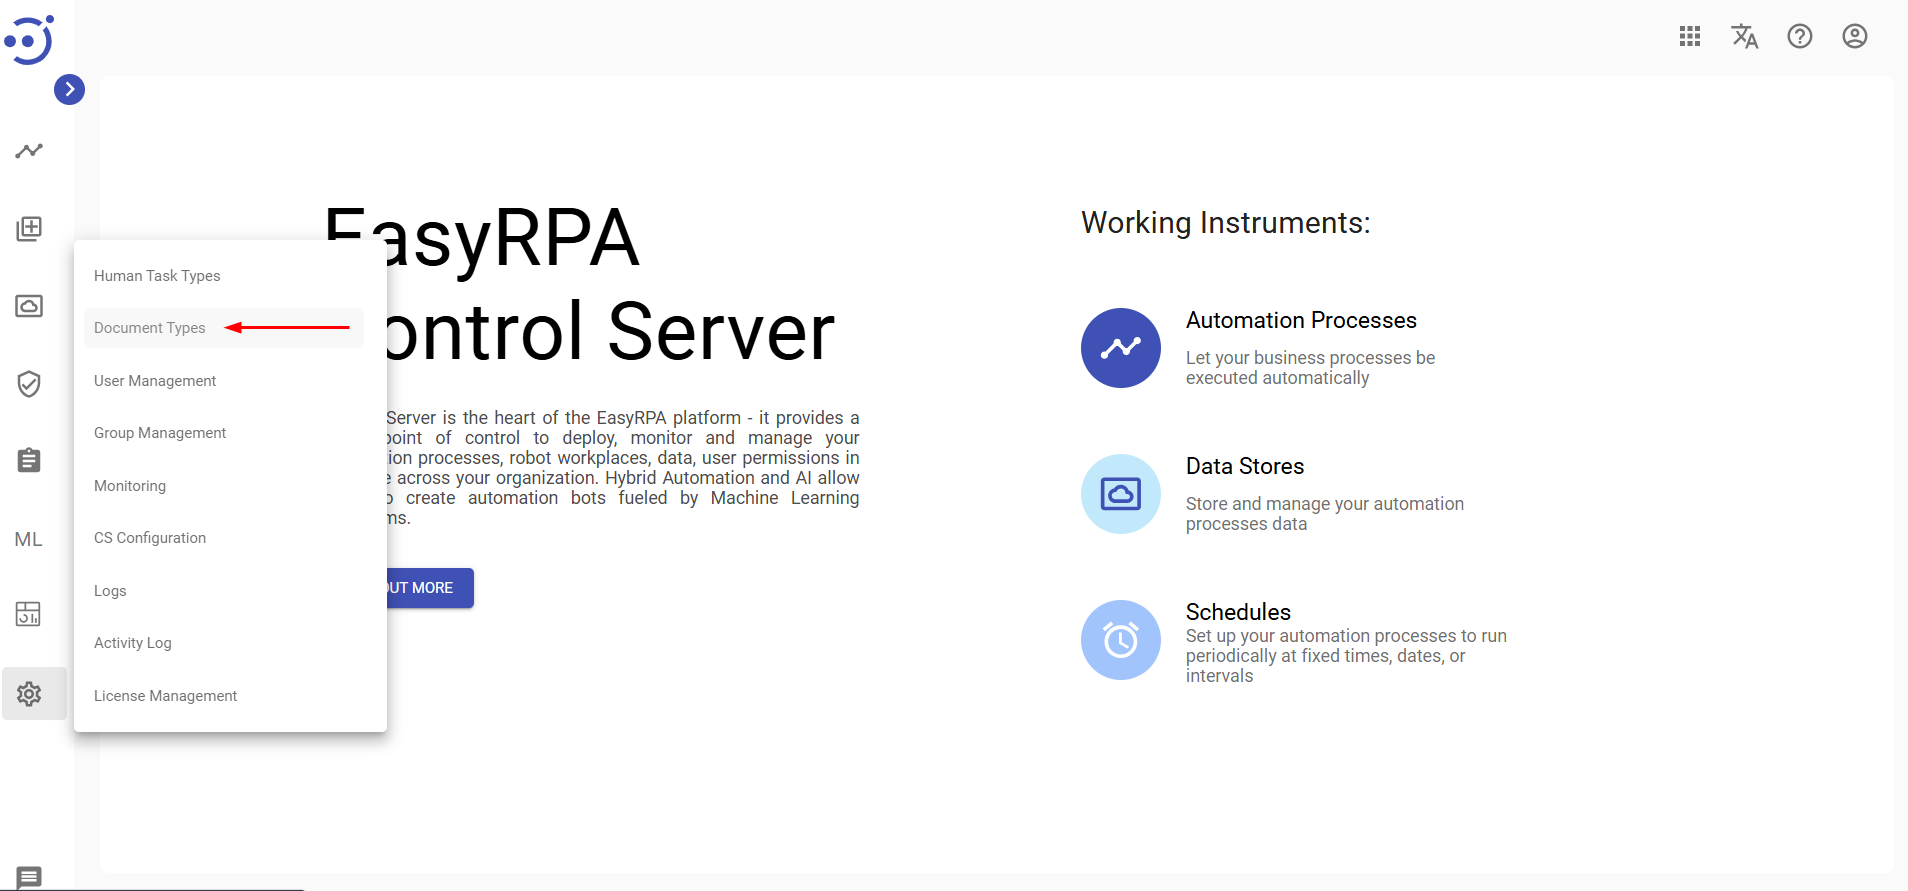
- Navigate to Administration → Document Types page.
- Create a new Document Type (Refer to the Create a new Document Type guide for detailed instructions).
- During creation, ensure that you:
- Select Information Extraction Task as Human Task Type.
- Define the Fields to be extracted, provide Task Title and Taging Instructions and some additional configurations in the JSON structure under the Settings section. Key JSON settings include:
taskInstructionText (string, optional) - instruction text displayed in the popup window.
taskTypeLabel (string, optional) - configures the task title (default: "Information Extraction").
categories (list of objects) (required) - specifies the fields to extract and their parameters.
Additional options:
Extra fields can be added under the "More" tab (e.g., notes).
Postprocessors can be defined to normalize extracted fields after tagging.
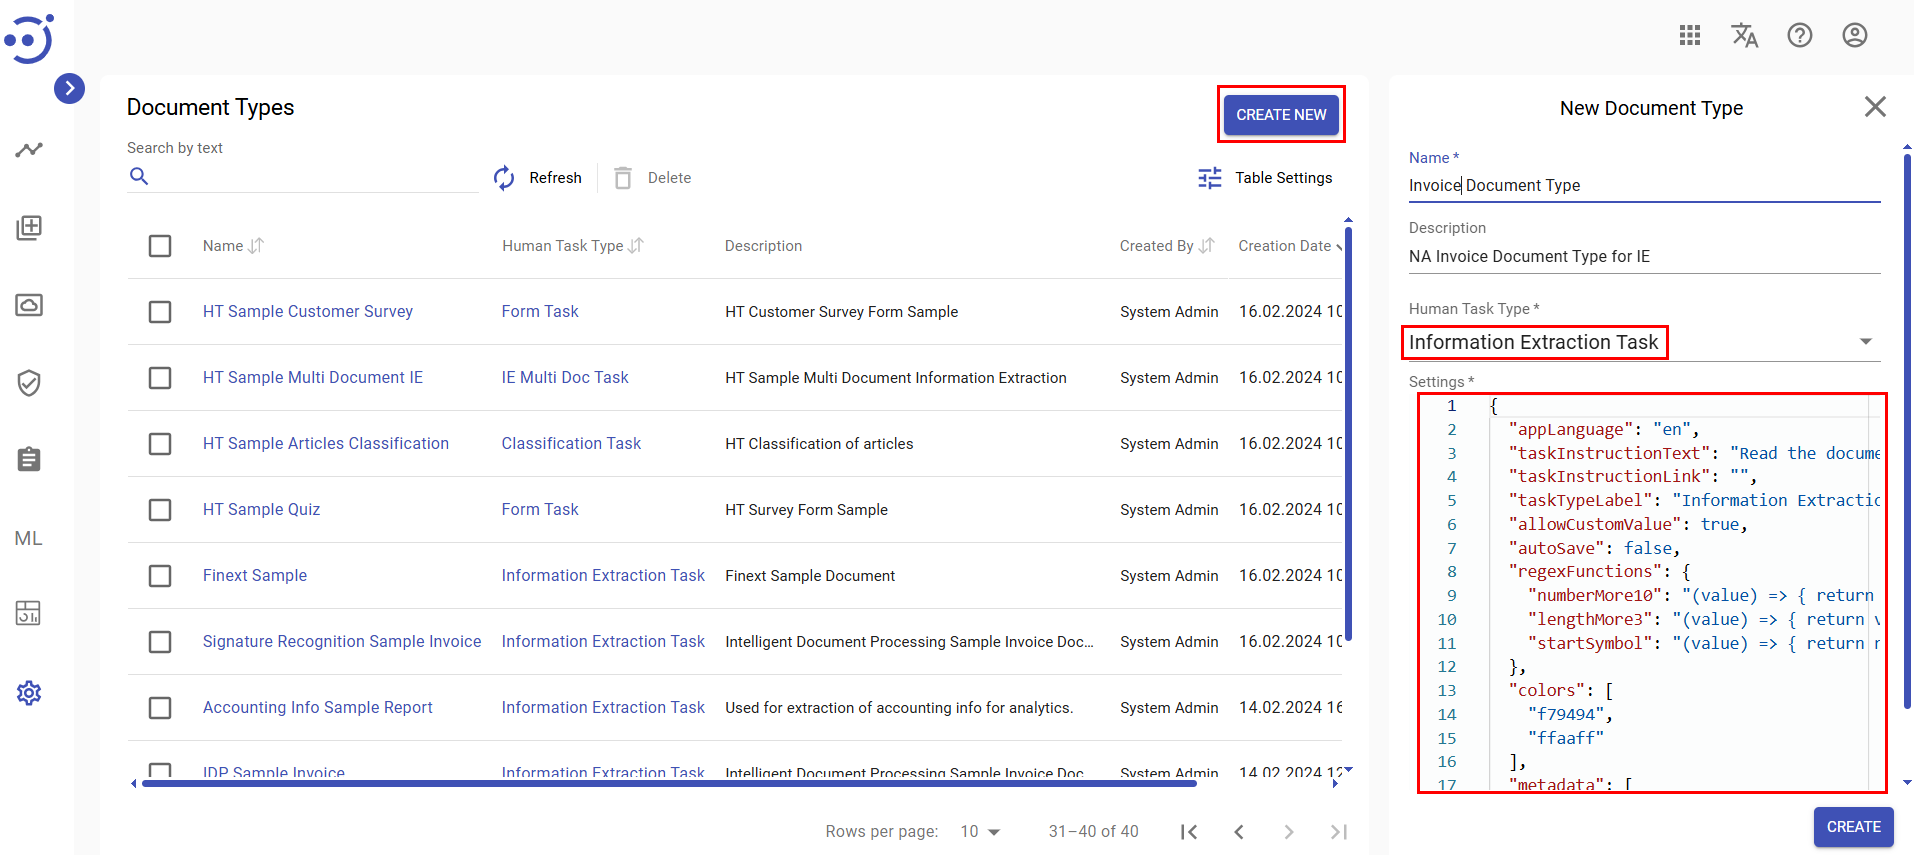
Here is an example of Information Extraction Document Type JSON Settings:
For a detailed reference on Information Extraction Document Type JSON settings, see Document Type Settings JSON Structure.
To explore the Document Types module UI, refer to Document Types.
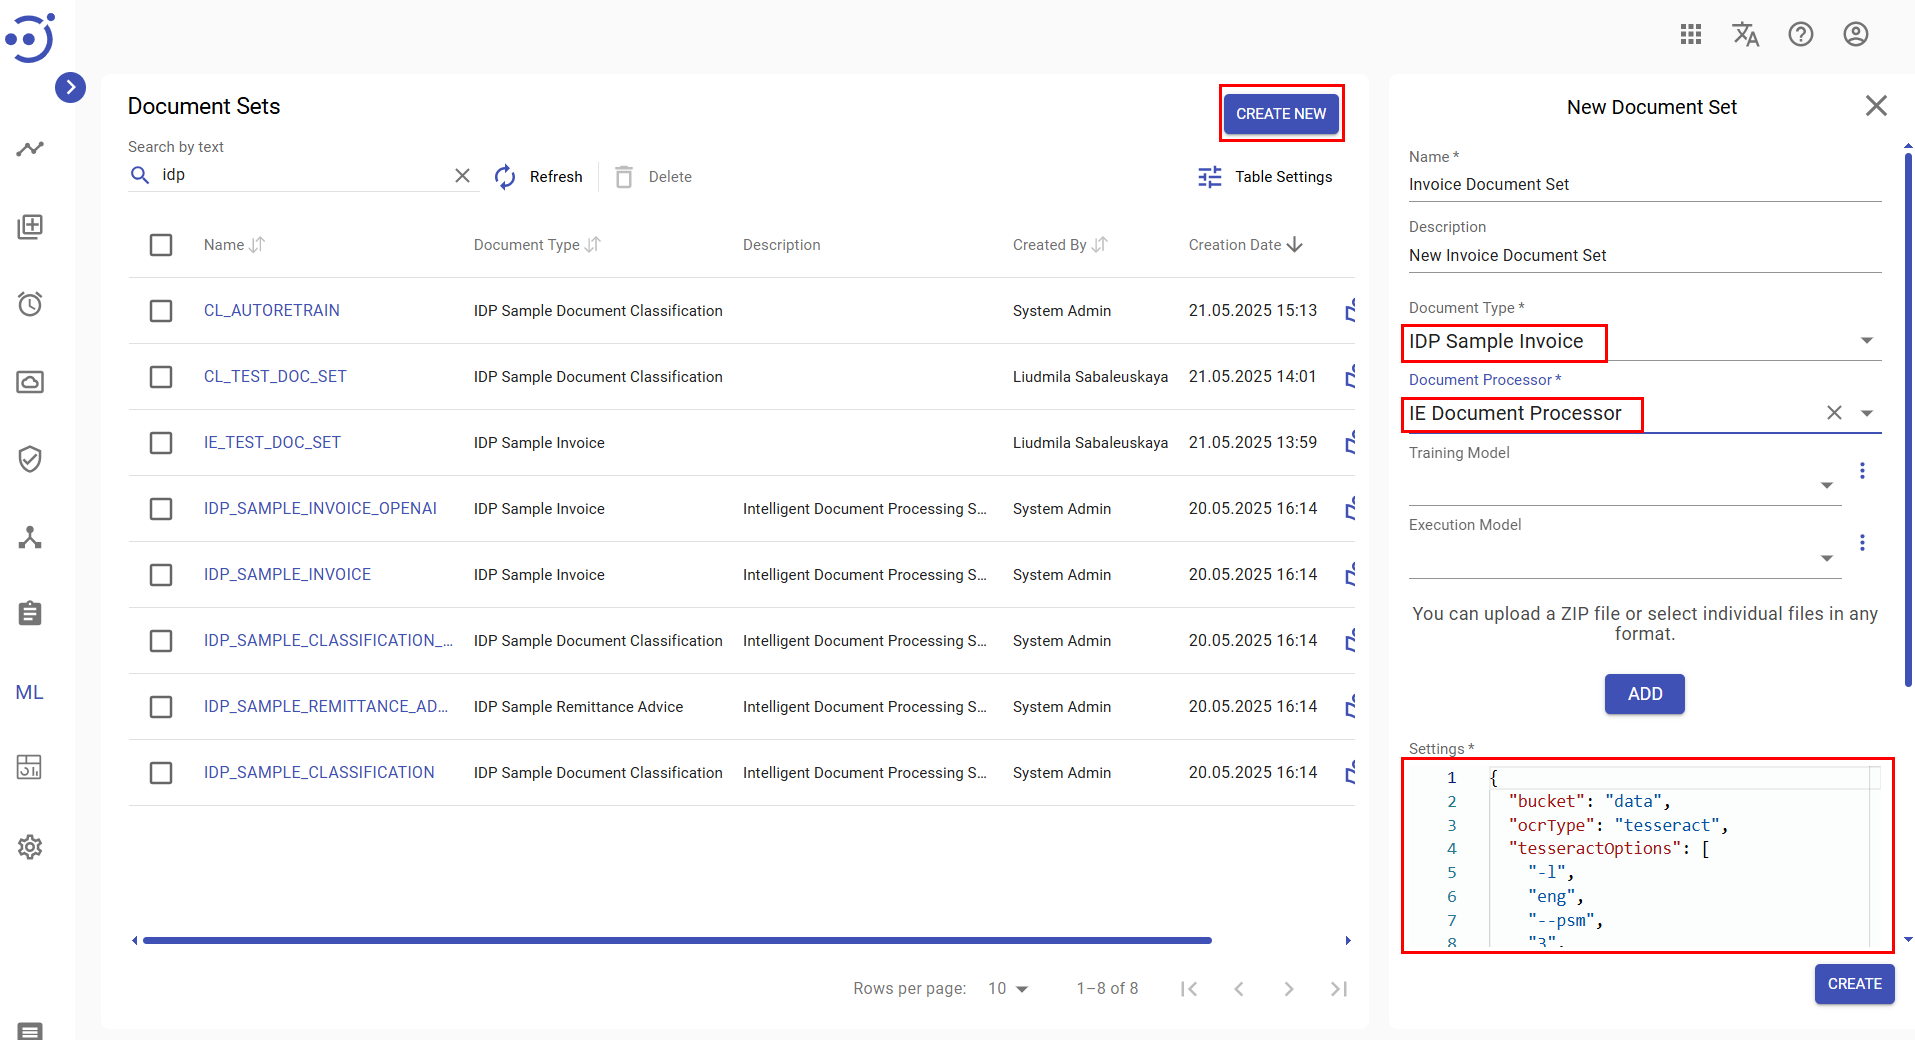
Create a Document Set
The Document Sets module enables users to create, view, and manage document sets used for training machine learning models.
To create a new Document Set for Information Extraction use case:
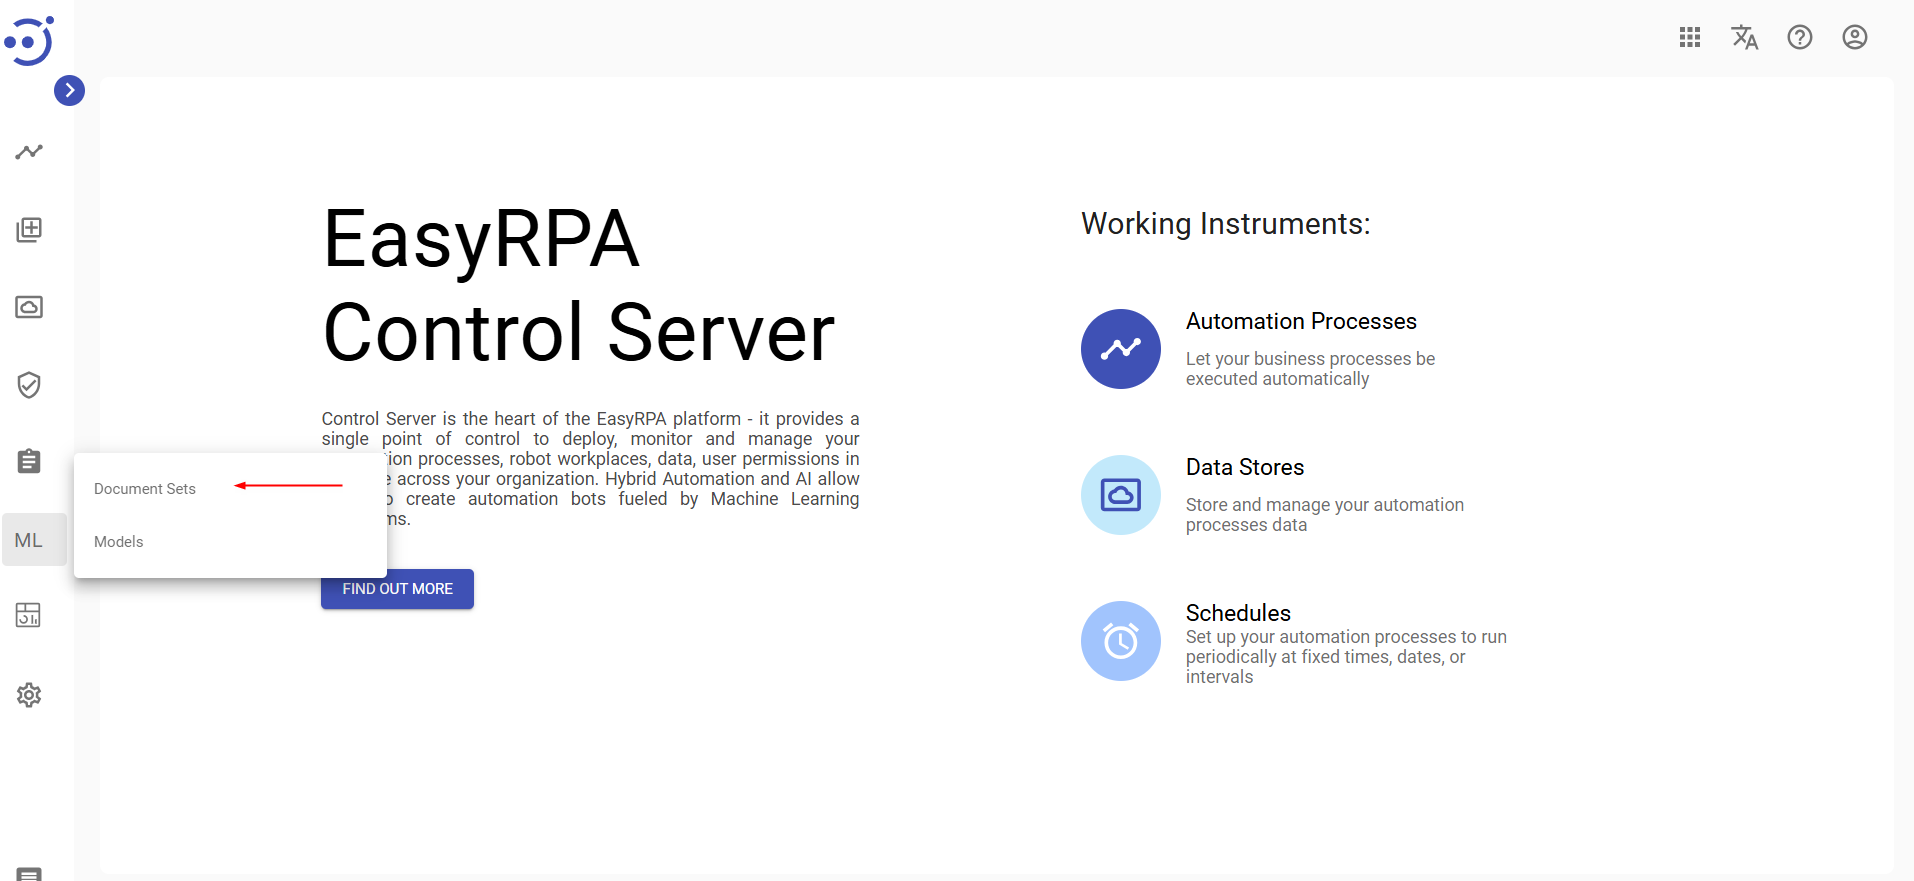
- Navigate to Machine Learning → Document Sets page.
- Create a new Document Set (Refer to the Create a new Document Set guide for detailed instructions).
- During creation, ensure that you:
- Select the Document Type you have created on the previous step in the dropdown,
- Select IE Document Processor in Document Processor dropdown,
- Configure OCR settings as JSON structure under the Settings section, specifying Storage bucket name, Tesseract options, Image Magick settings, and HocrFixWords parameters.
Here is an example of Information Extraction Document Set JSON Settings:
To explore the Document Sets module UI, refer to Document Sets.
To explore the OCR settings, refer to OCR Tuning Guide.
Upload the Training Set
You can upload input documents individually or as a zip archive. Documents can be added during the creation of a new Document Set or uploaded later if an empty Document Set has already been created.
Uploading documents while creating a New Document Set
- Click Add button to upload a .zip file with documents or individual documents to a new Document Set. A file explorer window is displayed.
- Select a .zip file to be uploaded into the document set.
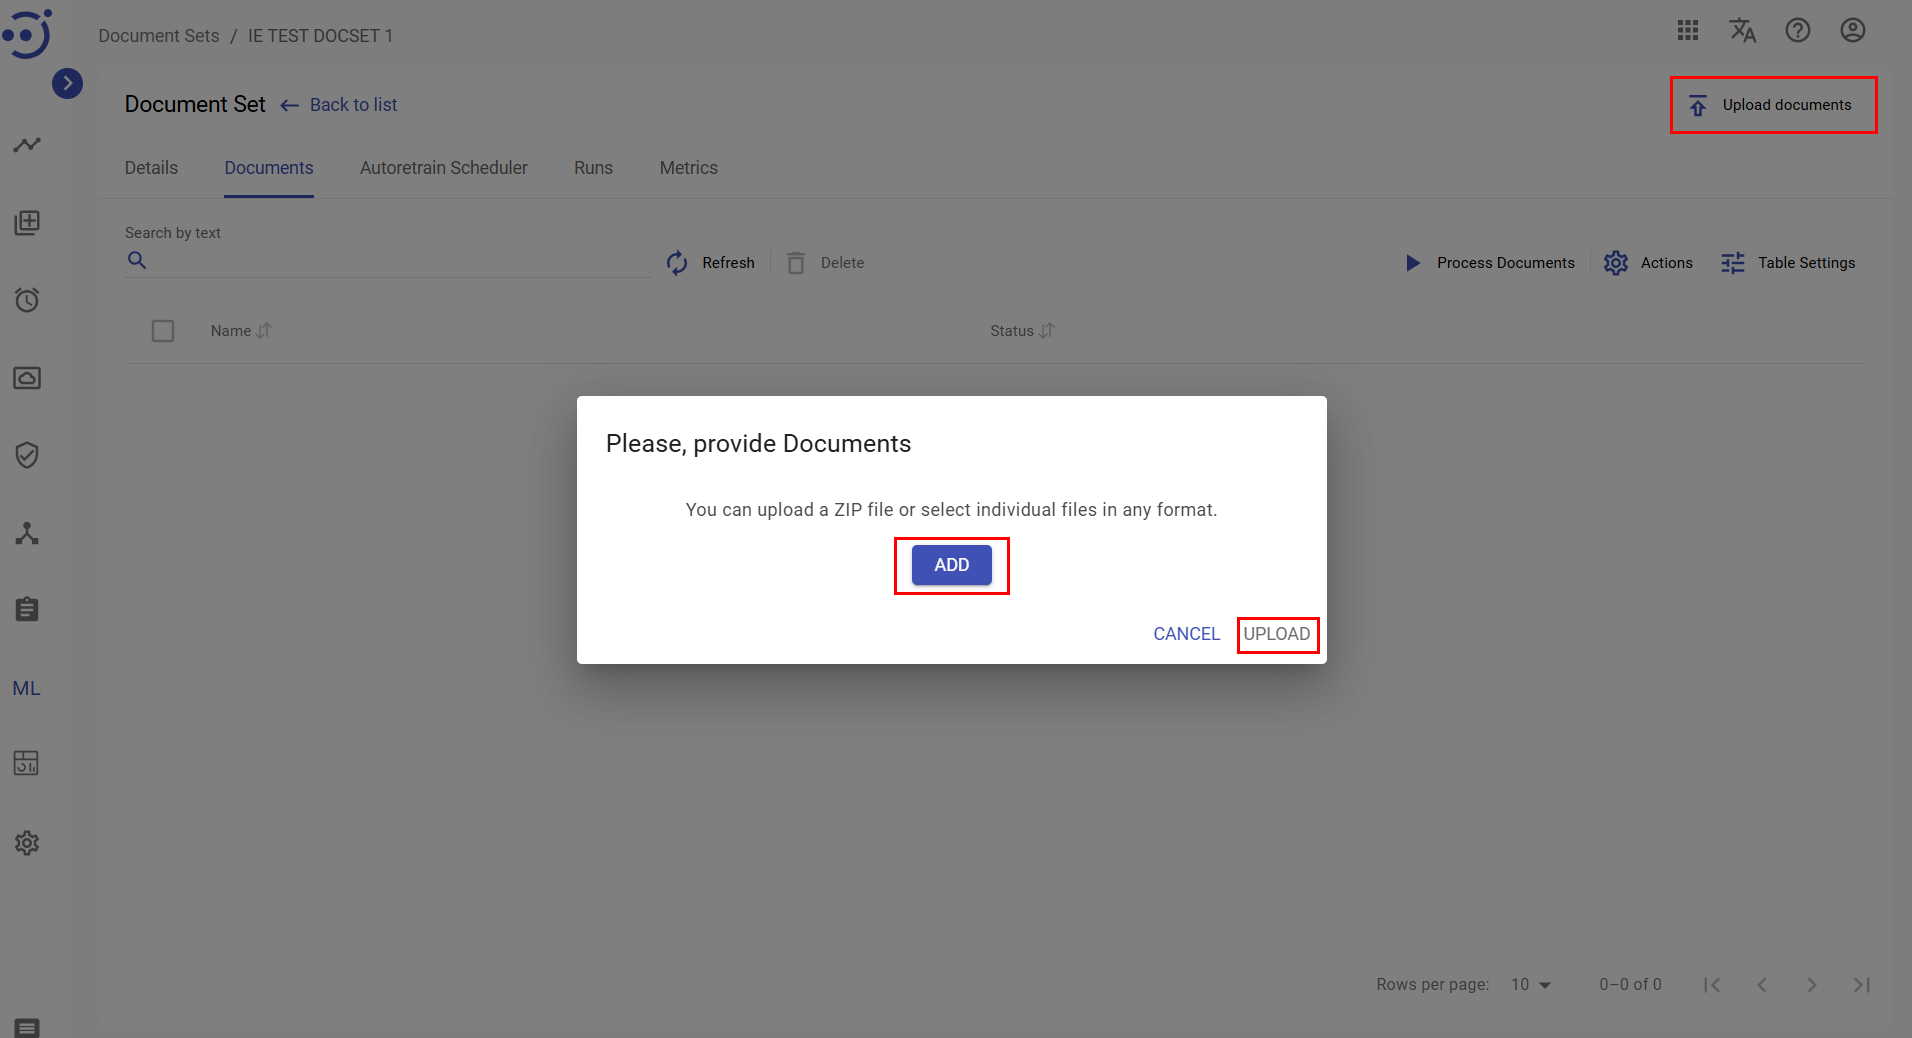
Uploading Documents to an Existing Document Set
- Navigate to the Document Set you have created.
- Click Upload Documents.
- Click Add.
- Select either a zip archive or individual files to upload.
- Click Upload to complete the process.
Preprocess and Send to Workspace
After uploading the training set and configuring all necessary settings, run the IE Document Processor actions to:
Optimize document format and readability.
Perform OCR processing.
Make the processed documents available for tagging in Workspace.
Steps to run IE Document Processor on the documents:
- Navigate to the Document Set you have created.
- Click Process Documents.
- Select Preprocess and Send to Workspace checkboxes.
- Click Process to start the automation process.
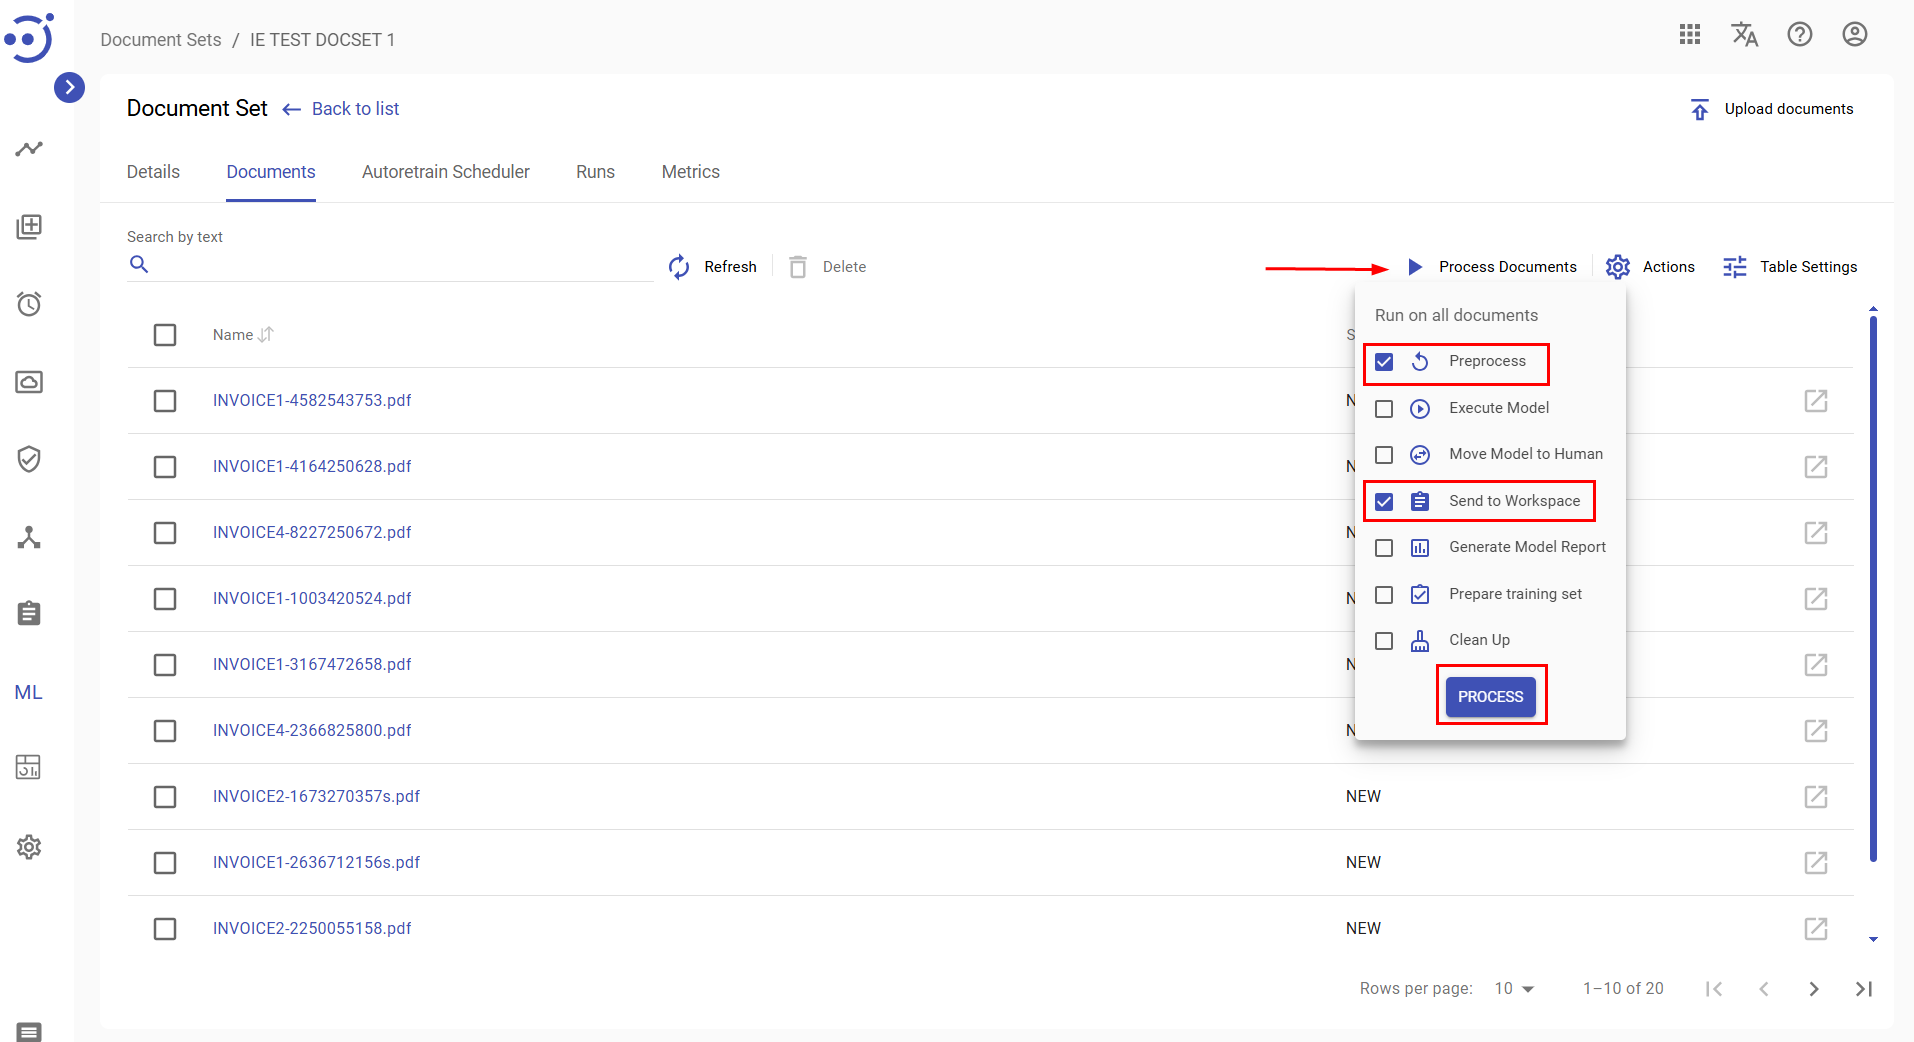
Once completed, the documents will be available in Workspace for tagging.
To explore the Documents module UI, refer to Documents.
Assigning Human Tasks to Workspace Groups
The Workspace Groups functionality provides a flexible framework for assigning human tasks for document tagging (reviewing) to specific groups of users. This allows data analysts and administrators to provide task assignment and user permissions to individual use cases, optimizing workflow efficiency and data security.
A key benefit of using Workspace Groups is the ability to separate rights and responsibilities among different worker groups. For example, you can create distinct groups for:
- General Taggers: Workers with broad access to accept any available Human Task.
- Specialized Taggers: Teams restricted to working on specific Document Types.
- Quality Auditors: Users with read-only access to monitor progress and metrics without making changes.
Procedure: How to Configure a Workspace Group for Document Tagging
Prerequisites:
- A Document Set must be created, configured, and have documents uploaded.
- Users must be created in the system.
Configuration Steps:
- Create a Workspace Group:
- Navigate to Administration > Workspace Groups.
- Create a new Workspace Group (e.g., WG_Invoice).
- Create and Configure a User Group:
- Navigate to Administration > Group Management.
- Create a new User Group (e.g., UG_Invoice_Taggers).
- Assign the necessary permissions for the Workspace Group's Context ID (see "Permission Scenarios" below for details).
- Add the relevant users to this group.
- Assign the Workspace Group to a Document Set:
- Navigate to the Document Sets module.
- In the JSON settings for the Document Set, specify the workspaceGroup parameter:
{ "workspaceGroup": "WG_Invoice" } - Send the documents to the Workspace.
Permission Scenarios for Human Tasks
Assign the following permissions to the User Group for the specific Workspace Group Context ID to achieve the desired behavior:
| Scenario | Required Permissions | User Experience |
|---|---|---|
| 1. Full-Function Taggers (Users can choose any task from any document type) | READ, UPDATE | Users can freely accept, save, complete, and choose any available Human Task from the Workspace. |
| 2. Document Type Specialists (Users are limited to tasks from a specific document type) | READ, CREATE | Users can only start available tasks from within a specific Document Type row. The system assigns a random available task from that type; users cannot choose individual documents. They can accept, complete, and save these assigned tasks. |
| 3. Randomized Task Assignment (Users receive random tasks from any type to prevent "cherry-picking") | READ, ACTION | Users must use the global "Start Available Task" button. The system assigns a random task from any available document type. Users cannot choose document types or specific documents. |
| 4. Ability to Skip Tasks | Add DELETE to any scenario above | Users have the additional ability to skip an accepted Human Task. |
| 5. Read-Only Observers (For managers and quality auditors) | READ | Users can view the Workspace Group, its details, performance metrics, and notifications. They can preview available Human Tasks but cannot accept or interact with them. |
To explore the Workspace Groups module UI, refer to Workspace Groups.
To explore the Group Role Permissions, refer to Role Permissions.