Schedule an Automation Process
Schedule an Automation Process
Besides running your automation process manually, you can set up a schedule to run the automation process periodically at fixed times, dates, or intervals.
Create a New Schedule
To create a schedule:
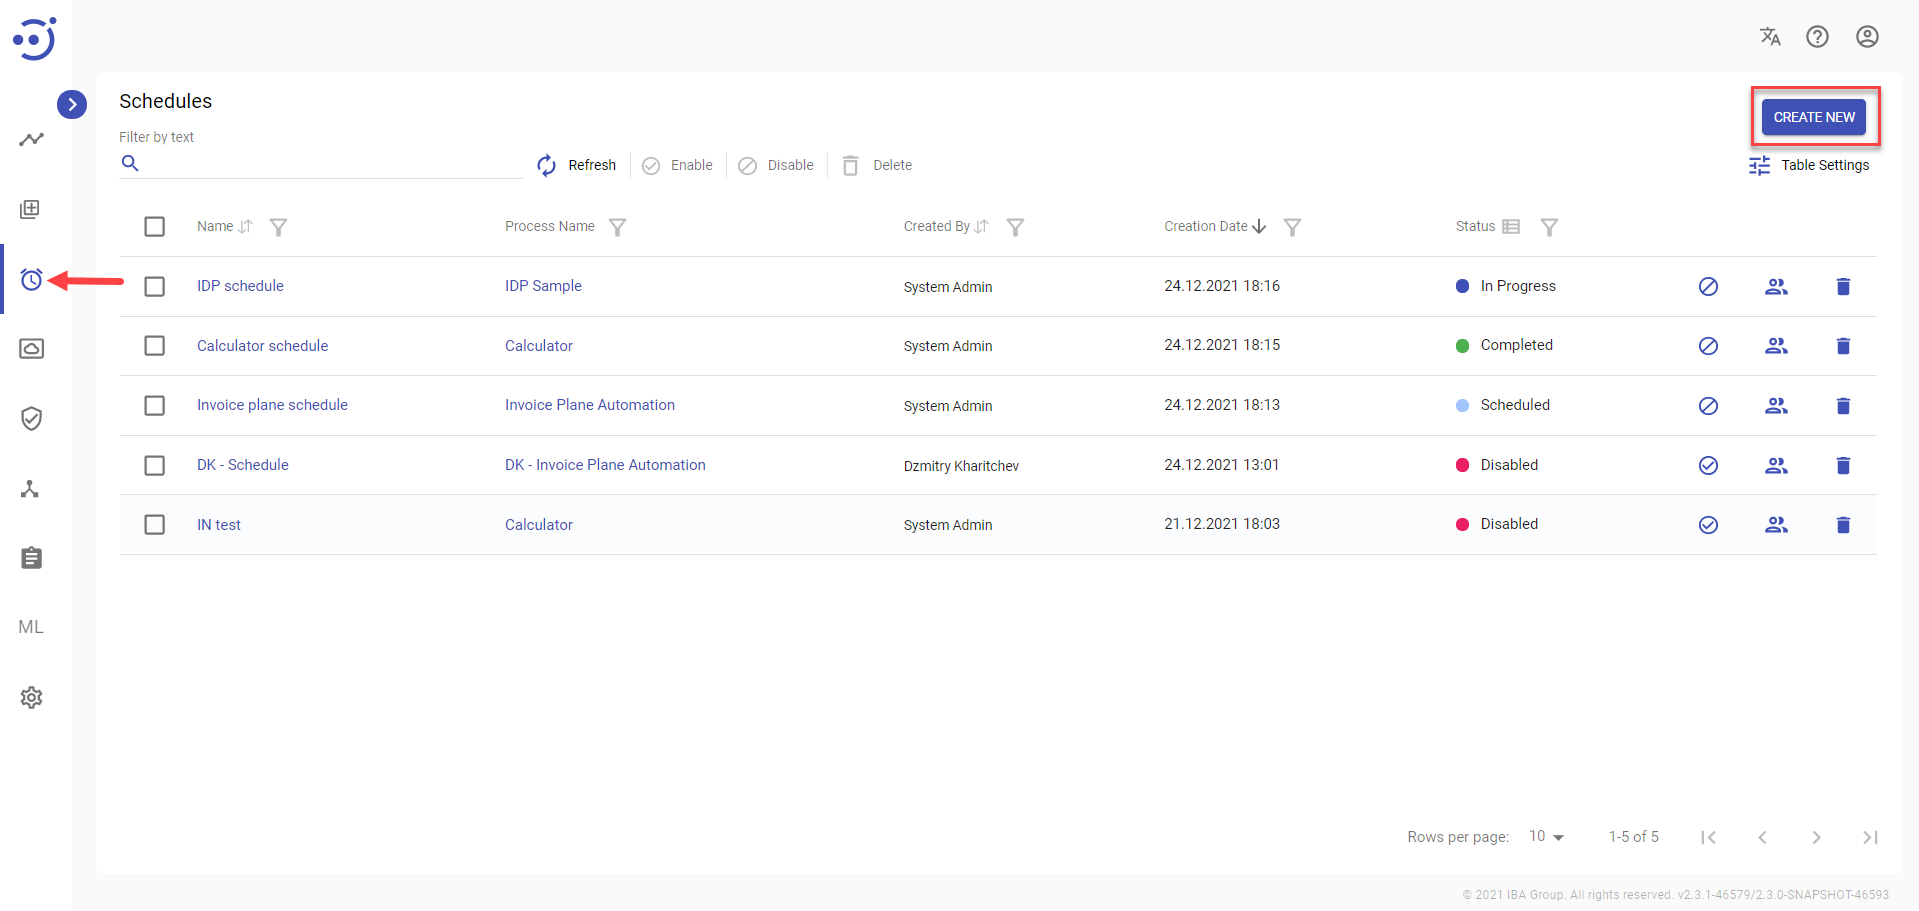
- Go to the Schedules module and click Create New.
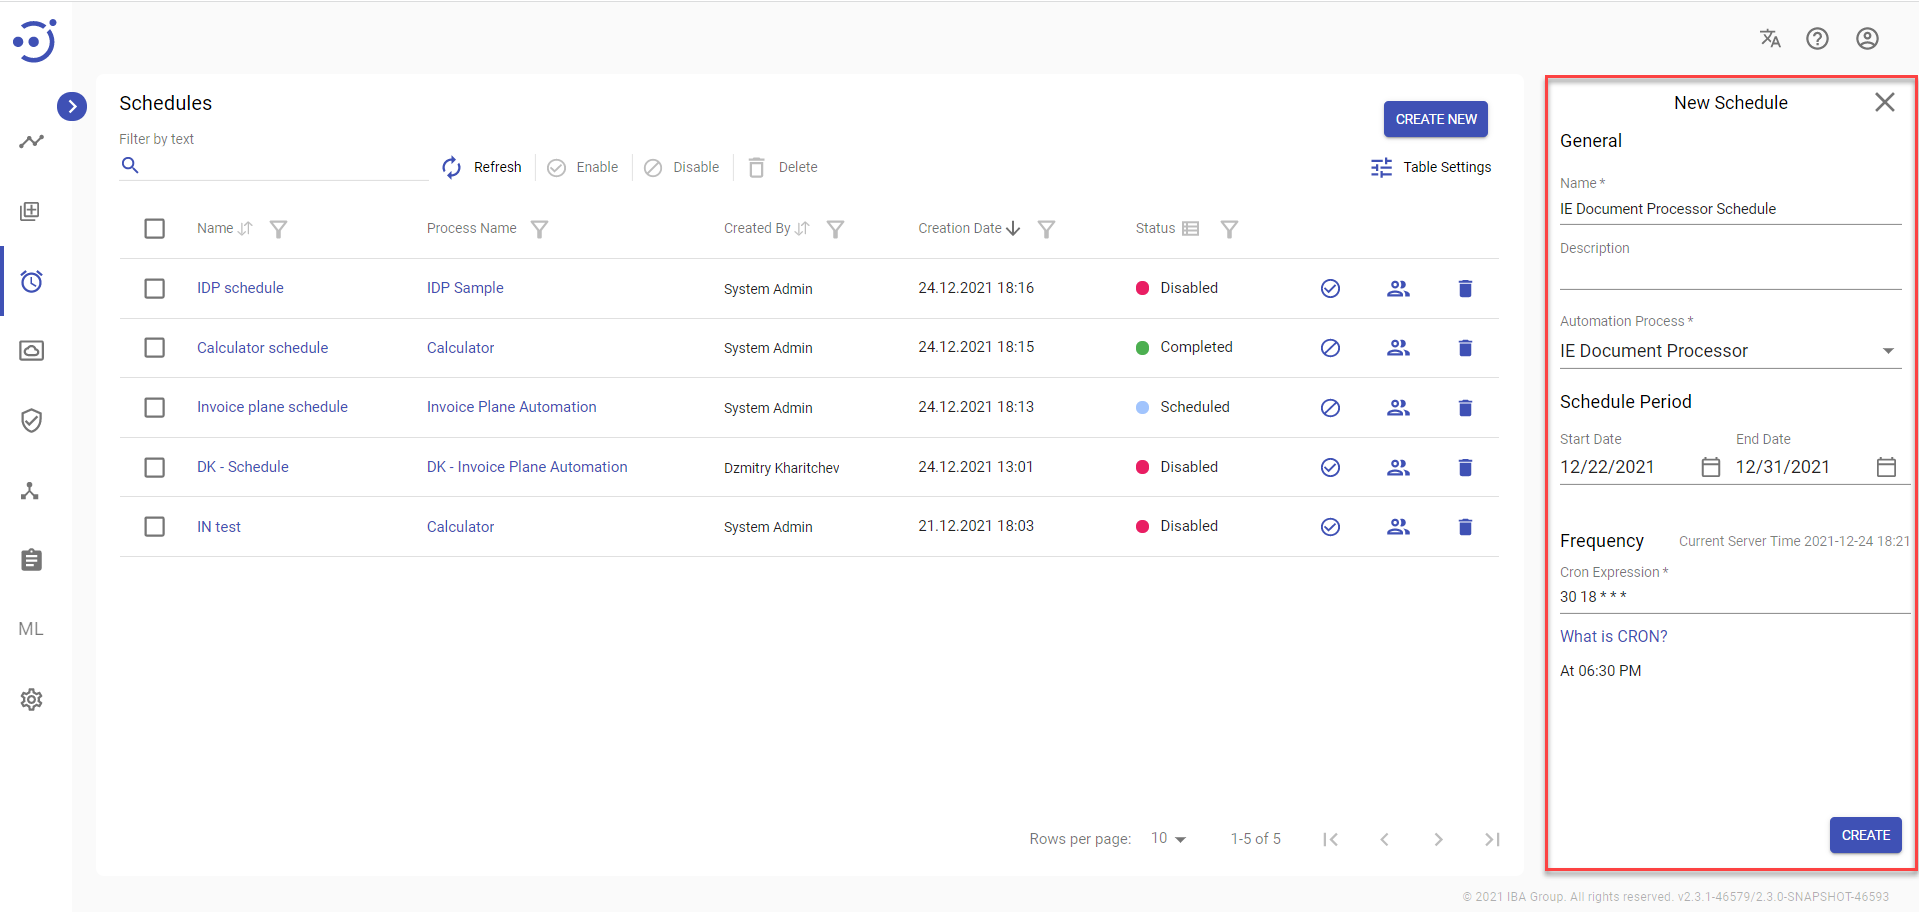
2. In the New Schedule pop-up panel:
- Enter a unique name to distinguish the schedule.
- Enter description optionally.
- Select the automation process you need to run.
- Set the schedule period (type in start and end dates in the mm/dd/YYYY format or select the values from the dropdown menus).
Set the schedule frequency using CRON expression.
The schedule will be triggered according to the schedule frequency only within the scheduled period.
3. Click Create button.
View/Edit a Schedule via a right-side panel
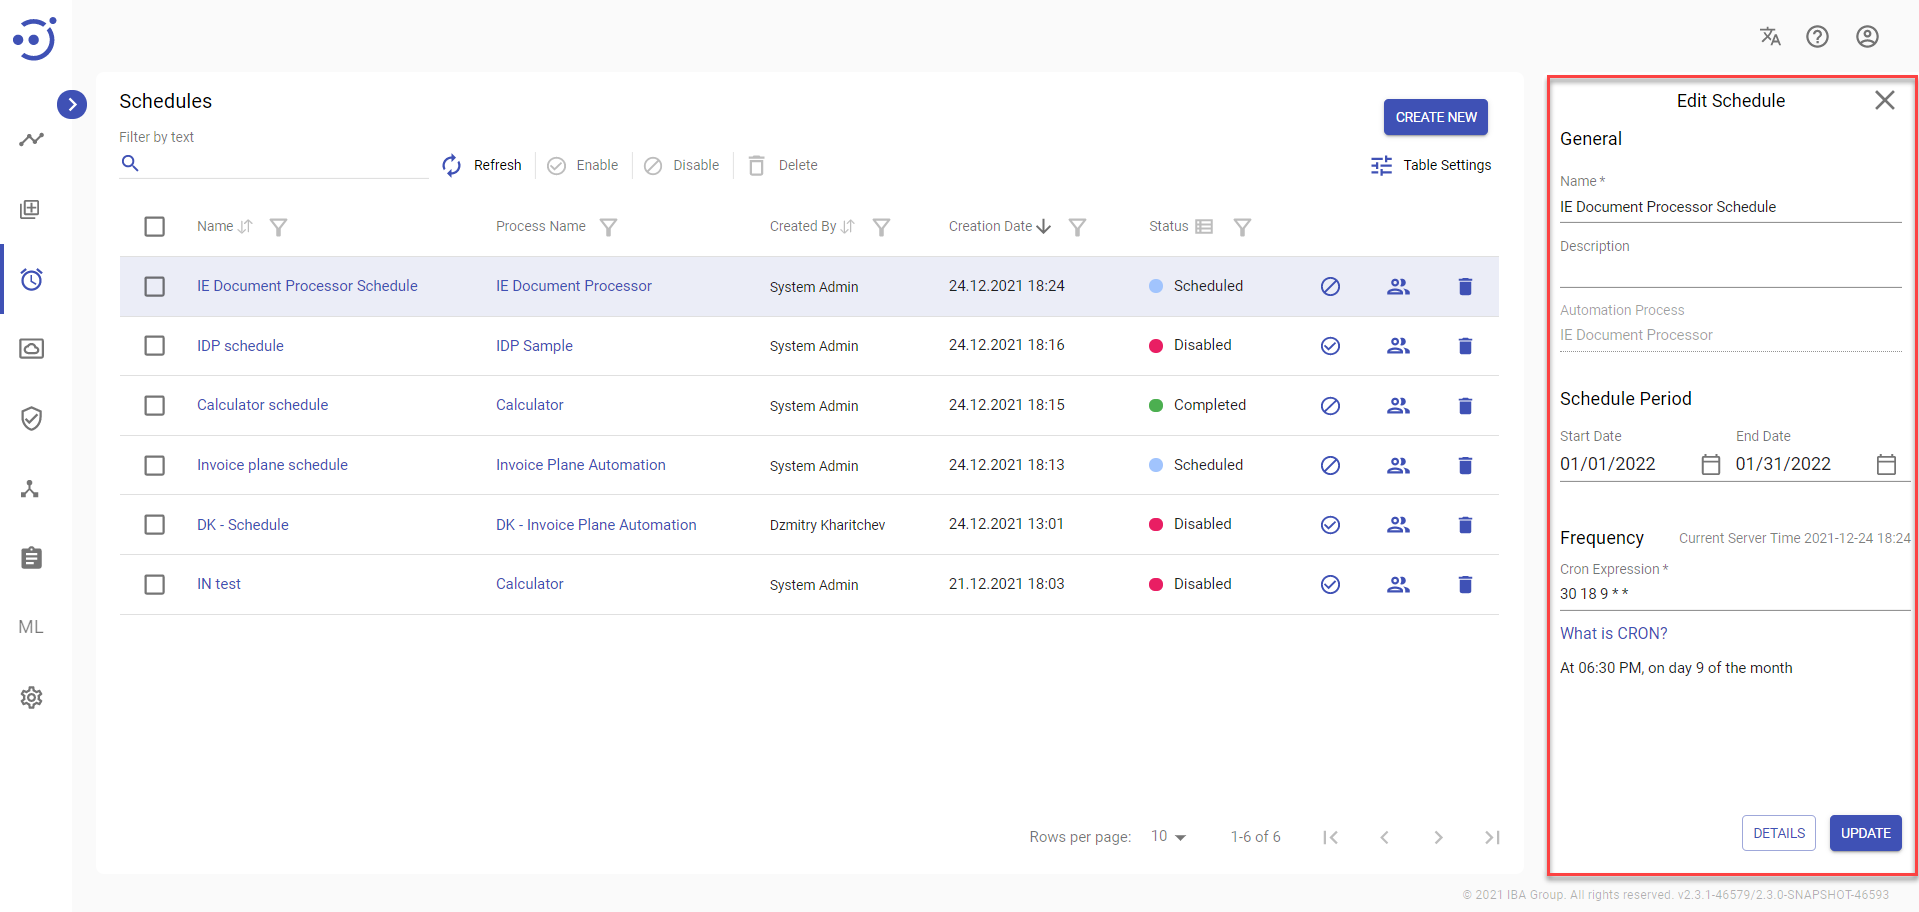
To view the detailed information about an existing schedule, click at any place in the corresponding row of the automation process schedule and the information pop-up will appear. To edit the information about a particular schedule, edit necessary fields at the information pop-up and click the Update button.
Schedule Details
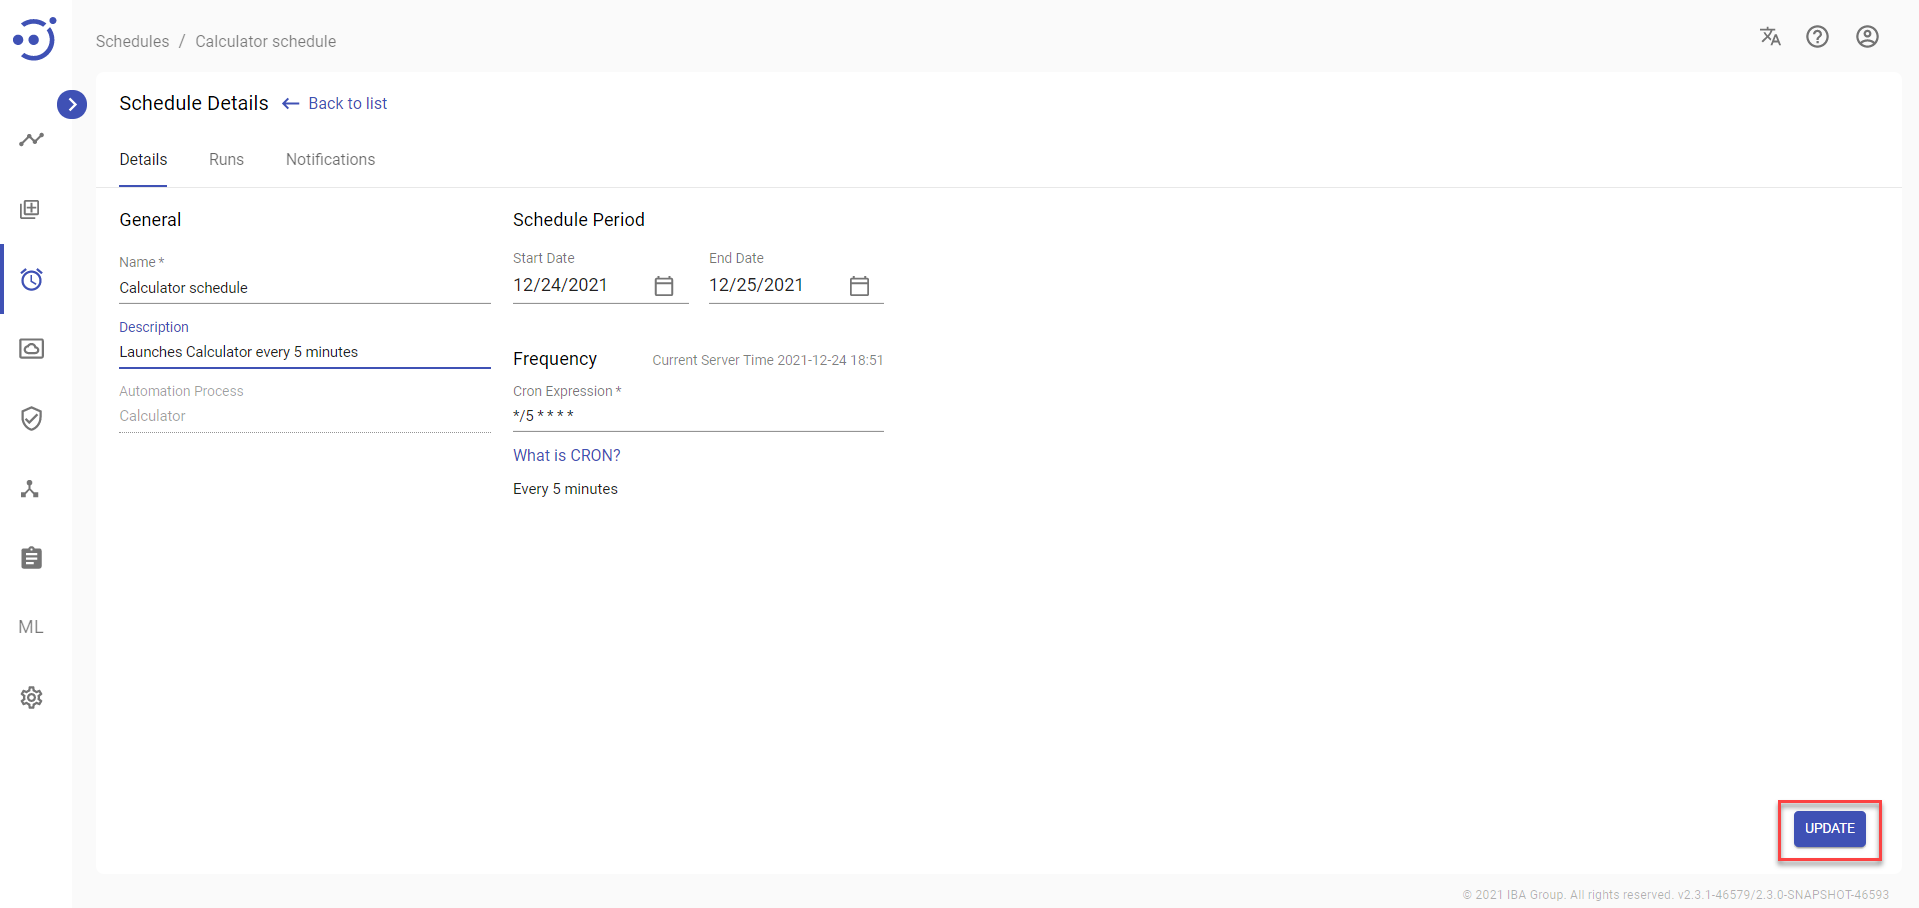
The Details tab displays the Run schedule and the Schedule settings.
To view/edit Schedule details, you need to:
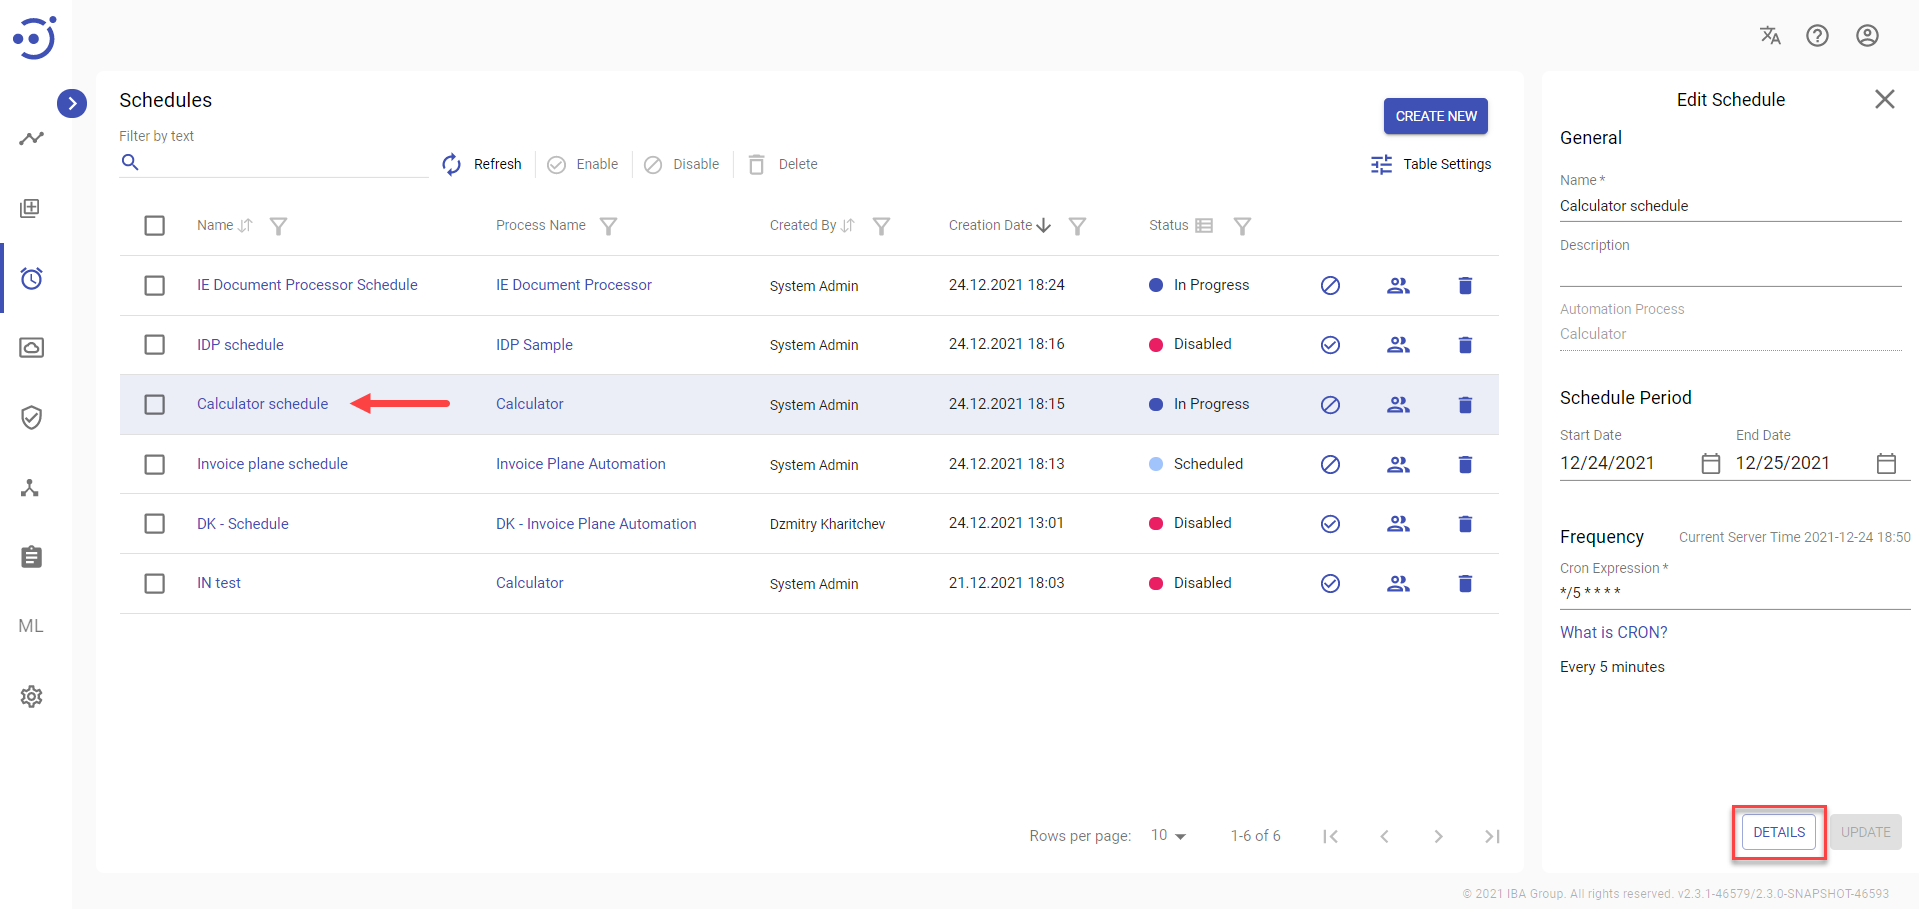
- Navigate to the Schedules module and click on the corresponding Schedule Name or navigate to the Schedules module, click on the corresponding row with the Schedule, and at the pop-up panel click Details.
View/Edit a Schedule via Schedule Details
To view/edit Schedule details, you need to:
- Change one of the field values.
- Click Update.
Fields Description
- Name - the schedule name.
- Description (optional) - a short description of the schedule.
- Automation process - selected automation process for the Schedule, the field is not edited.
- Start and End dates in the mm/dd/YYYY format.
- Schedule frequency using CRON expression.
Schedule Runs
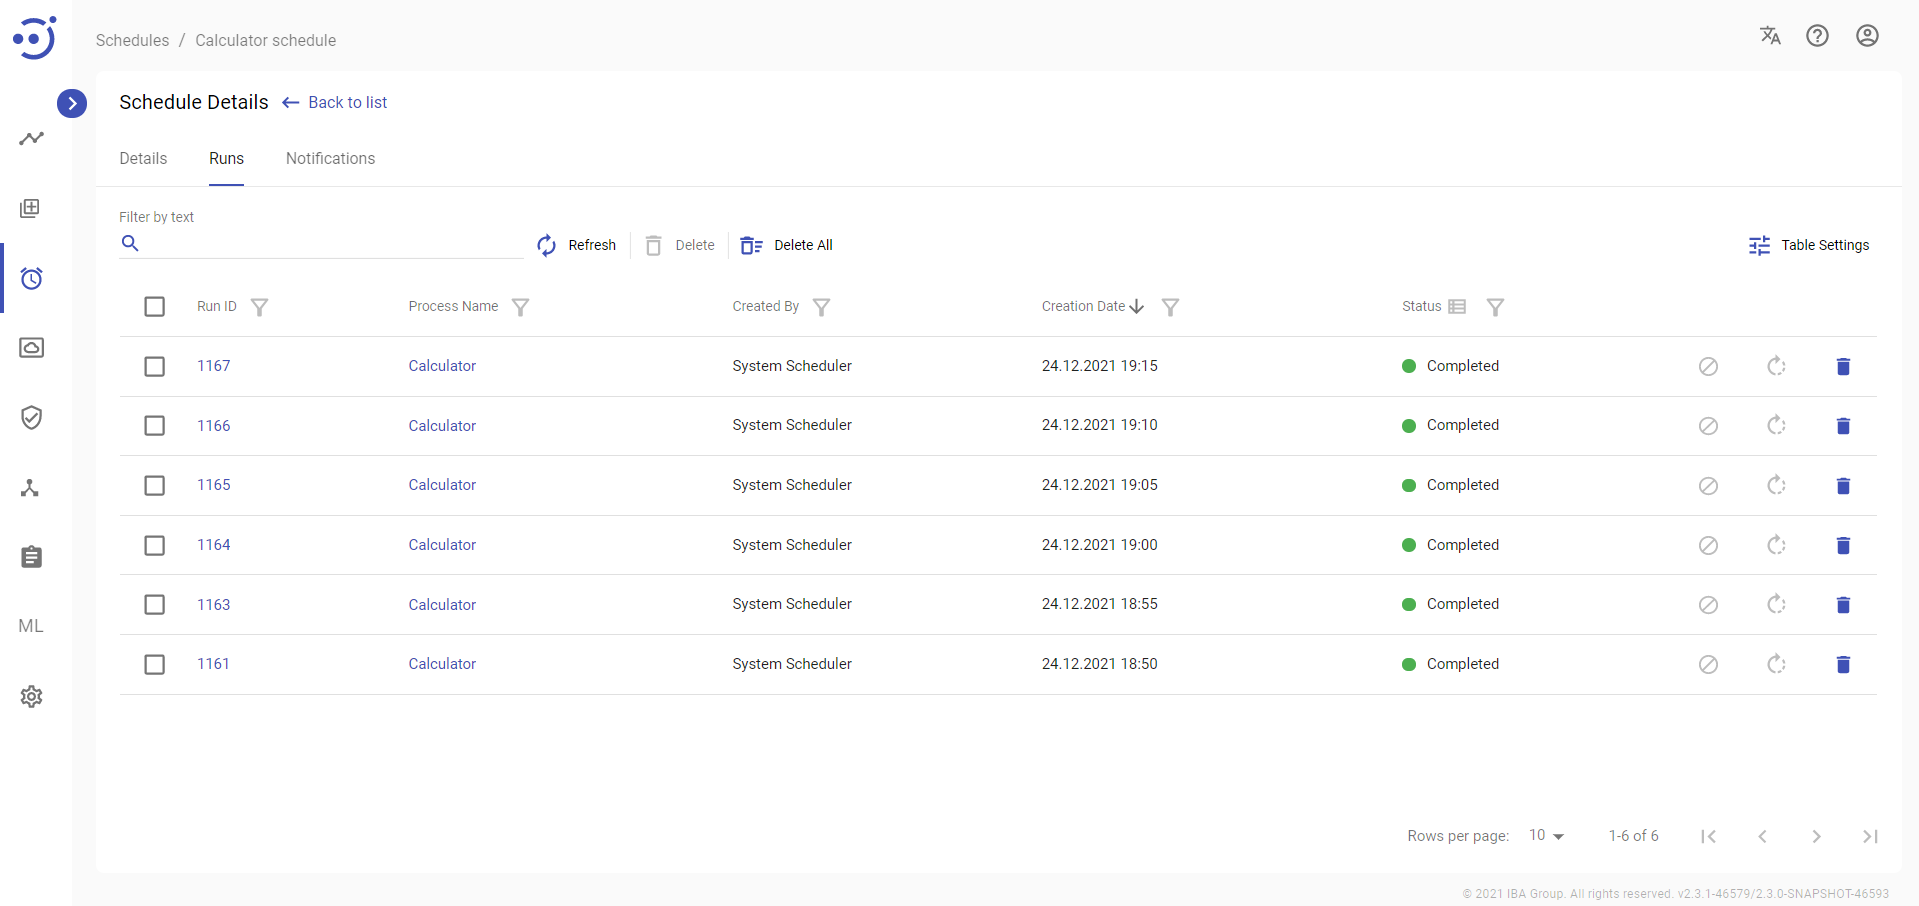
The Runs tab contains information about all runs of a particular Schedule and their statuses. You can manage the automation process runs using Control icons.
When the schedule starts an automation process, it creates a separate instance of this process.
Columns Description
- Run ID - numeric identifier of the particular process run. By clicking on the Run Id, you can see the history of the particular process run.
- Process name - the automation process name. By clicking on the Process Name, you can see information about all runs of the particular automation process and their statuses.
- Created By - the automation process runs initiated by the schedule will have System Scheduler value
- Creation Date - the date and time when the Run was created.
- Status - the current status of the Run.
Control icons
- Stop - to stop the automation process run. Required Permission: Schedule-ACTION. See Role Permissions.
Note: the process is included when Status of Run is Queued, Deploying on Node, In Progress, Stopping, Stopped Idle.
In other statuses the button is disabled. - Retry - to repair the automation process run. Required Permission: Schedule-ACTION. See Role Permissions.
The Run is deleted from the Schedule after clicking Retry, the Run is on the Automation Process Runs tab.Note: the process is included when Status of Run is Stopped and Failed.
In other statuses the button is disabled. - Delete - to delete the selected automation process run. Required Permission: Schedule-DELETE. See Role Permissions.
- Delete All - to delete all the automation process runs that were started on this Schedule. Required Permission: Schedule-DELETE. See Role Permissions.
Table Settings
Table settings allow you to manage the table view. Click the icon to start working with the table settings. The table settings can be managed with the following buttons:
- Advanced filter - to switch the advanced filters for the columns.
- Columns Display - to select the columns that will be displayed in the table.
- Apply - to apply the changes made to the table settings.
- Сancel - to cancel the last actions with the table settings.
Filter by text
Filtering allows you to search the automation process by Run ID, Process Name, Status, and Created By columns.
Advanced filters by columns
Advanced Filter allows you to extract a list from a table with predefined criteria. Click the icon to start working with the advanced filter. The advanced filters can be managed with the following buttons:
- Clear filter - to reset all the proposed advanced filter criteria for the column.
- Сancel - to cancel the last actions with the proposed criteria for the column.
Apply - to filter the table according to the proposed criteria for the column.
Sorting
Ascending/descending sorting is allowed for the Creation Date column.
Related Pages
Clicking on the Process name value will lead to the "History" page of the selected automation process run. See Automation Process Run for more information.
See Automation Process Run Status Lifecycle for more information about the automation process statuses and control icons.
Notifications
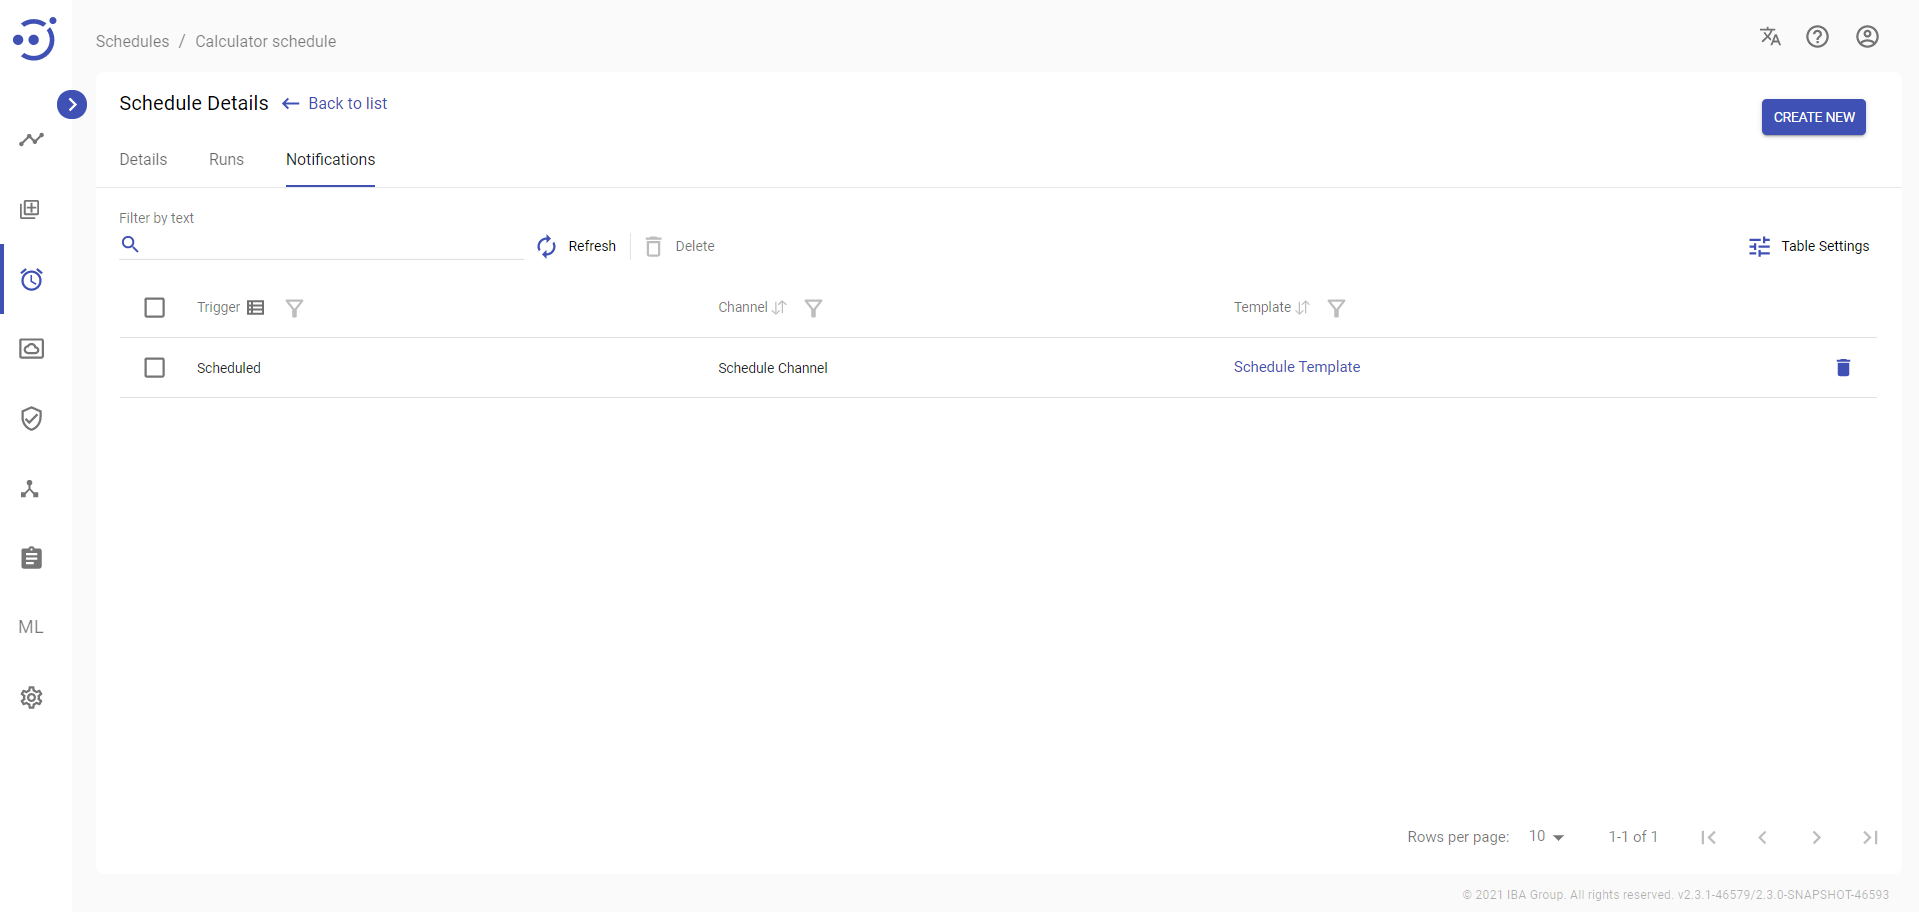
The Notifications tab allows users to receive messages about a particular AP Run. To access the Notifications, you need to be granted Schedule-READ permission. See Role Permissions.
Columns Description
- Trigger - the action for which the message is sent to the particular channel.
- Template - example of a message is sent to a channel.
- Channel - mailing list of contacts.
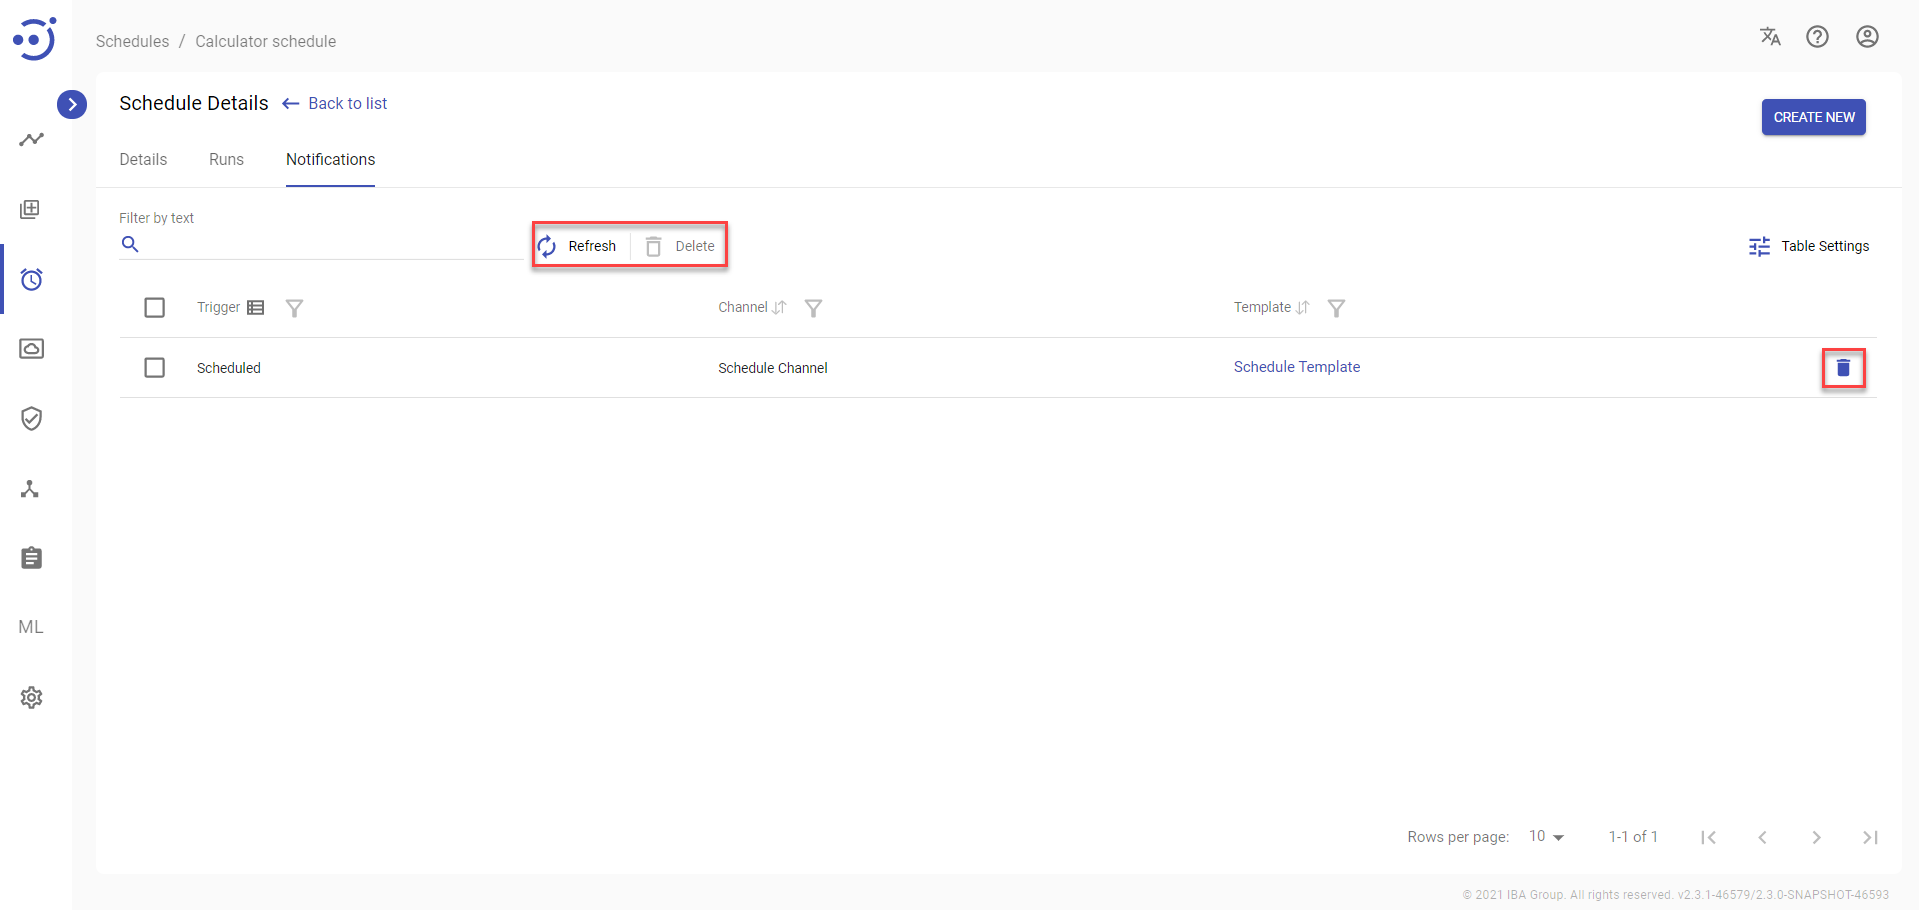
Control icons
- Refresh - to refresh the page.
- Delete - to delete Notifications.
Required Permission: Schedule-UPDATE. See Role Permissions.
Table Settings
Table settings allow you to manage the table view. Click the icon to start working with the table settings. The table settings can be managed with the following buttons:
- Advanced filter - to switch the advanced filters for the columns.
- Columns Display - to select the columns that will be displayed in the table.
- Apply - to apply the changes made to the table settings.
- Сancel - to cancel the last actions with the table settings.
Filter By Text
Filtering allows you to search the automation process by Trigger, Template and Channel.
Advanced filters by columns
Advanced Filter allows you to extract a list from a table with predefined criteria. Click the icon to start working with the advanced filter. The advanced filters can be managed with the following buttons:
- Clear filter - to reset all the proposed advanced filter criteria for the column.
- Сancel - to cancel the last actions with the proposed criteria for the column.
Apply - to filter the table according to the proposed criteria for the column.
Sorting
Ascending/descending sorting is allowed for the Trigger, Template and Channel columns.
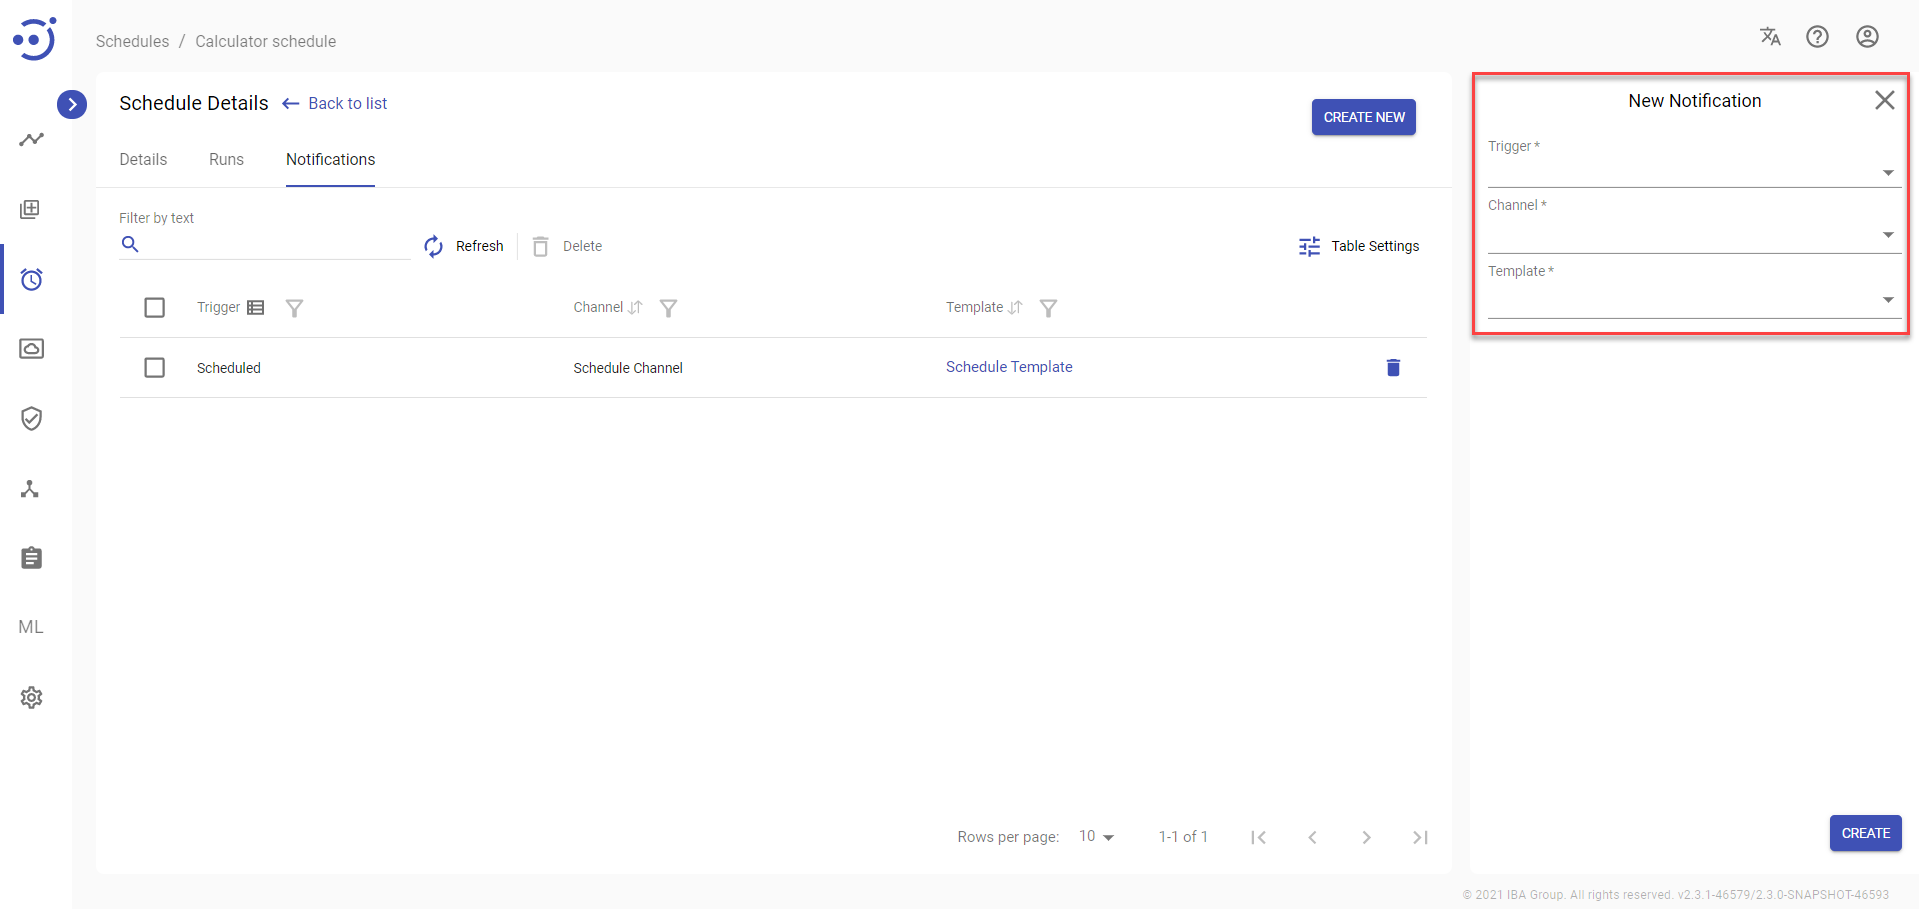
Create a New Notification
To create a New Notification:
- Click "Create New" button.
- In the New Notification pop-up panel enter Trigger, Chanel, Template.
- Click CREATE.
To create the Schedule Notifications, you need to be granted Schedule-UPDATE permission. See Role Permissions.
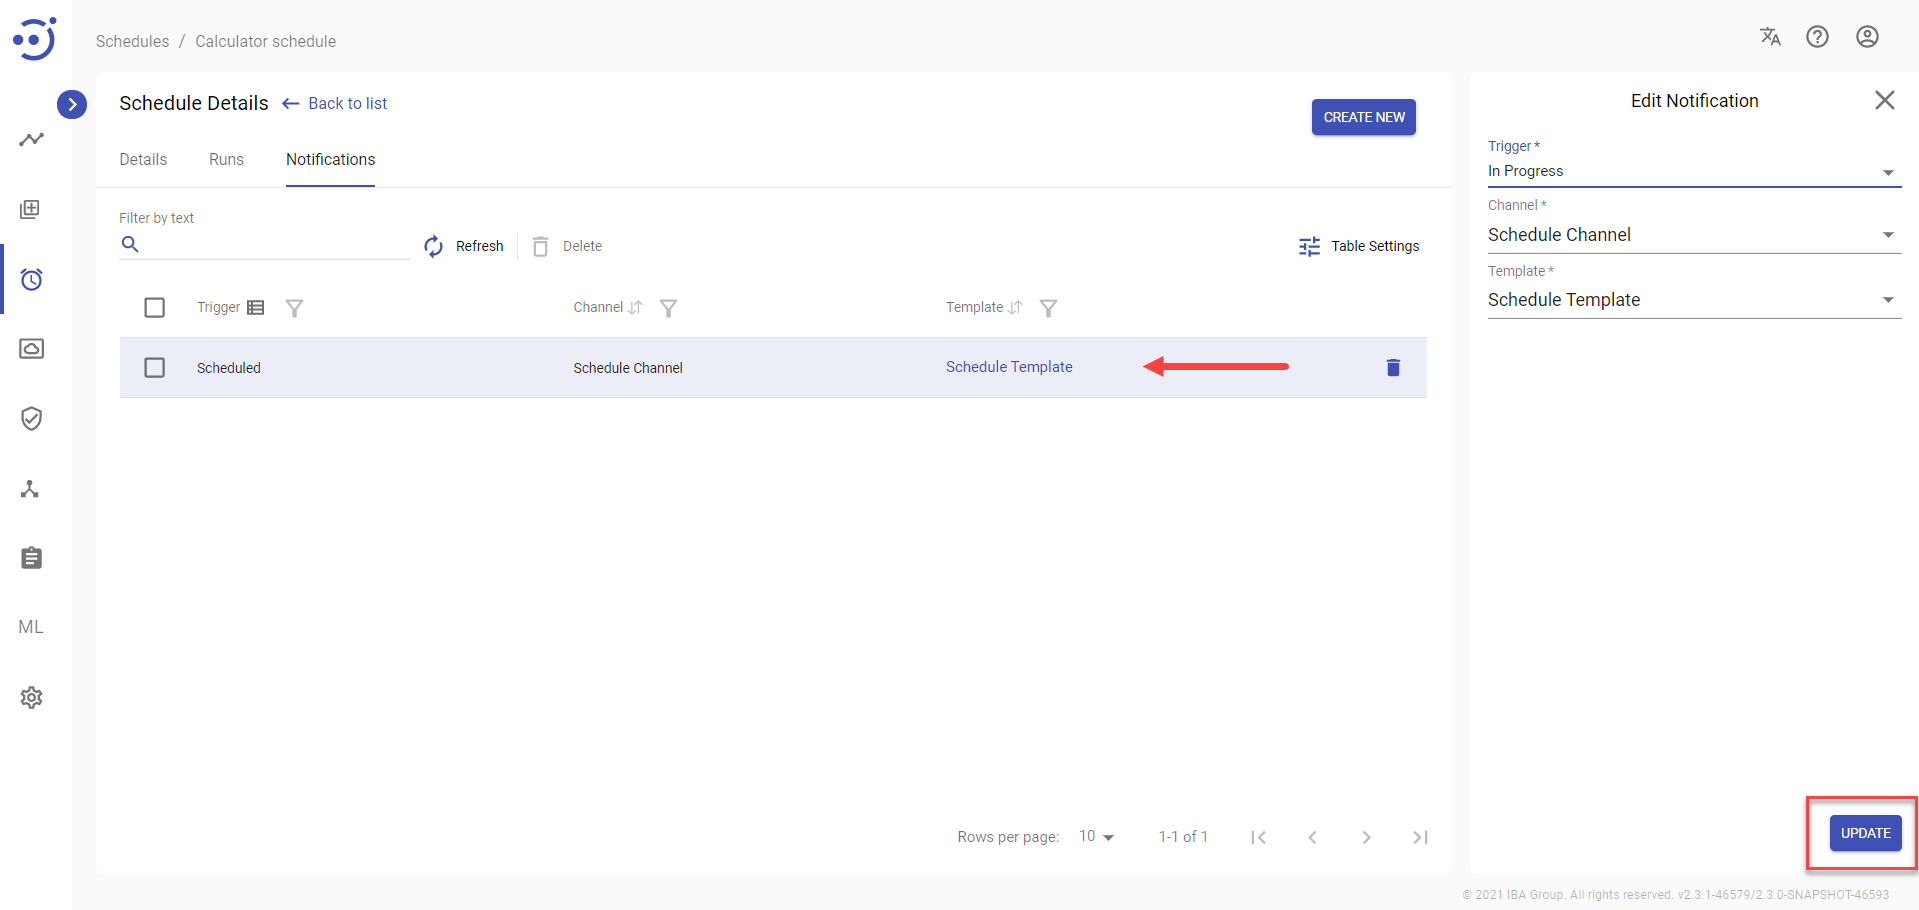
Update Notifications
To Update an existing notification parameters, you need to:
- Click on the corresponding notification.
- Change one of the field values.
- Click Update.
To update the Automation Process Notifications, you need to be granted AutomationProcess-UPDATE permission. See Role Permissions.
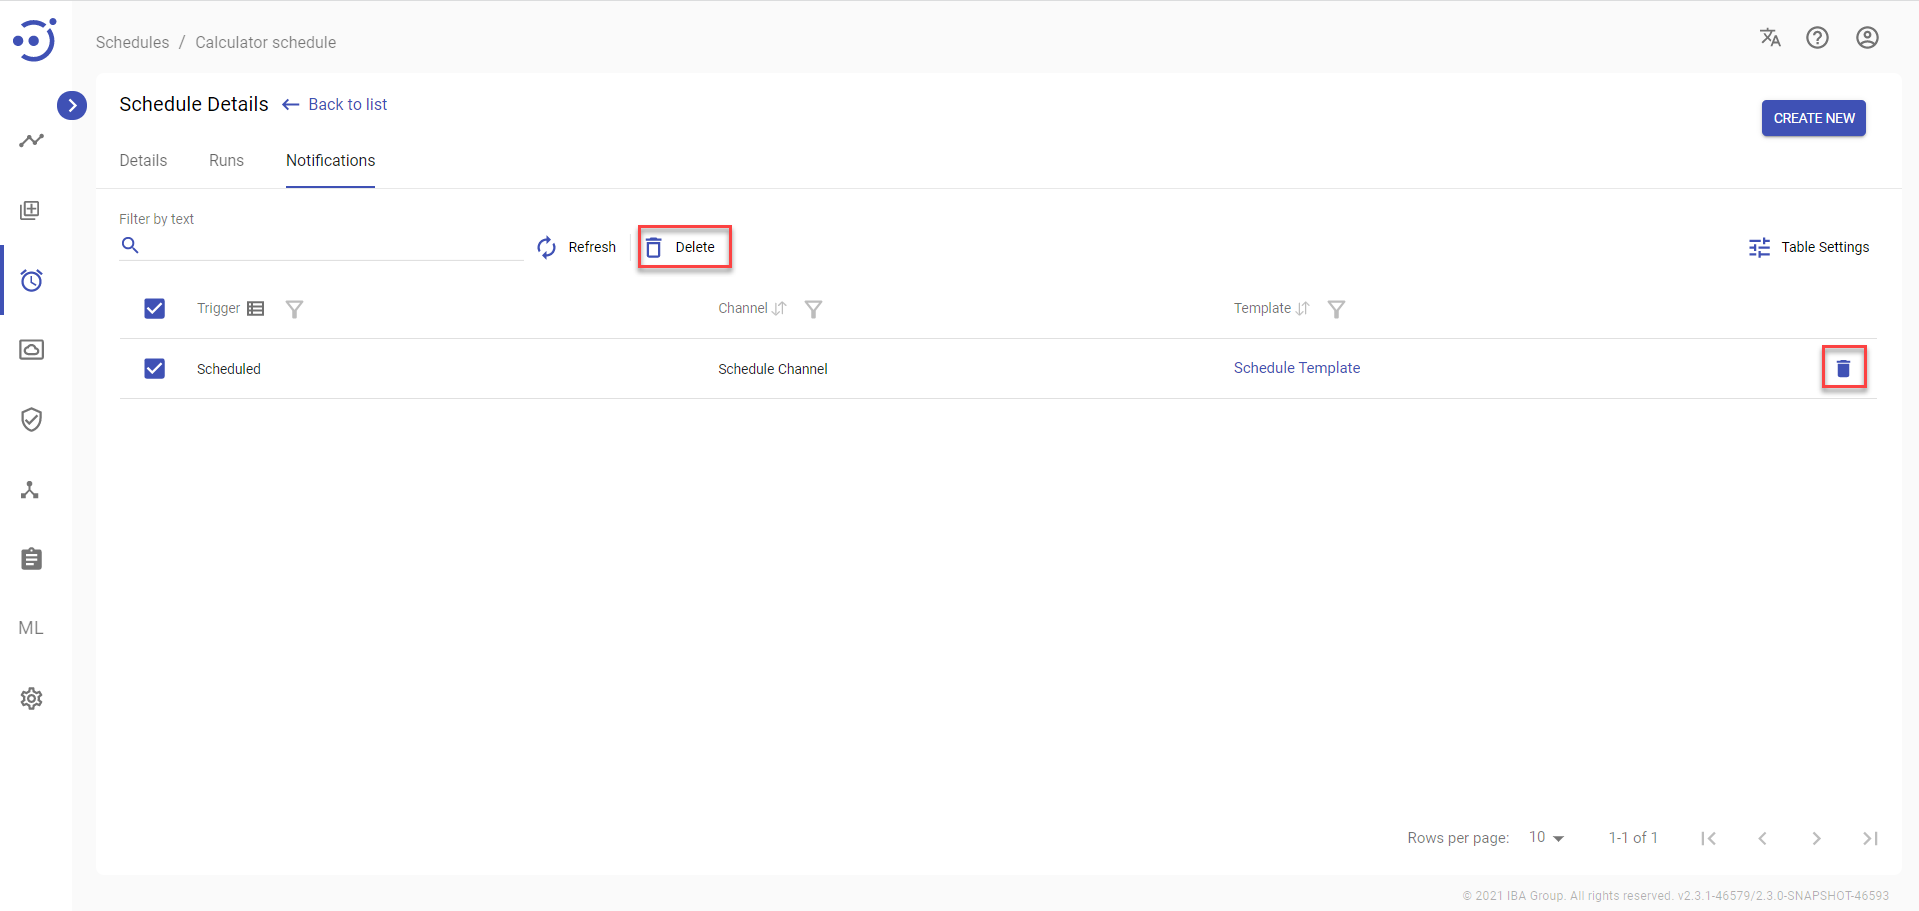
Delete Notifications
There 2 ways to Delete Notifications:
- Press the control icon Delete.
- Choose the Notification or all Notifications and press icon Delete.
You need to be granted Schedule-UPDATE permission. See Role Permissions.
