Development Environment Setup
Development Environment Setup
Install JDK
As Java project, EasyRPA required JDK installed. Currently we are supporting minimal java version 17. We recommend to use Oracle JDK 17. Ensure JAVA_HOME environment variable is set and points to your JDK after install.
Install Maven
EasyRPA uses Maven for project building. You can download Apache Maven from official site. Extract distribution archive in any directory and add the unpacked distribution’s bin directory to your user PATH environment variable. Refer to Installing Apache Maven documentation for details.
Using Maven with HTTP repositories
External HTTP insecure URLs are blocked by default starting from Maven version 3.8.1.
It may affect you if your EasyRPA Nexus server has insecure HTTP URL.
You can install older Maven version 3.6.3: https://archive.apache.org/dist/maven/maven-3/3.6.3/binaries/
Or to read more details in "How to fix when I get a HTTP repository blocked?" section: https://maven.apache.org/docs/3.8.1/release-notes.html#how-to-fix-when-i-get-a-http-repository-blocked
Install Git
Git is great tool to version control. You can get installer for you OS here.
Then you will need to configure your local Git installation to use your GitHub credentials. Start command line and run commands:
git config ––global user.name “github_username”
git config ––global user.email “email_address”
Replace github_username and email_address with your GitHub credentials.
The IDEA environment contains Git plugin by default and you can use this feature for RPA development instead of downloading Git from site.
Install IDE
Though it's possible to work with EasyRPA in other IDEs, we recommend starting your acquaintance with IntelliJ IDEA Community Edition IDE. Get installer here.
Install Lombok Plugin
Lombok plugin for IDEA provides more convenience in writing your code. You can check all its features on the official site.
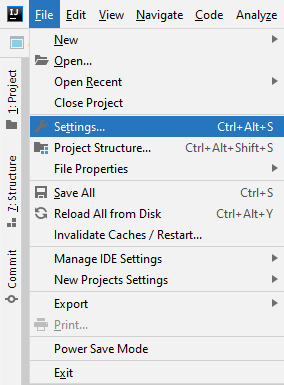
Start IntelliJ IDEA IDE. Go to File → Settings menu:
Select Plugins on the left panel, type lombok in search field and press Enter.
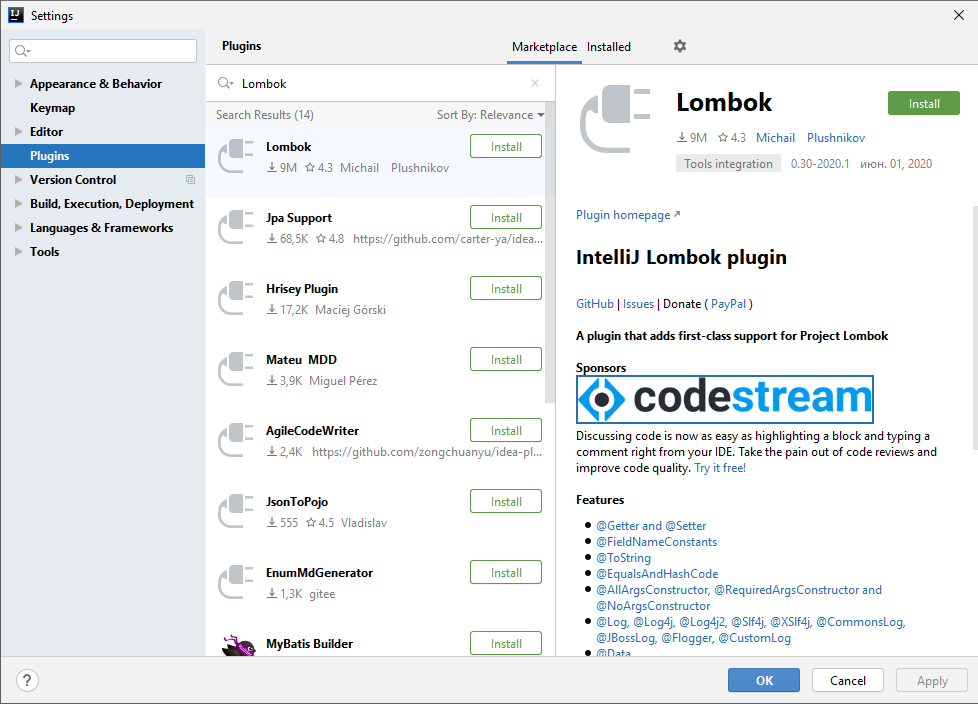
Click Install button for Lombok and restart IDE.
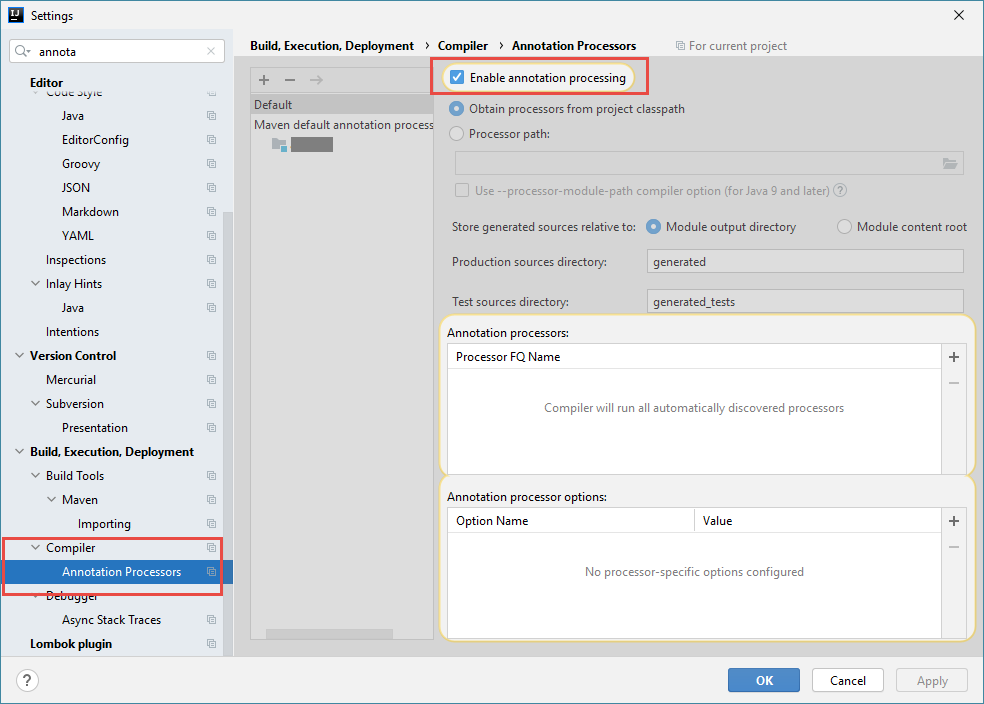
Switch annotation processing on:
Add Certificate to Truststore
You may need to add EasyRPA server certificate into your Java for correct communication of development environment with EasyRPA.
If ULR of Control Server that you're going to use has "HTTPS" protocol and it has self-signed certificate (you can notice red color "Not secure" warning in Chrome browser), you should perform the following steps:
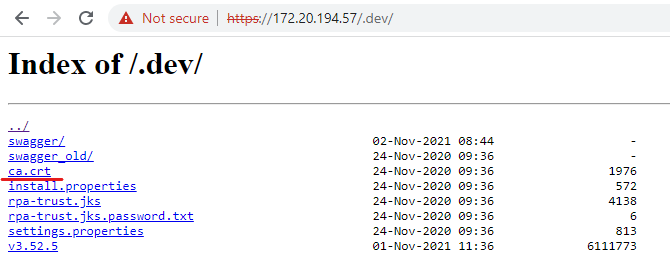
- Open the following Control Server URL:
https://{control_server_url}/.dev/
Pay attention that it's only available if Control Server was installed with "dev=true" option.
In other case this server is not supposed to be communicated with developer environment.
So you should contact your system administrator who is responsible for server installation to get this certificate. - From the opened page download file with ".crt" extension:
Import the certificate to the truststore
%JAVA_HOME%\bin\keytool -keystore %JAVA_HOME%\<jre>\lib\security\cacerts -import -file ca.crt -alias easyRpa
You will be asked to enter keystore password.
Java: The initial password of the "cacerts" keystore file is "changeit".If the key already exists and/or it's not correct, so you need to delete that alias (or type different alias on step 3):
%JAVA_HOME%\bin\keytool -delete -alias easyRpa -keystore %JAVA_HOME%\<jre>\lib\security\cacerts
Development Control Server instance
You can test Automation processes locally, but not all task are supported (refer for the details in the Quick Start Guide). To fully test Automation Processes you should have Control Server instance. Ask your administrator to add your account to the Developer group.
There is also possibility to have personal development instance running inside VirtualBox.
VirtualBox Development instance setup
- Download and install VirtualBox https://vitualbox.org
Download and import VM from distribution server.
Please contact to your IBAGroup contact person to obtain distribution server name. Use the provided address for the scripts below:
Start VM. Via UI or headless with following command:
VBoxManage startvm easyrpa-<version>-debian-11 --type headless
Access application by following URLs
| URL | Application |
|---|---|
EasyRPA UI | |
Kibana UI | |
Grafana UI | |
Minio UI |
5. Optionally install CA into browser and Java trust store:
-----BEGIN CERTIFICATE-----
MIIFtzCCA58CFEQoCGW3Mw8g1I+dwkutHfmfgS6gMA0GCSqGSIb3DQEBCwUAMIGX
MQswCQYDVQQGEwJCWTEOMAwGA1UECAwFTWluc2sxDjAMBgNVBAcMBU1pbnNrMQww
CgYDVQQKDANJQkExCzAJBgNVBAsMAjREMSYwJAYDVQQDDB1sb2NhbGhvc3QtZGV2
ZWxvcG1lbnQtcm9vdC1jYTElMCMGCSqGSIb3DQEJARYWZGV2ZWxvcG1lbnRAZWFz
eXJwYS5ldTAeFw0yMjAxMjcwOTMwMzZaFw0zMjAxMjUwOTMwMzZaMIGXMQswCQYD
VQQGEwJCWTEOMAwGA1UECAwFTWluc2sxDjAMBgNVBAcMBU1pbnNrMQwwCgYDVQQK
DANJQkExCzAJBgNVBAsMAjREMSYwJAYDVQQDDB1sb2NhbGhvc3QtZGV2ZWxvcG1l
bnQtcm9vdC1jYTElMCMGCSqGSIb3DQEJARYWZGV2ZWxvcG1lbnRAZWFzeXJwYS5l
dTCCAiIwDQYJKoZIhvcNAQEBBQADggIPADCCAgoCggIBAL3wI1WTY6XONfYlUyNG
qWvQjxkldg50nikB21Cv6Uxoox/iOEXZgUNALhKTxg+hGZH5Hg285ga1Cv6HG9OP
YZrnckjtqp5fItrKdl3Z1ZAGUR8tQT2D1fgaYvHadDJblw6FDdWiJla6LWr15lpJ
7+ydZuyHB0fO7+bim6i4Bwe1pV5LsdhMRlHA4fgvmAEF9b0l7qRL3tESIqNH2/8o
X3nyLQgvVuKU0WMeQgrrDkUOuVmGyLptTg3MyhORd5I1P77OE+azGX484oC9nI5P
D9ZQD6IkD4Z+/tycLOSX9Kxp2P9XwlSIcoCkI7RRnyIbGF4fBpiJAFbT8B9cn6bU
UwMPUBt6Z1TlE6RJdcN1J/gx7akwJ4guETo24mlWRTq40EtHiF5lSEOhNl7HZWgf
JoqAAADXkVw21uWmdQrJTehhNIuSCplTSCisiZ4XAkKcPfZPlsZySY0GTBqQ2wM5
Ax0d8tWnnrGcPpaNIPbeuwau6vHR1y+9qq4Rvvfmj4s2TBnuiHawzUclNzupm+f/
RUnd8RgX5hxl/saYCzpJVcsQO4Fpq85/PORdeF9KEuZetdD/KM86VkvLg/ZHNQCo
MsscjRBdrZLFKkWuza4vb8R2s+sWur+kdHwA2gKzdw+htsY9Ckq6U9b4ZIdGBVui
+fRZQBQZG12NgP1HWR0GgKUHAgMBAAEwDQYJKoZIhvcNAQELBQADggIBAEHjArYQ
J2UBd53jSgg7s5bY8IwiAUdkHIHeVDLCgSgS0qeCQCeVHYU7/MTqZGv+AhoSg9bi
Y/mIJ7tYEt0FwkDxBM541RBHWK/txg7yZHmiRsg1Xcm+UqZ7tMtvIYPkOtHd9btD
CfAYFocHbYDNdUyRmeinma+f/t7J7hRiMOtsW8NDixpCoMmsbrR83Bgrx4UyXa7v
rotzZuV9LxuoJEUmdvSCfnUb+19xo3iqLoeGA1TJMDQqa1900RTIwrWaYsDuv5r1
HvihaatRQHVbN7X7gWhA2dsWDwZQpTXjJhaNMcTrvTdyjUtoJVpH2yRzLaUd2Exp
jVjJ0Uut7LzA2wCOPd1SPcXT9U5M4Z6E12eii/6460QfoYk+hzDAgs5yvAKtP4fl
PEFcT89DwAAjxt2sbSXzLa0YFNXt+/hCatTsxmVMiy7Nsl/wJJmQJ6r54HFfzTMT
LMjweEYBIu34Ct9ObZR3hHb2eFlmM4WtCx5iJaTCzatTGtpEY6v0z5Xlyhjuk+Ti
PPerdMptY9YfhrE+r9rYl1JKUqLYvQvG141S/HNUFeAUiKXB+CouUu3ErEdViaBo
VBMnDv82XZtOkWGjtysB9gLzmhvJHnetoinleF/GK/pDyuDOFbxubDzmWgDVO5nk
zd6rT4SeOd8dku+qnYdppqMEV8nciRRgQM8y
-----END CERTIFICATE-----
Podman Desktop Development instance setup (Windows)
On Windows, Podman Desktop can be used to run locally a set of mandatory EasyRPA applications as docker containers. Developer will be able to test and debug Control Server application in local IDE against these applications. Please follow steps below to configure environment:
- Download and install Podman Desktop https://podman-desktop.io/
- Optionally setup WSL on Windows
Create Podman WSL2 Machine by following steps at https://podman-desktop.io/docs/podman/creating-a-podman-machine
- Enable 'Root' privileges for the machine
- Enable 'User mode networking' to let machine access internet/intranet resources
- Setup Podman Compose by following guide https://podman-desktop.io/docs/compose/setting-up-compose
- Download 'easy-rpa-cs-base' GIT project locally
- Follow 'Readme.md' instruction to setup local Developer's environment with the local Podman instance