Setting Up OCR Test Environment
Setting Up OCR Test Environment
Achieving high accuracy with tools like Tesseract depends greatly on how well source images are preprocessed. Setting up an OCR test environment will enable you to quickly check different ImageMagick and Tesseract OCR settings and find the optimal configuration to preprocess a given set of text-based images. You can leverage Docker to set up an isolated test environment. It provides the ideal controlled sandbox for a data analyst to methodically test, iterate on and refine OCR settings which can be later transferred to EasyRPA platform production use. The container setup allows testing various configurations on your documents without installing tools locally.
Installing Docker Desktop
Download and install the latest version of Docker Desktop for your OS from https://www.docker.com/products/docker-desktop/.
During setup, enable the WSL 2 based engine for Linux containers support.
Restart your system for changes to take effect.
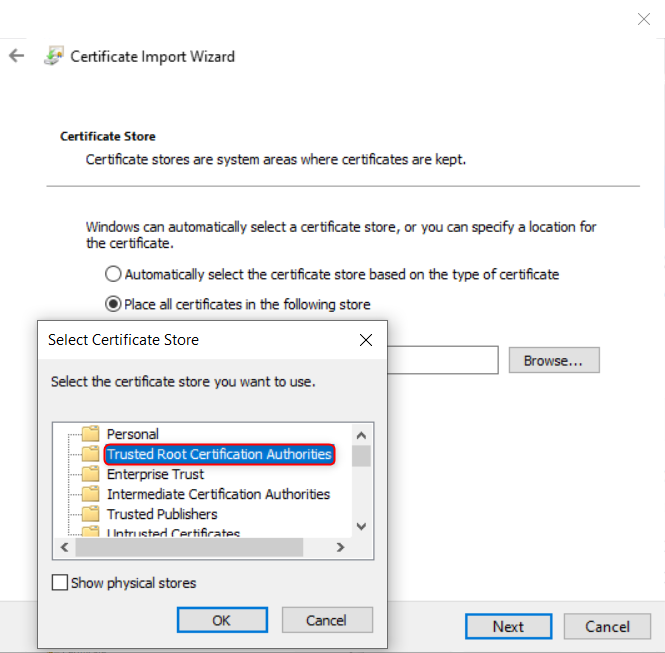
Adding Trusted Host Certificate
- Get the CA certificate file (.crt) from the host you want to connect to - ci.rpaplarform.org. This should be provided by the host administrator.
- On your local machine (Docker host), download the CA certificate file and install it.
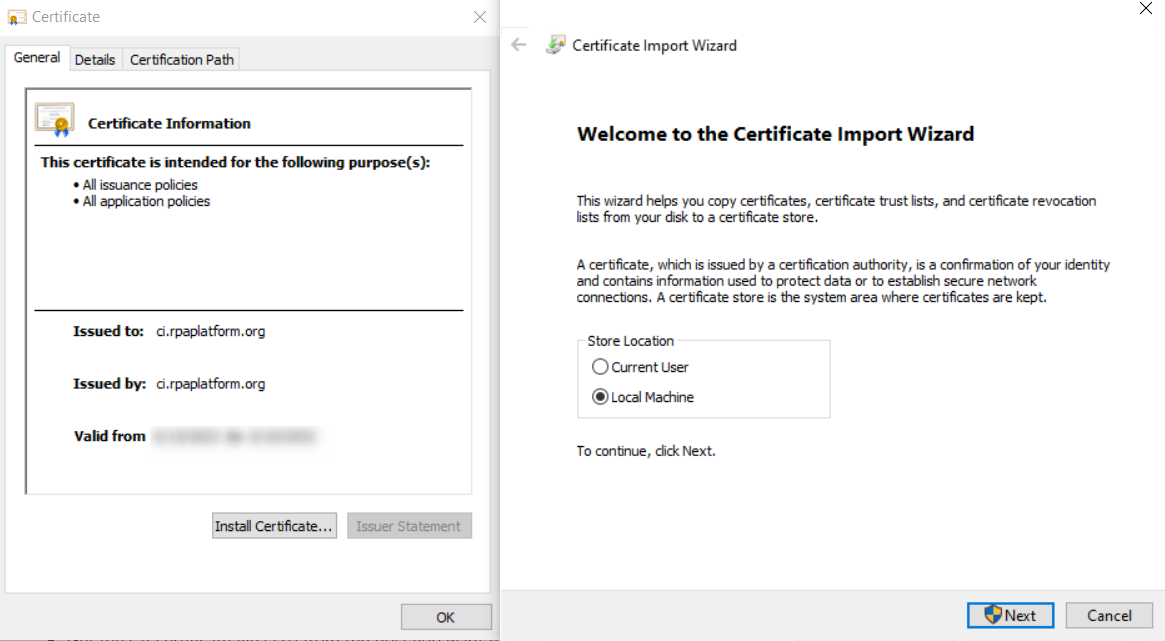
- Docker automatically refreshes the trusted cache without restart.
Pulling the OCR Docker Image
Open a terminal/command prompt.
- Start Docker Desktop application.
- Log into the private Docker registry hosted at ci.rpaplatform.org on port 8080 with valid credentials. The credentials should be provided by a host admin.
docker login -u <username> -p <password> https://ci.rpaplatform.org:8080
Pull a pre-built Docker image with Tesseract and ImageMagick installed. Use the following command to pull an OCR container image from the registry, launch an interactive shell session in that container and mount the D: drive on the host to /d inside the container for file access.
docker run --name OCR_TEST --entrypoint=/bin/bash -v D::/d -it --user root ci.rpaplatform.org:8080/rpaplatform/easy-rpa-ocr:<version>
Update the package indexes of the container's base Linux image.
apt-get update
- Now OCR_TEST container should be available in your Docker Desktop app.
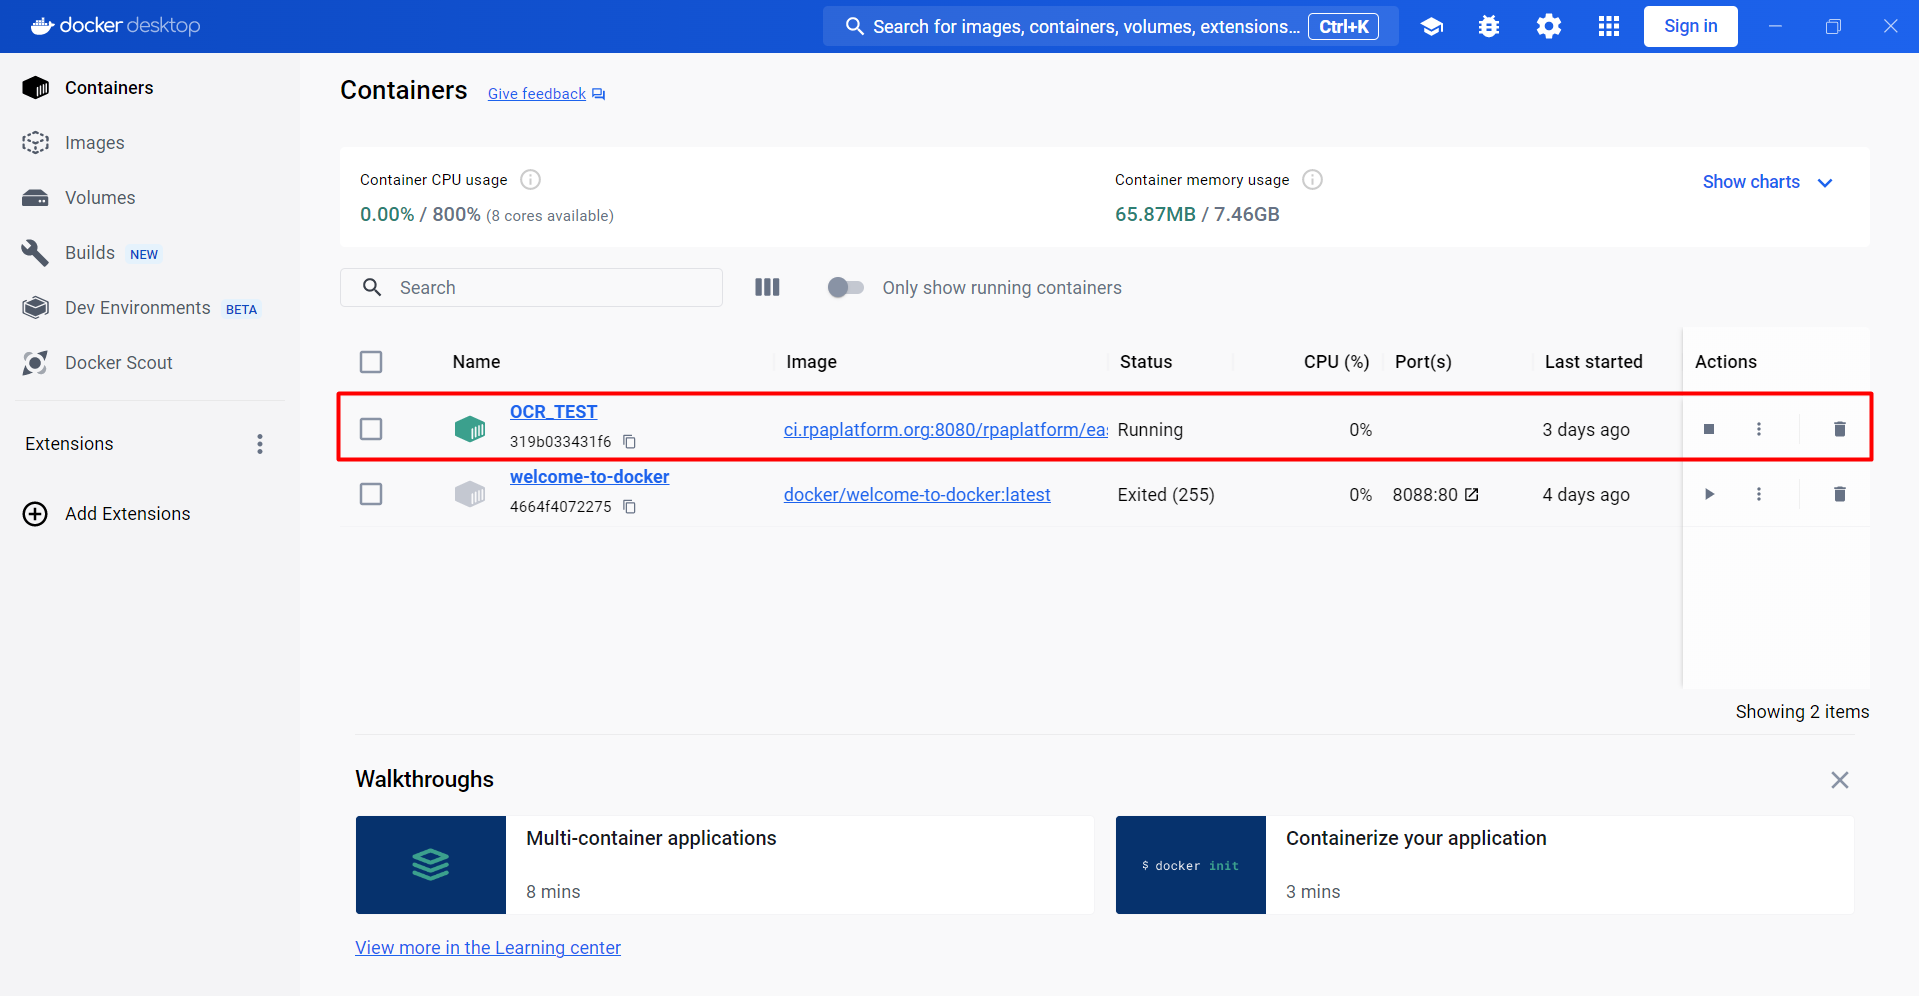
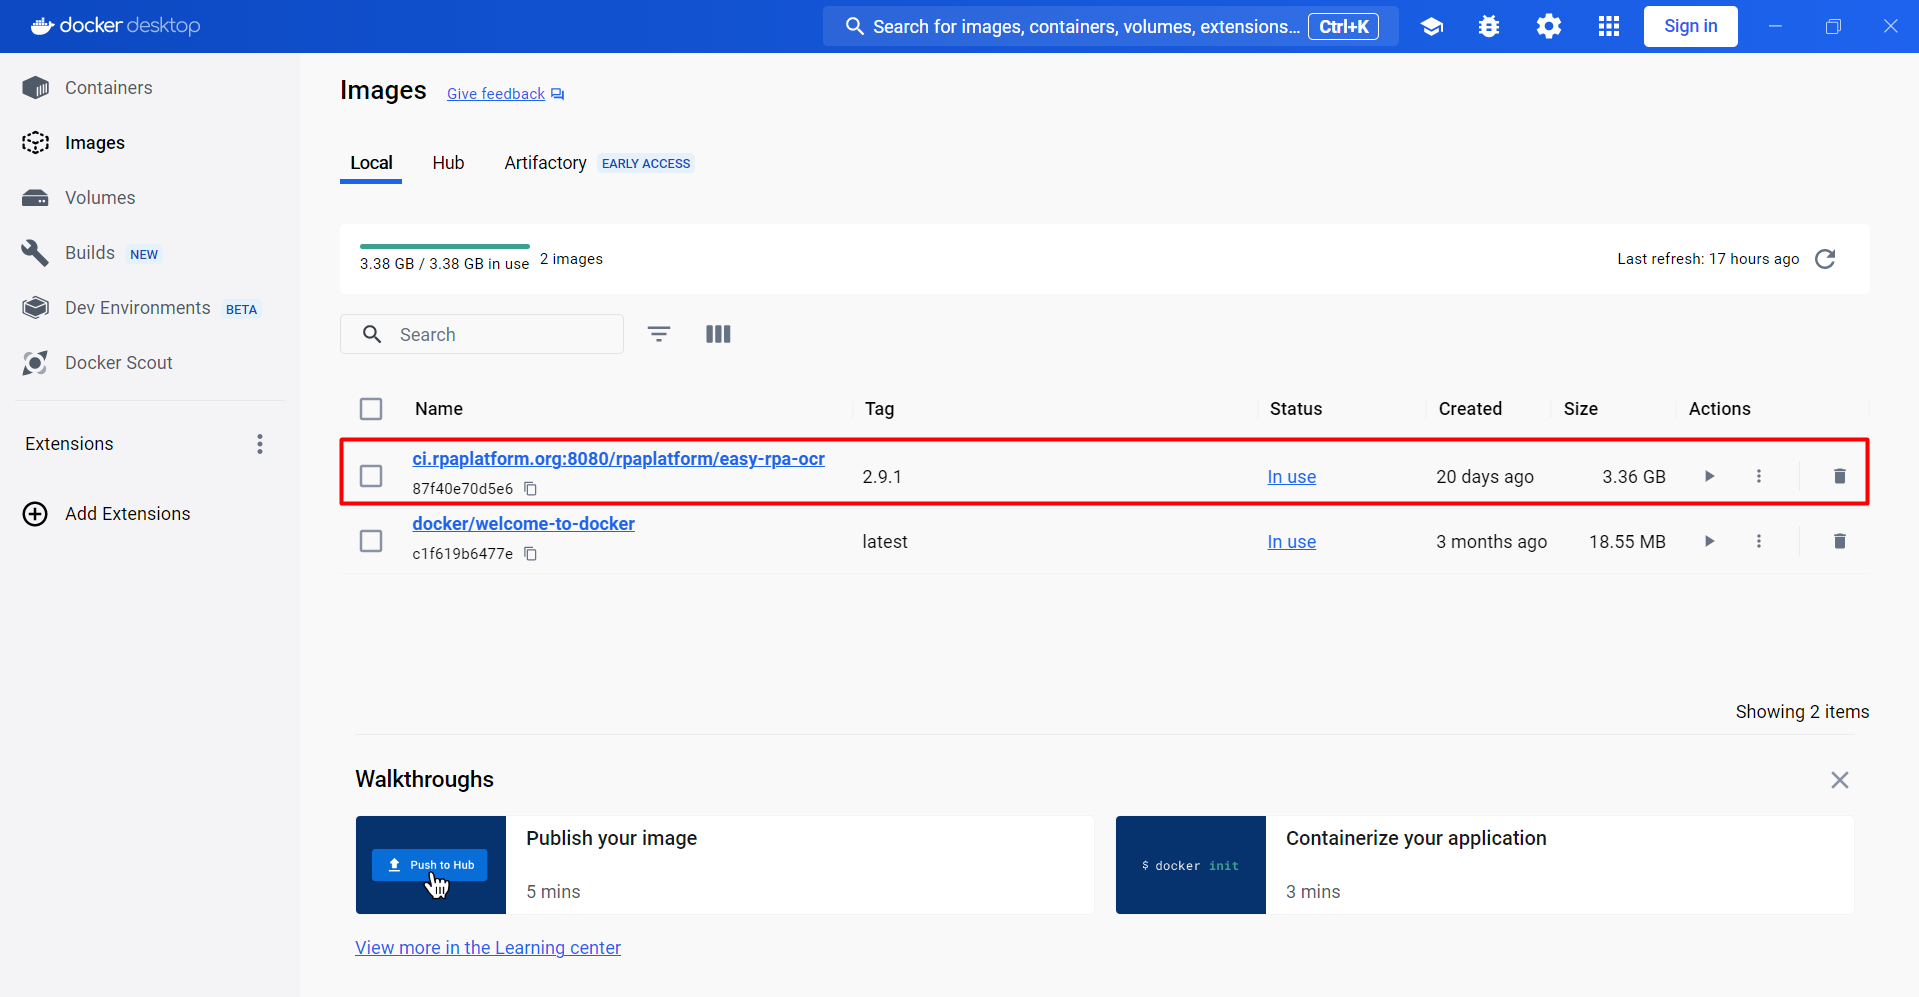
You should also be able to see Docker image being used (ci.rpaplatform.org:8080/rpaplatform/easy-rpa-ocr:<version>).
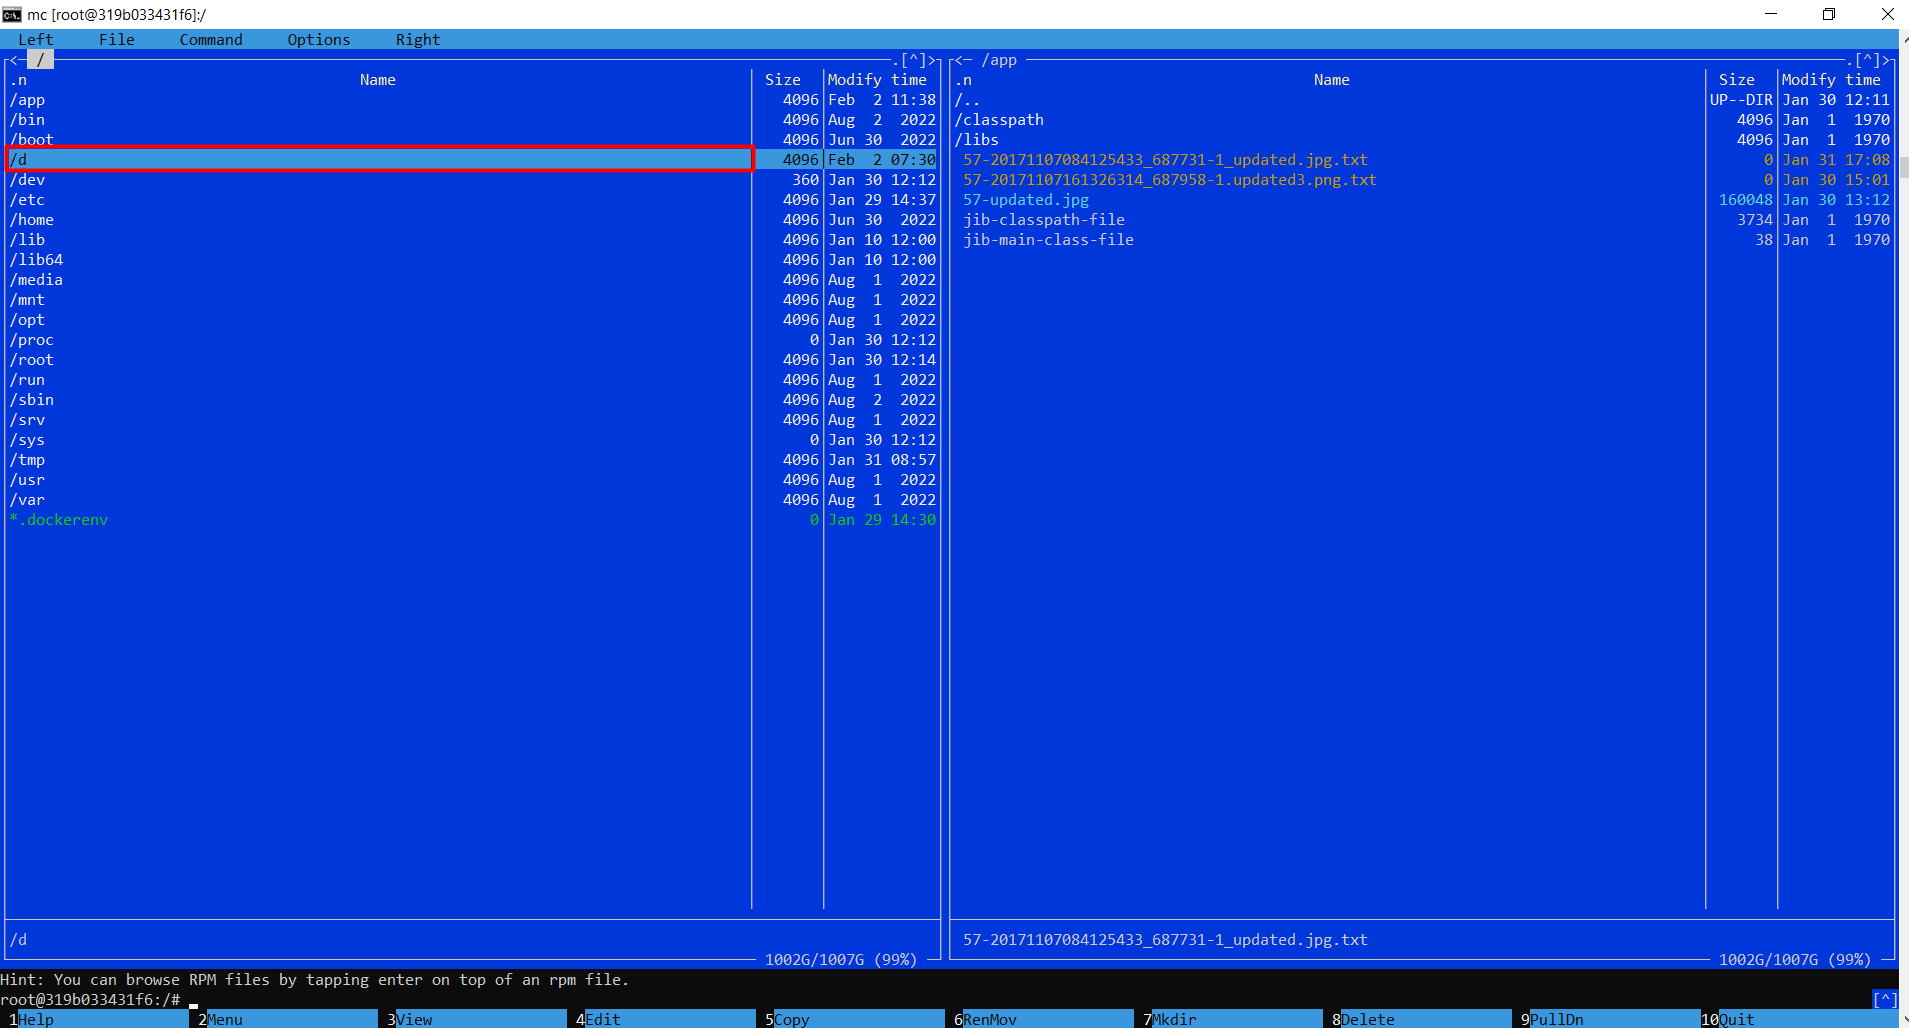
Using mc to Access Storage
The OCR Docker image contains pre-installed tools like Tesseract OCR and ImageMagick but it may not have all generic Linux utilities pre-installed for file operations. mc (Midnight Commander) is a free file manager for Linux similar to Far Manager on Windows. It provides a terminal-based graphical interface for viewing and manipulating files and folders. When the container is launched, the local host folder D: is mounted to /d inside the container. To view and work with the files inside the mounted host folder from within the container, a file manager is needed.
- Install mc inside the running container.
apt-get install mc
Run mc command inside the running container. Now mc can be used to navigate, copy, move files between the container's /d folder and the host machine's D: drive transparently.
Launching OCR container
Navigate to 'Containers' section on the left sidebar of Docker Desktop application. Click Start to launch OCR_TEST container.
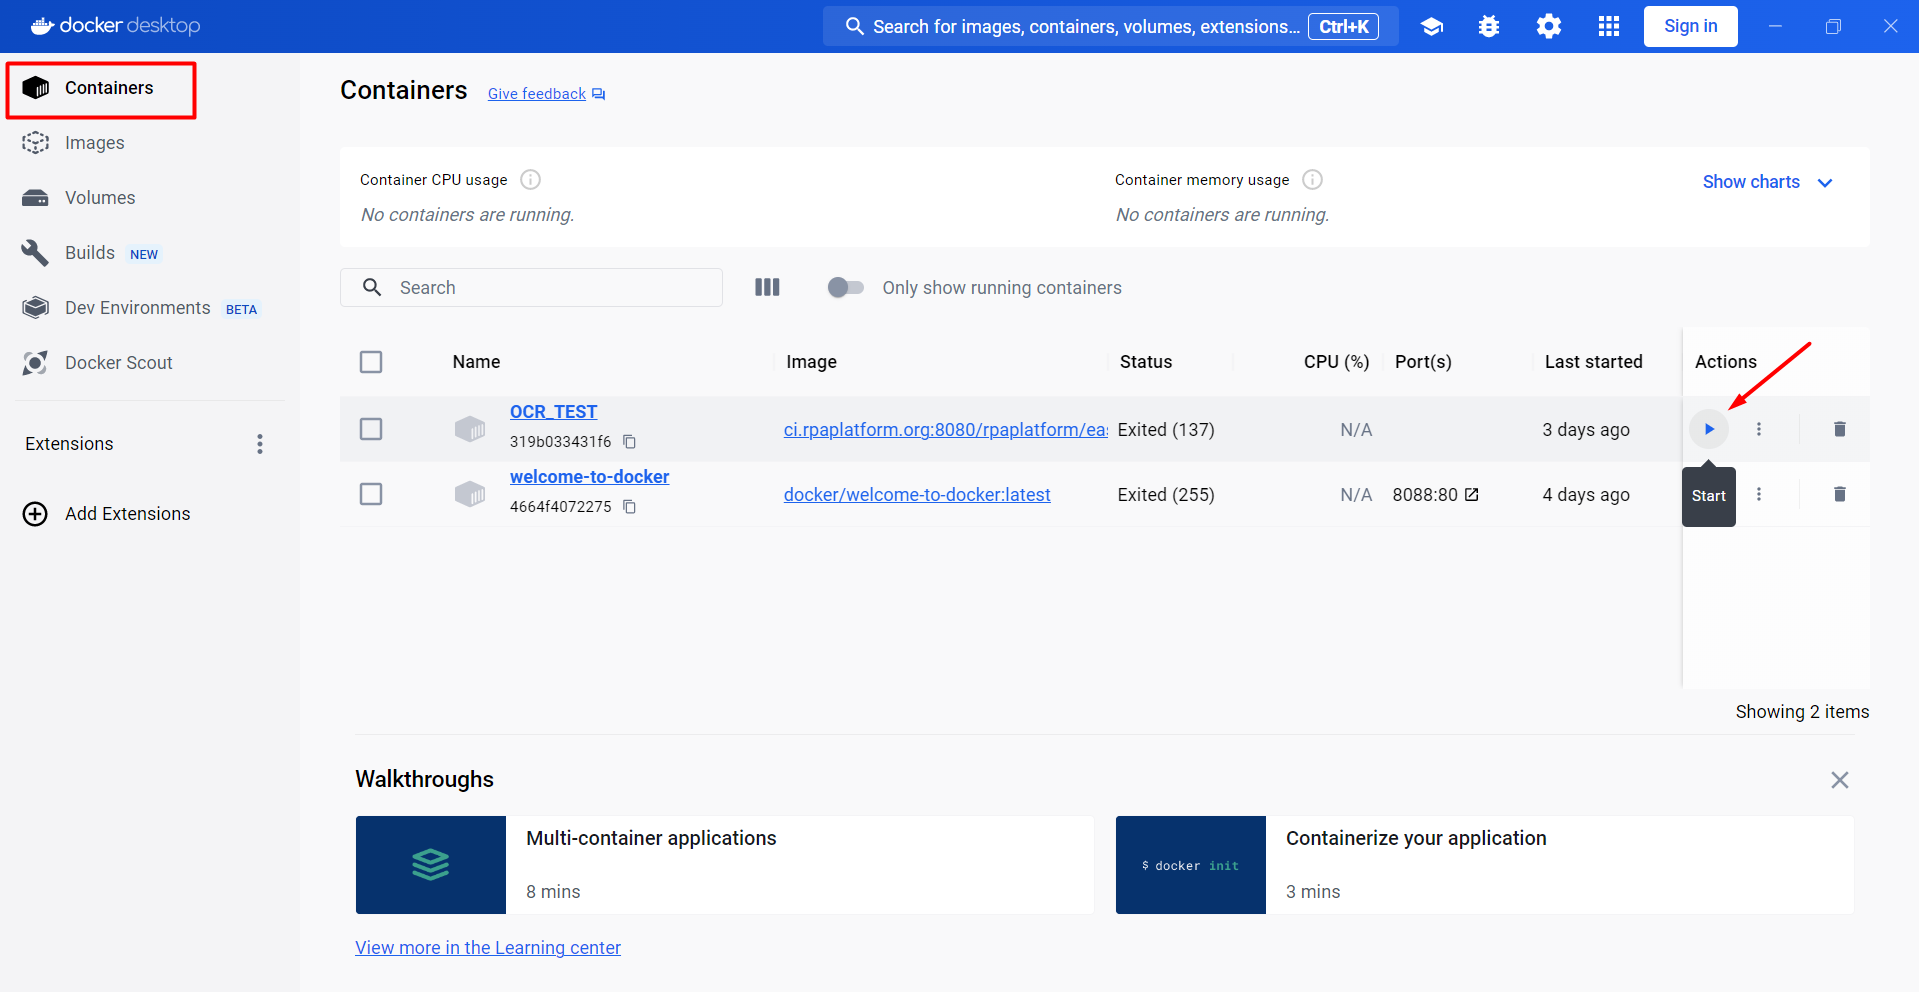
- Copy OCR_TEST container ID.
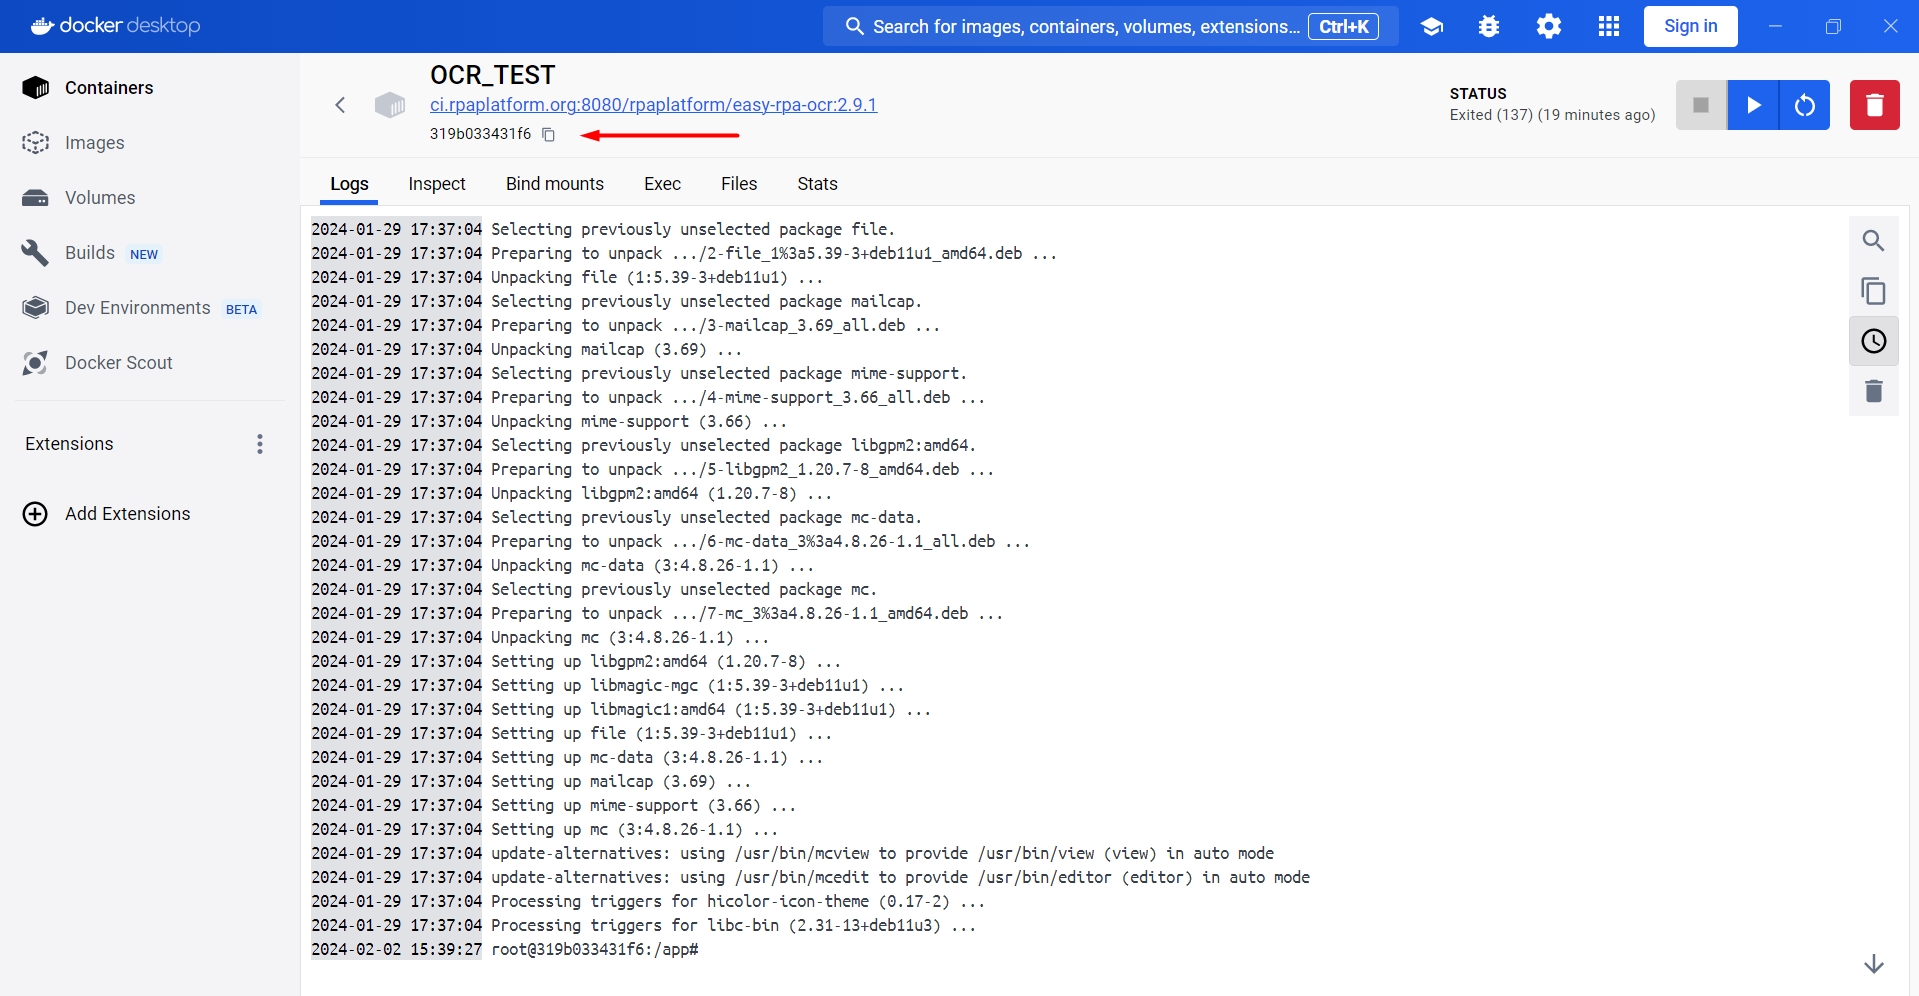
- Get a login shell inside the running container from the host to run ImageMagick and Tesseract commands directly from the terminal. In your terminal/comand prompt run:
docker exec -it <container id> /bin/bash
If login is successful the command prompt will change to root@container-id:/# to indicate you are now inside the container.
Any outputs or effects of commands will only be visible inside the container, not on the host. An interactive shell session will give you a standard Linux shell experience but isolated to that specific running container environment.
You can launch mc, navigate to local drive /d/ files and folders to check if you can see your file system, quit mc (F10) to start working in the command prompt.
Now you can run ImageMagick and Tesseract commands from inside the container command prompt to be executed on your local document folder files.
Ctrl+D or 'Exit' will terminate the shell and return you to the host prompt.
Tesseract Language Settings
To run Tesseract on your images make sure you have the necessary language packages installed.
Run this command to list all available languages:
tesseract --list-langs
If your language is not on the list you can install the necesseary language package. For example, to install French run:
apt-get install -y tesseract-ocr-fra
To accurately extract MRZ (Machine Readable Zone) information from passports mrz.traineddata language data file can be used with Tesseract OCR. The MRZ language data file contains the trained models specific to MRZ recognition, enabling Tesseract to accurately recognize and extract text from the MRZ region of passport images.
Download the MRZ language data file from an alternative source:
https://github.com/DoubangoTelecom/tesseractMRZ/blob/master/tessdata_best/mrz.traineddata
Additional information on extracting data from machine readable zones on passport images:
https://pyimagesearch.com/2021/12/01/ocr-passports-with-opencv-and-tesseract/